
This resource was originally created by user: jgreco on the TrueNAS Community Forums Archive. Please DM this account or comment in this thread to claim it.
It has been quite common, for many years, for there to be awesome deals on large capacity hard drives by major vendors on Black Friday. The only downside is that they come in a plastic shell and are “external drives.”
This week, Post-Covidian Black Friday Week, Best Buy is selling their external WD EasyStore 14TB (which is a whitebox WD140EDFZ in all the drives I have opened) for $199.99, while the price for other similar retail 14TB drives seems to hover around $400.
Because this technically voids the warranty, there is an economic argument to be made that you can self-warranty your drive simply by keeping the savings and buying another if one fails. The retail drives typically have a three year warranty. However, the external drives also have a two year warranty.
So rather than disassembling an enclosure with a hacksaw and a 5# sledge to get the drive out, one can use a little bit of care and finesse to remove the drive, without ruining the clips, without breaking the slide tracks, without even nicking the plastic. If you can reassemble the drive just the way it was, without obvious signs of tampering, you can send a failed disk in for RMA for up to two years after purchase. This means you have to wash the peanut butter off your hands, and also keep the drive shells around, because they are serial numbered just like the drives. You can’t shuck a dozen drives and just keep one drive shell. The hard part seems to be the “finesse” bit.
Tools and supplies required:
Guitar picks - I like Fender heavy tri’s
#2 Phillips
Clean hands, or, better yet, ESD gloves, to avoid leaving fingerprints all over
A reasonably safe environment
Screw loosening tool (T10 Torx, but #2 metric hex key works too)
Baggie
The basic process is like this.
The goodie:

Open the box without ruining it, because you may very well want to store the enclosure back into the box. The boxes stack and store very nicely, with an easy-to-read serial number on the box, while the bare enclosures do not.
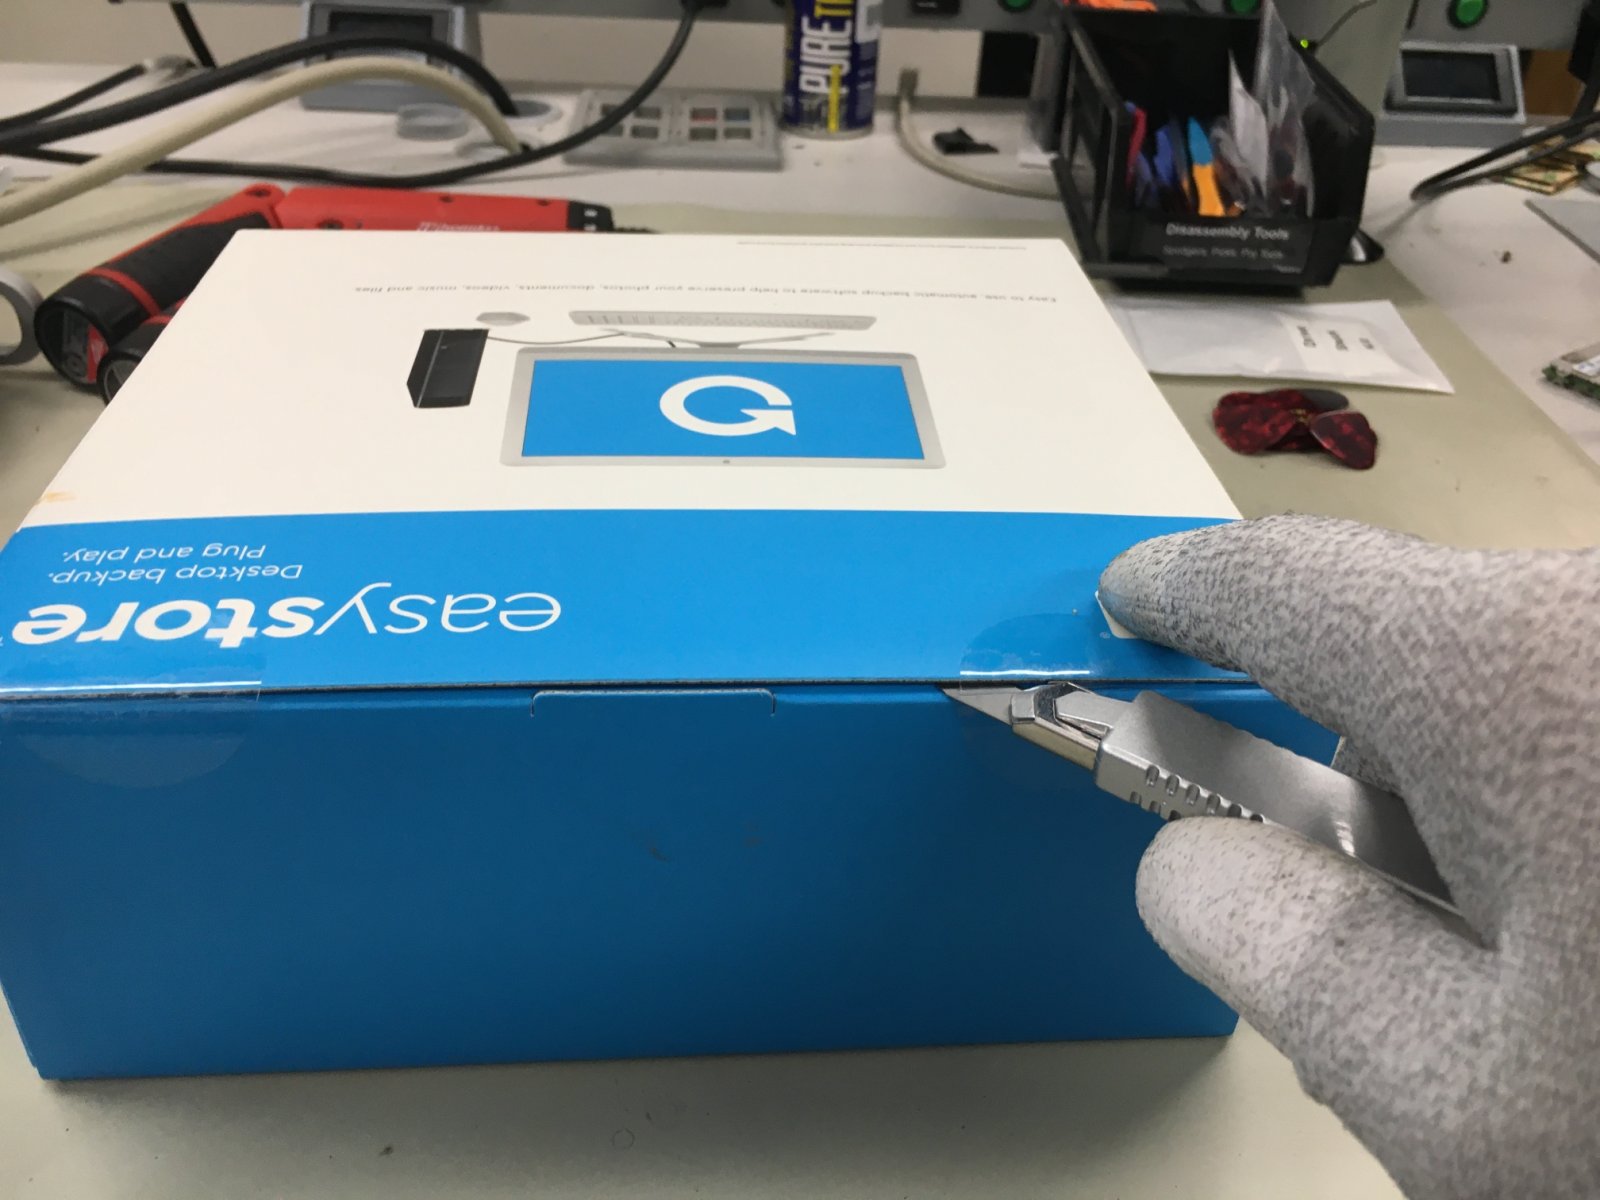
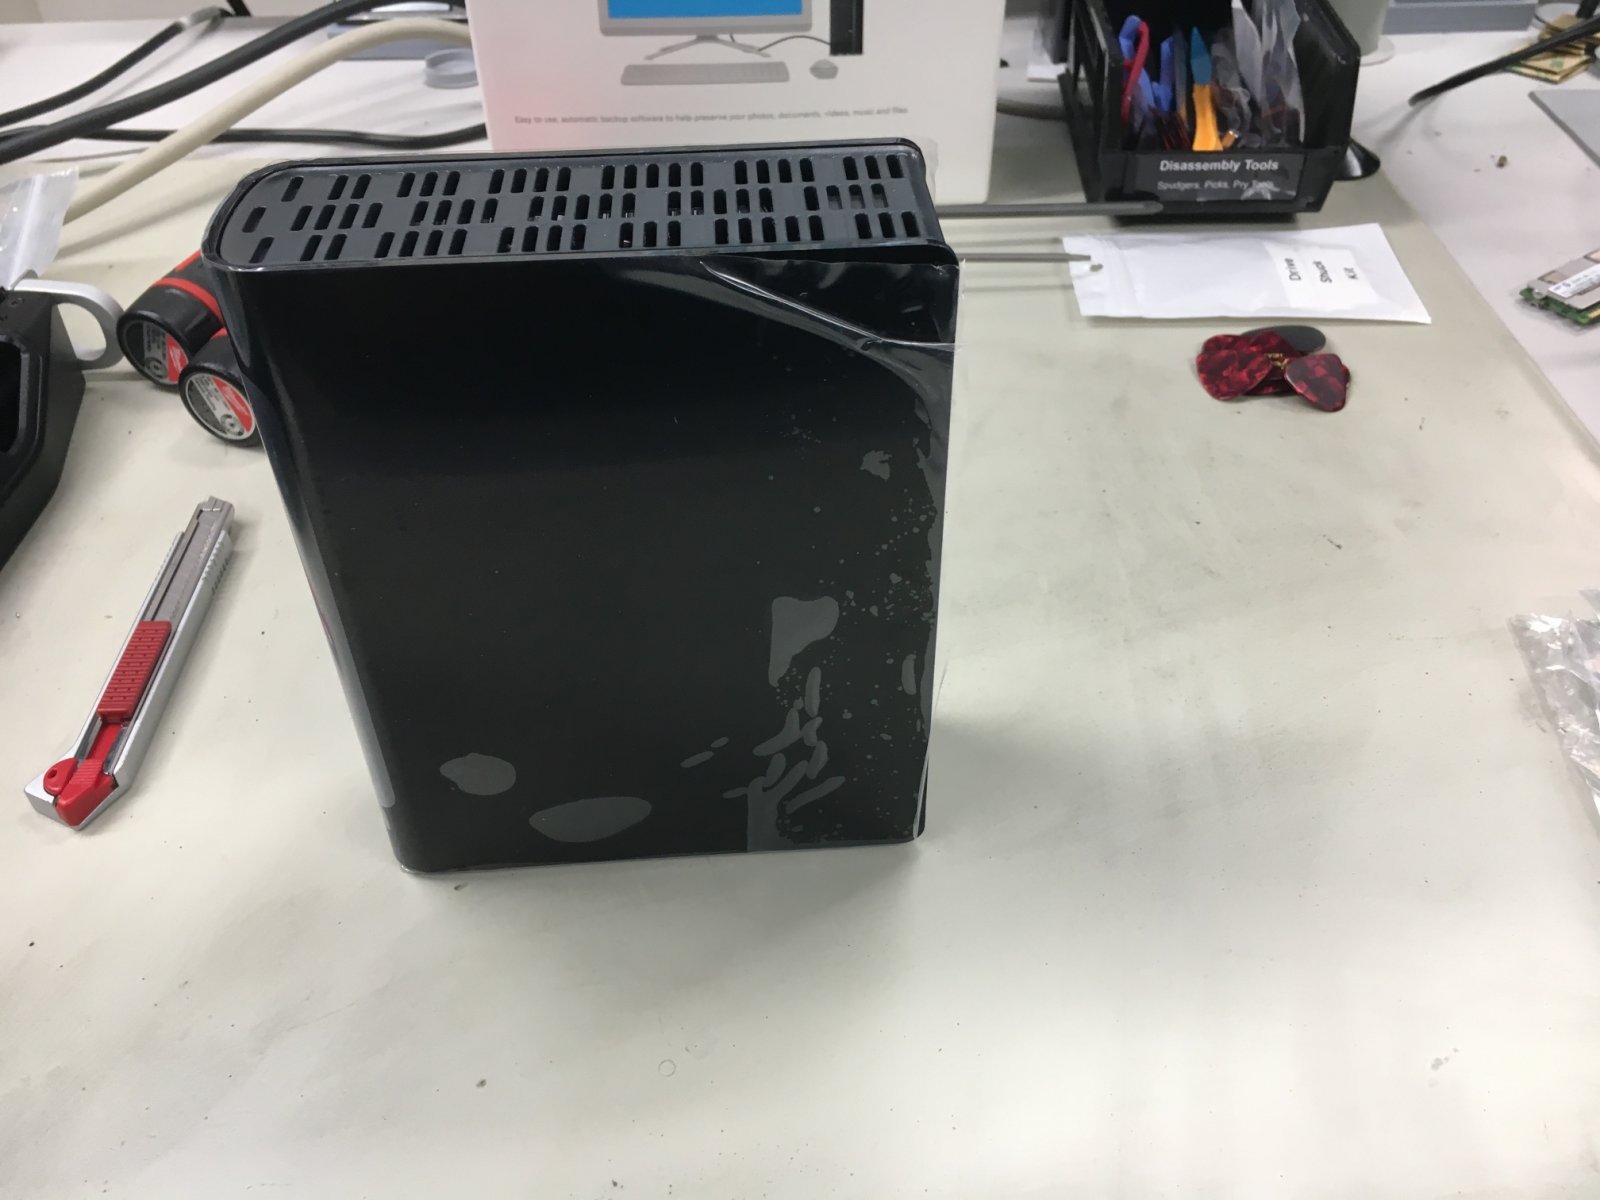
Remove just the EasyStore from the box:
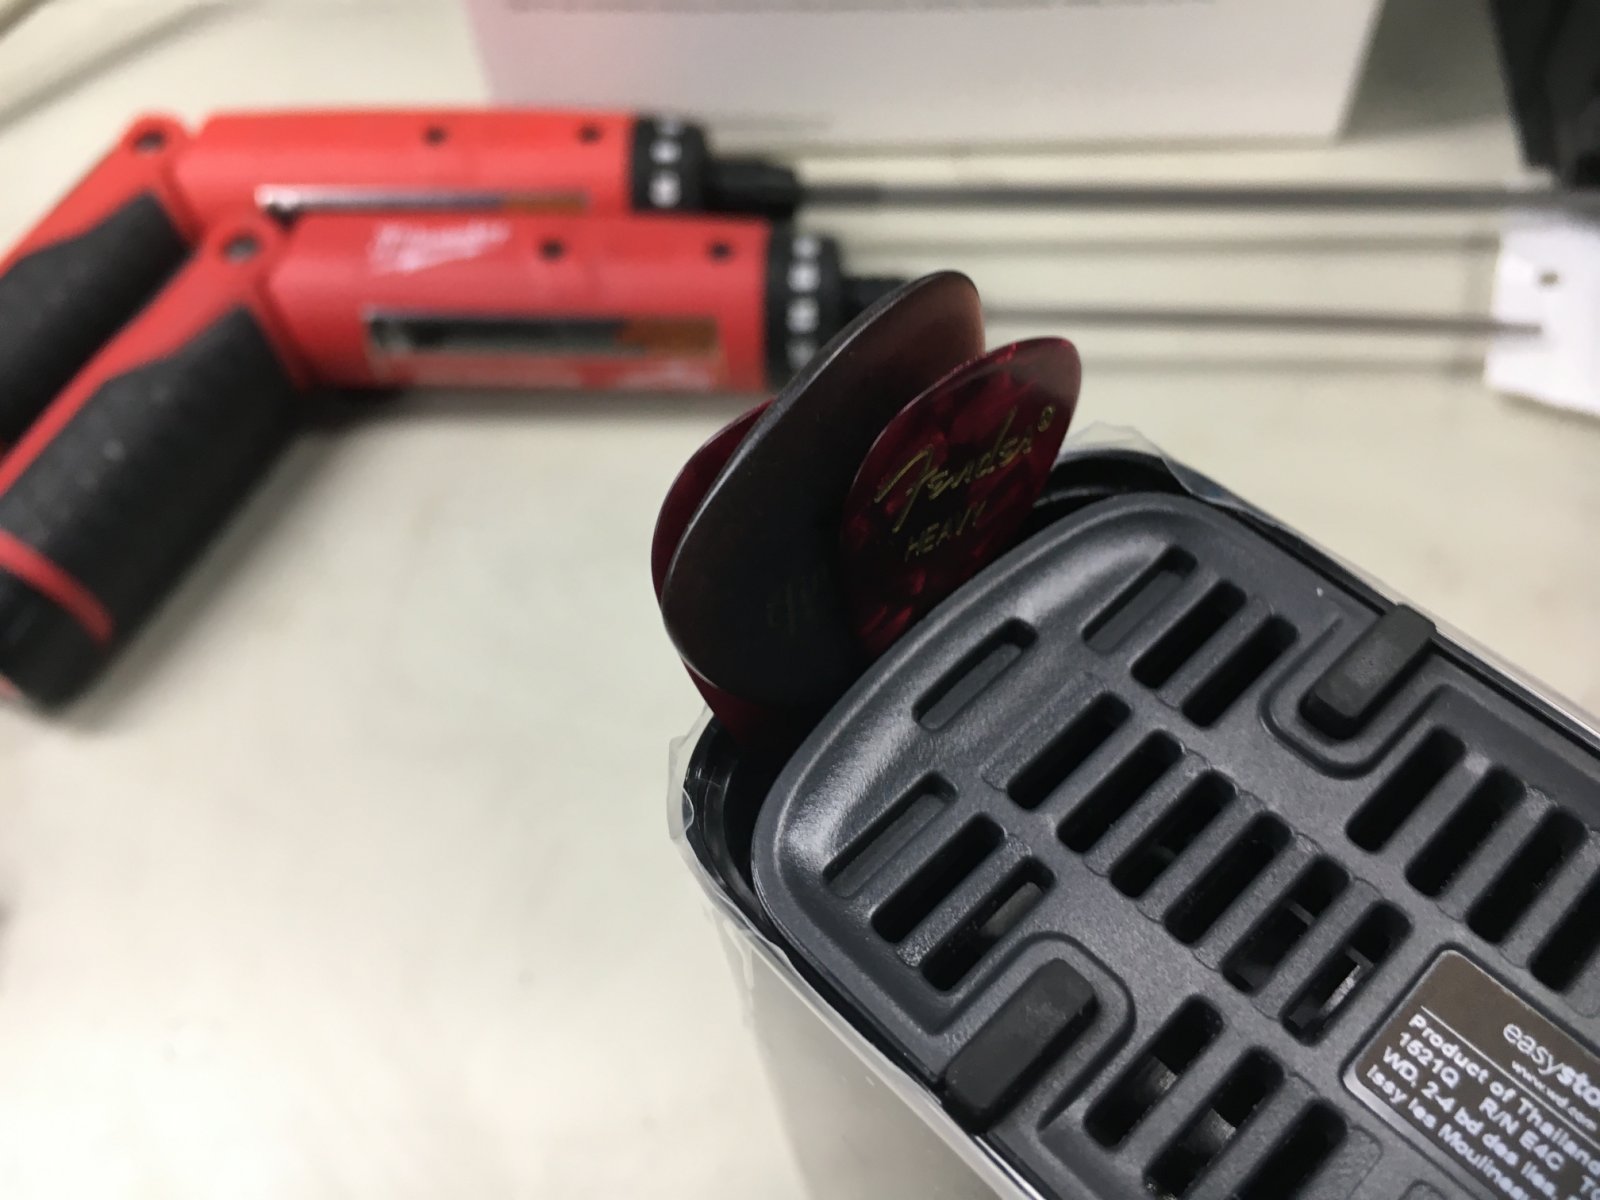
Now, there are a lot of spudger-wedgy-warranty-voiding tools like the blue tri-picks often used on cell phones, but I’ve found that getting those doesn’t work well, as they’re made in Asia and of varying quality, thickness, etc.
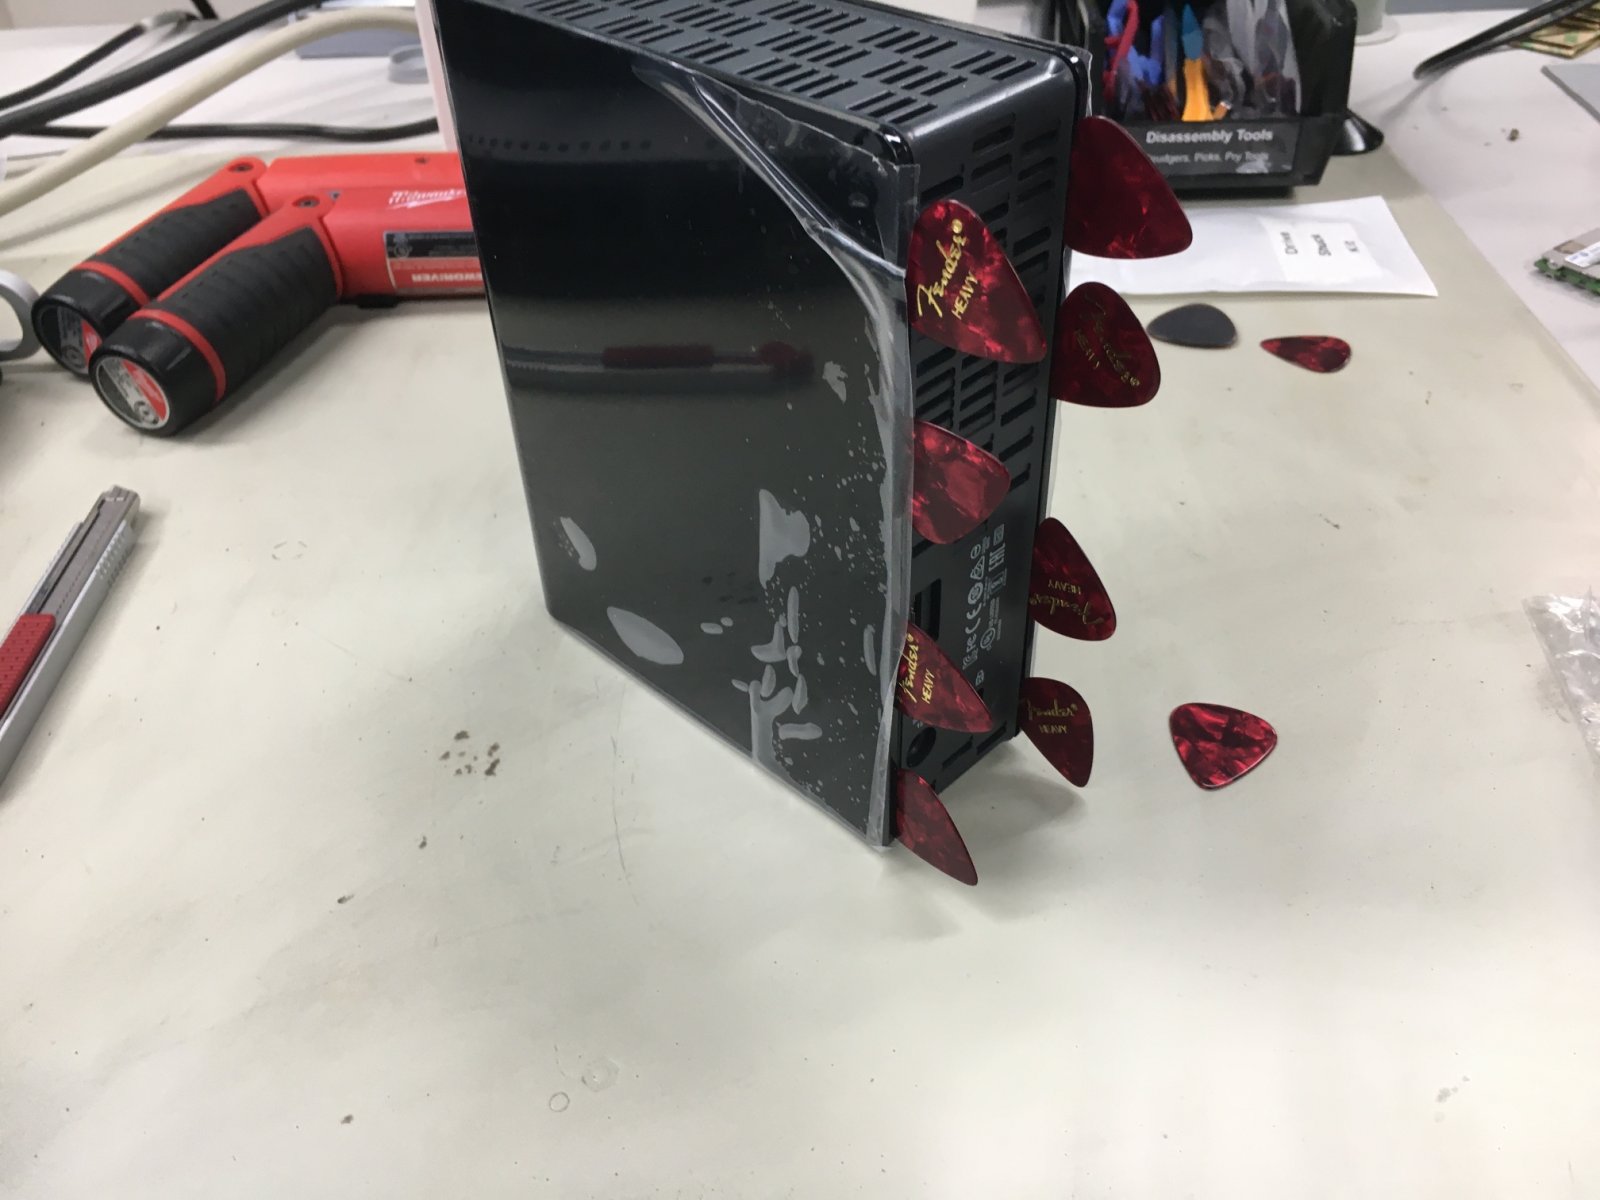
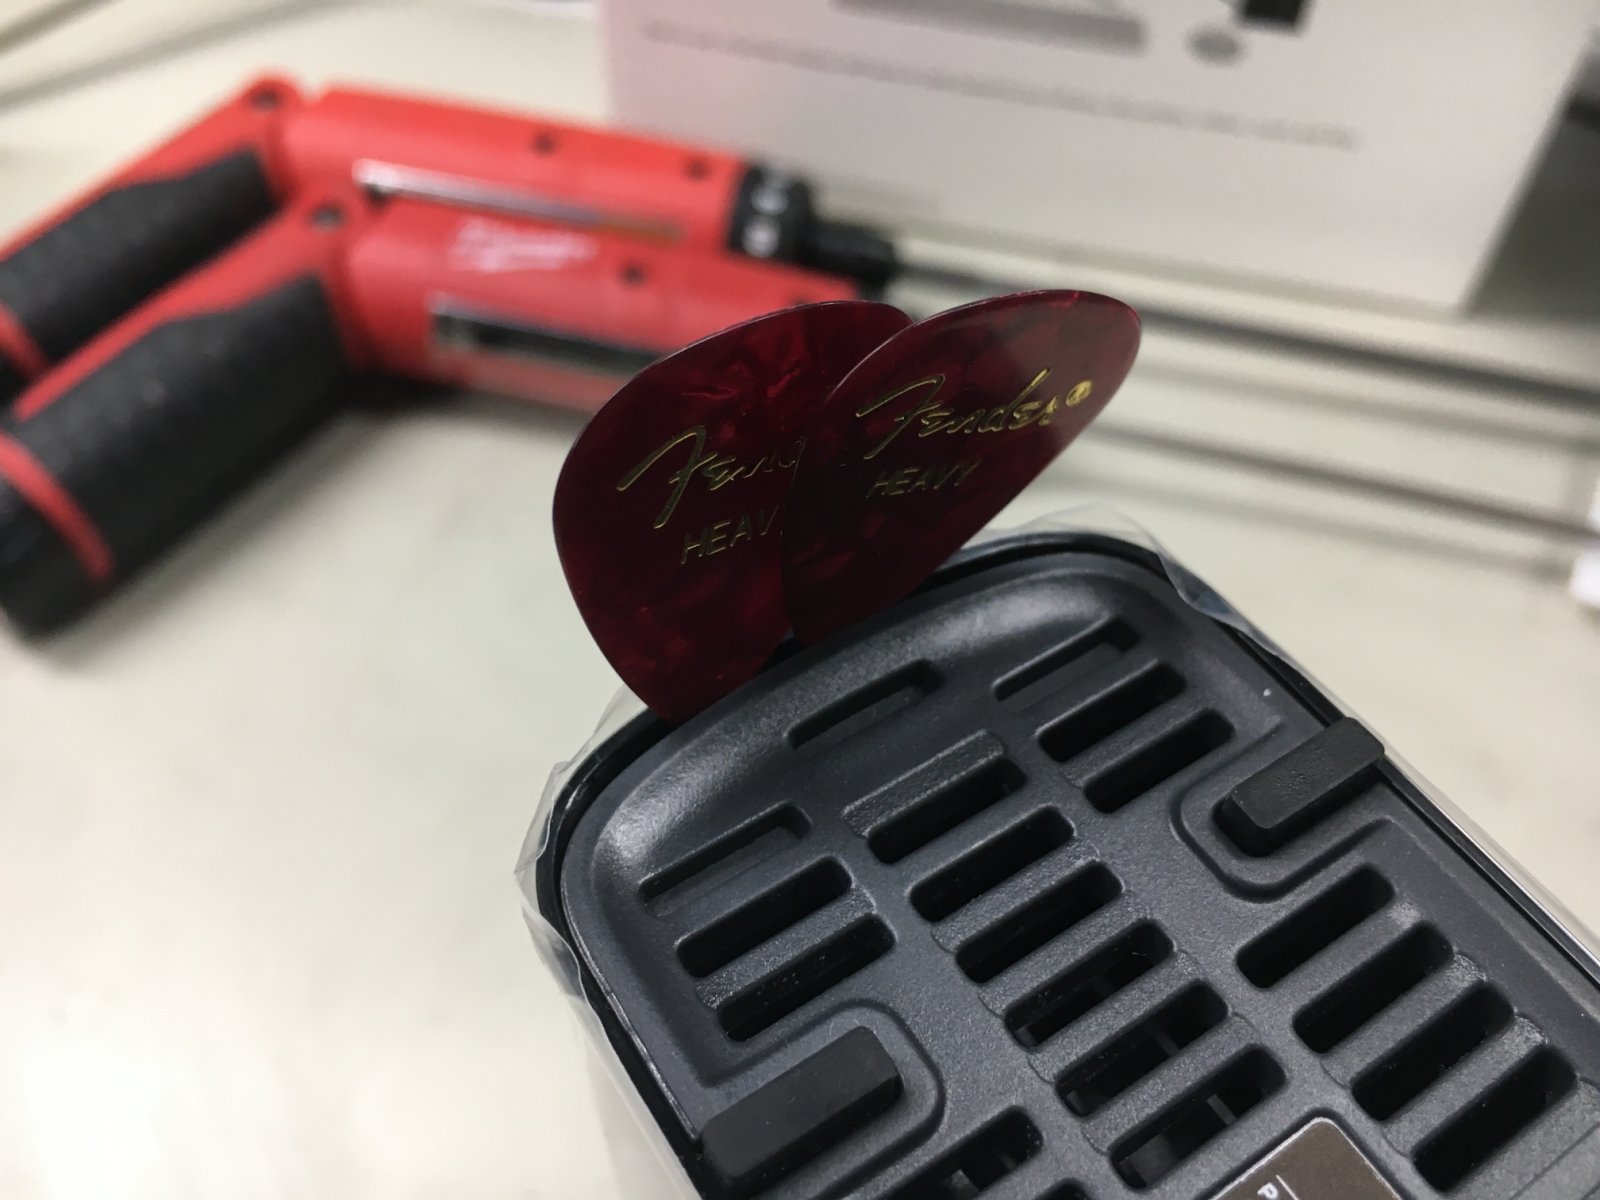
I have found that guitar picks are better than the blue tri-picks or most other options, and that for this particular job, Fender Heavy guitar picks are optimal. They have nicely rounded edges that make damaging the plastic of the case quite difficult, insert without a lot of effort, and are the right width to avoid doing other damage.
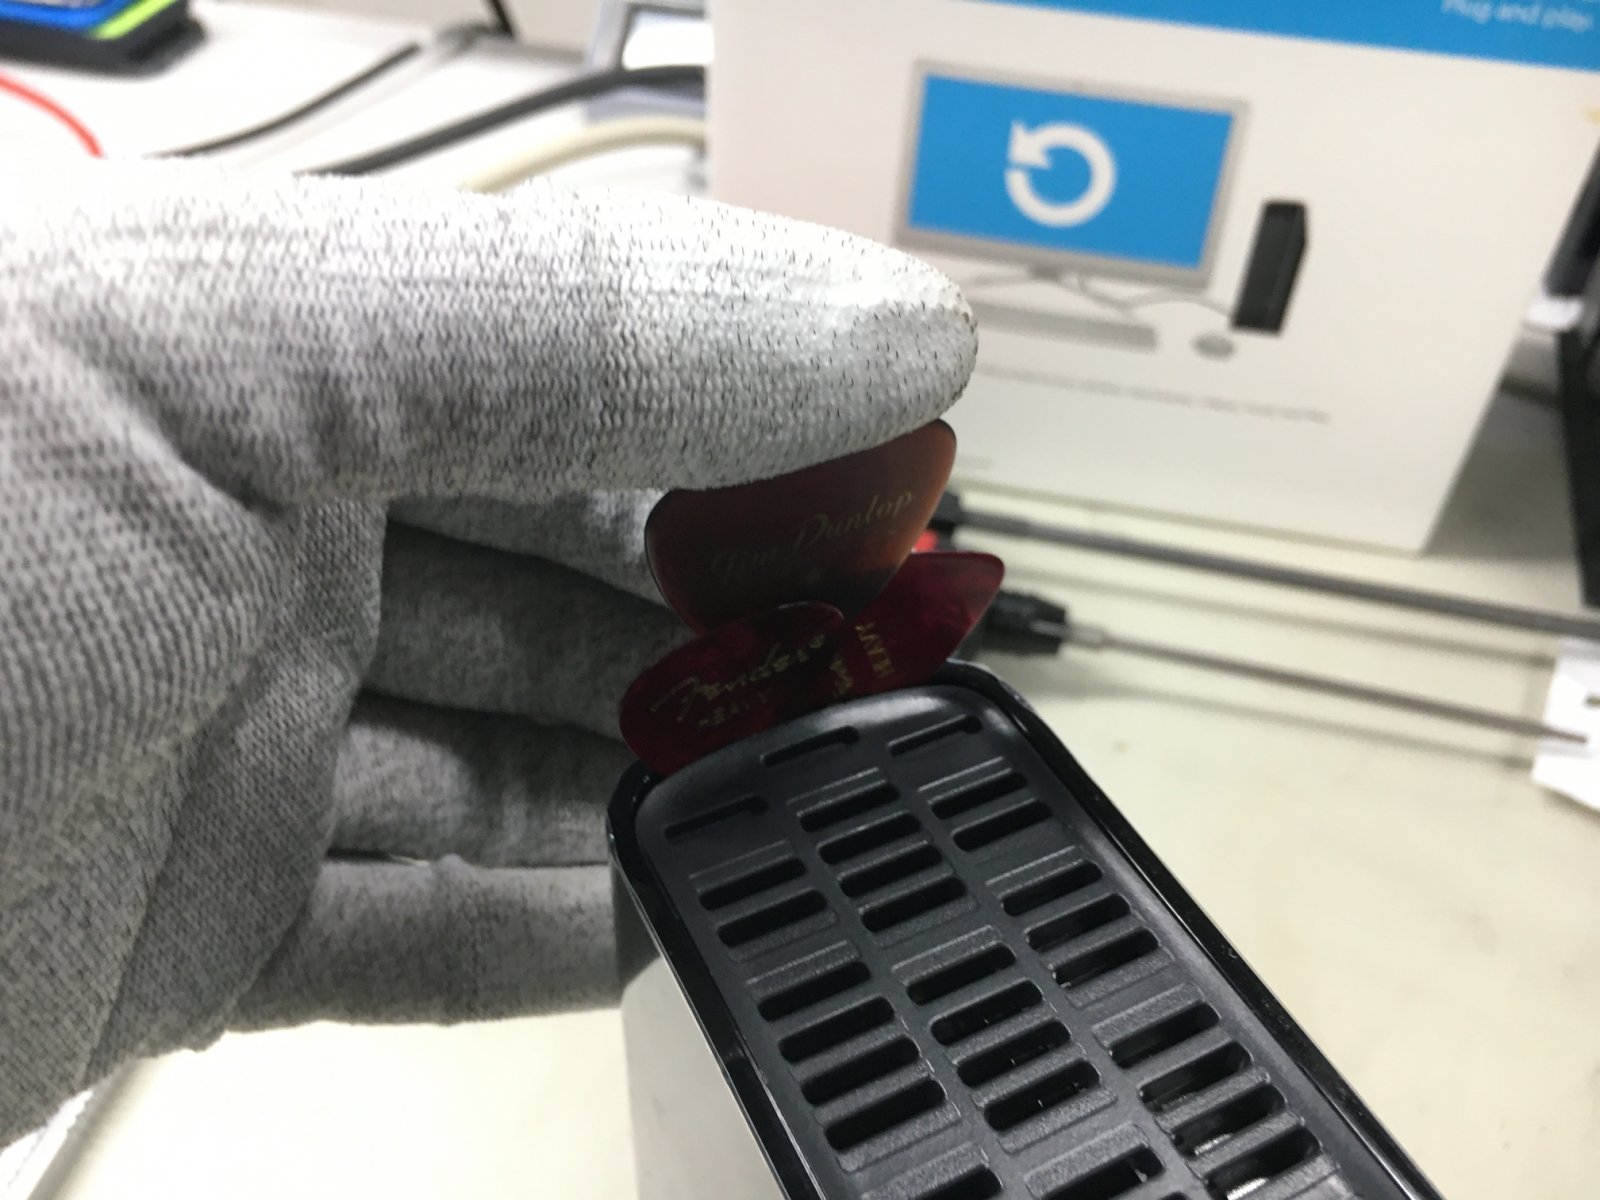
There are three locking tabs on each side of the case that lock it shut. Shoving four picks in each side is ideal. The goal isn’t to shove them in as far as they can possibly go, but rather just to separate the tabs from the cover so that the cover can be pulled off. It’s just maybe two millimeters. I use four picks on each side because it’s easier than trying to remember the exact location of the tabs. Four evenly spaced picks reliably opens these things just fine. Be gentle.
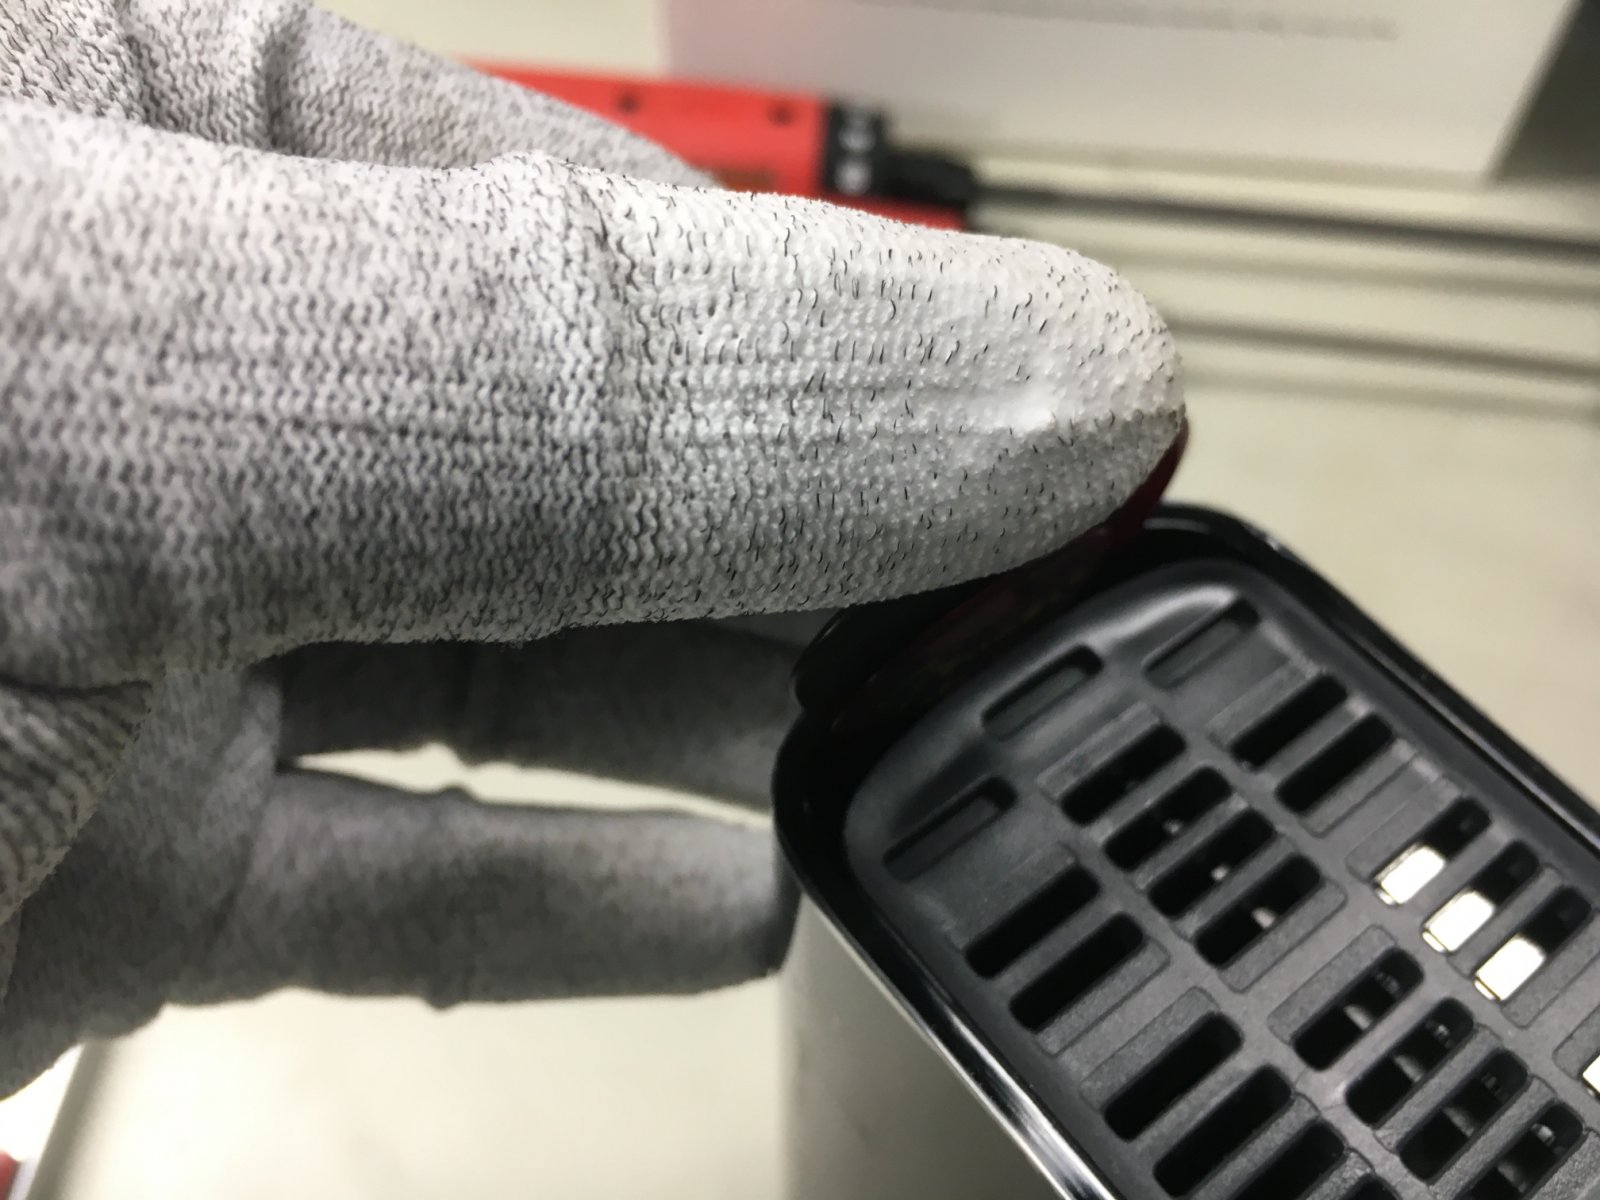
Two more picks on the top curved edge are used to pry it open. This is the ONLY step which requires any significant amount of force, and that’s just enough to get the picks further in. Moving the picks towards each other so that they overlap should be enough to dislodge the cover:
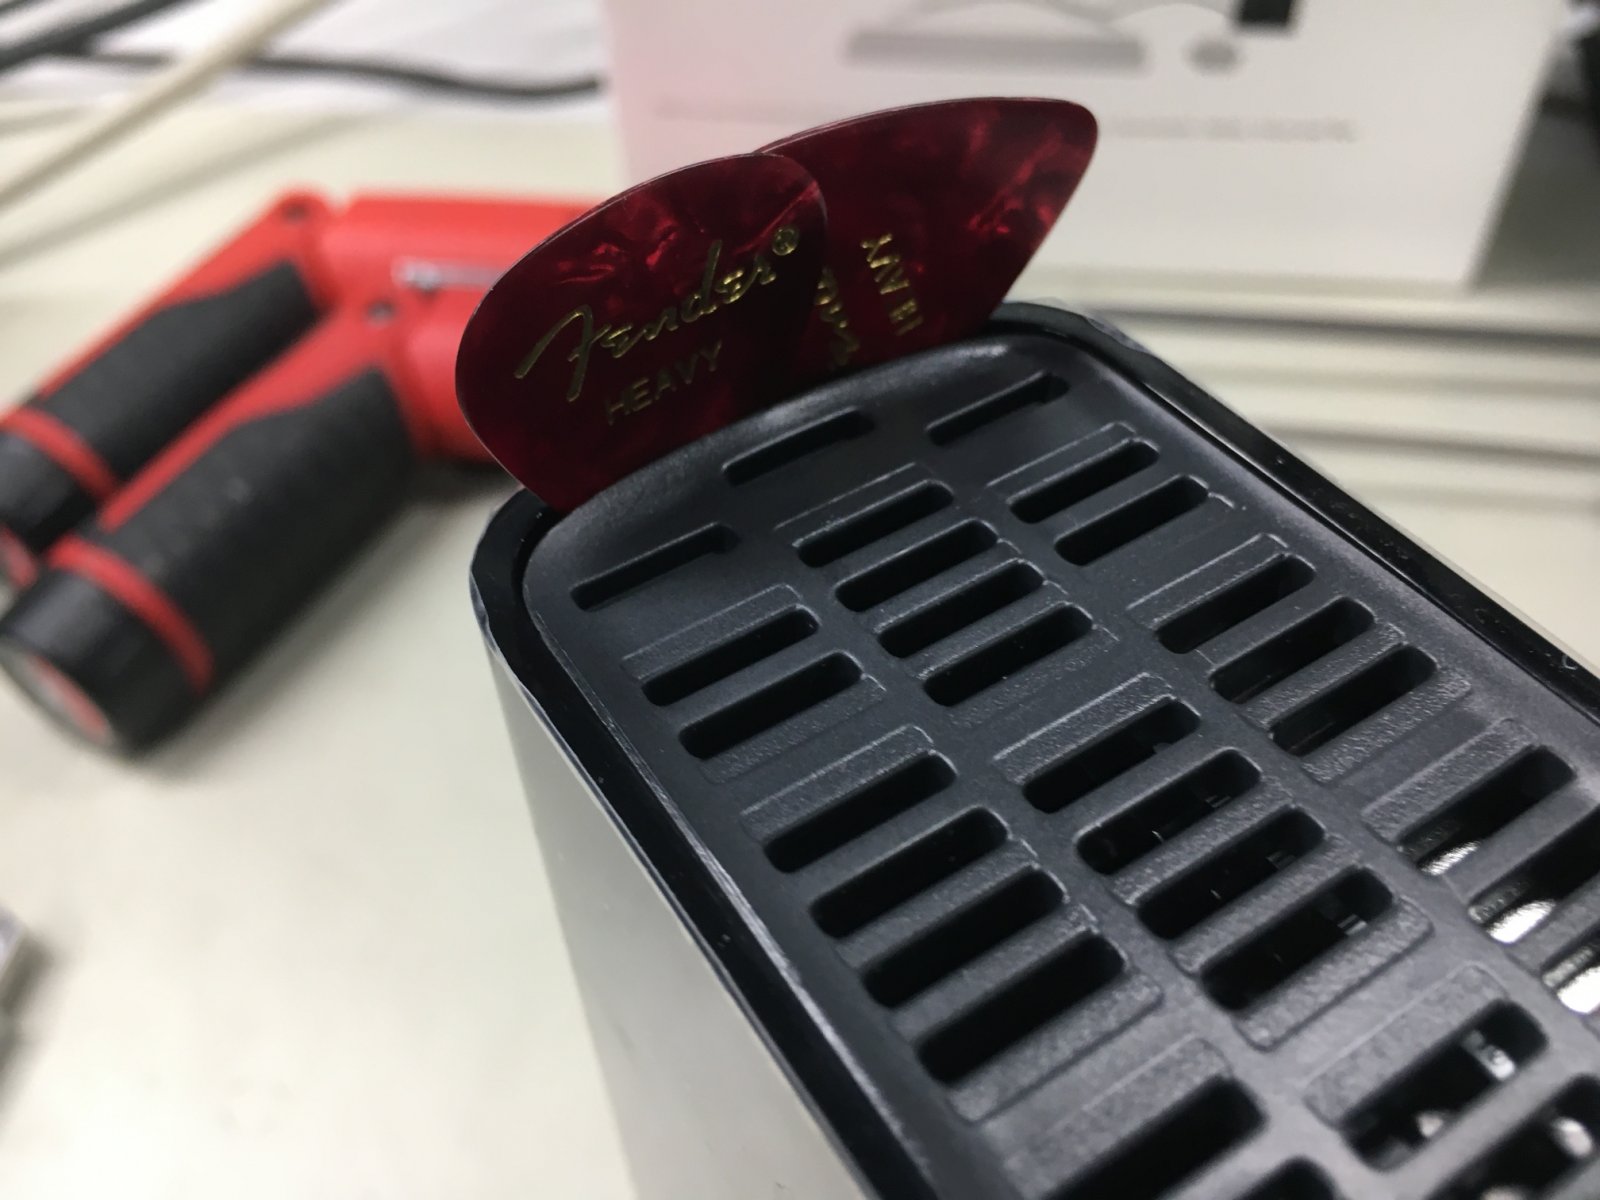
Once overlapped, I stick a really fat guitar pick in to widen the gap. This isn’t necessary, it just makes the opening process go faster:
There’s a nice satisfying “thuwunk” as you force the picks in and create a gap:
And there’s the finished gap:
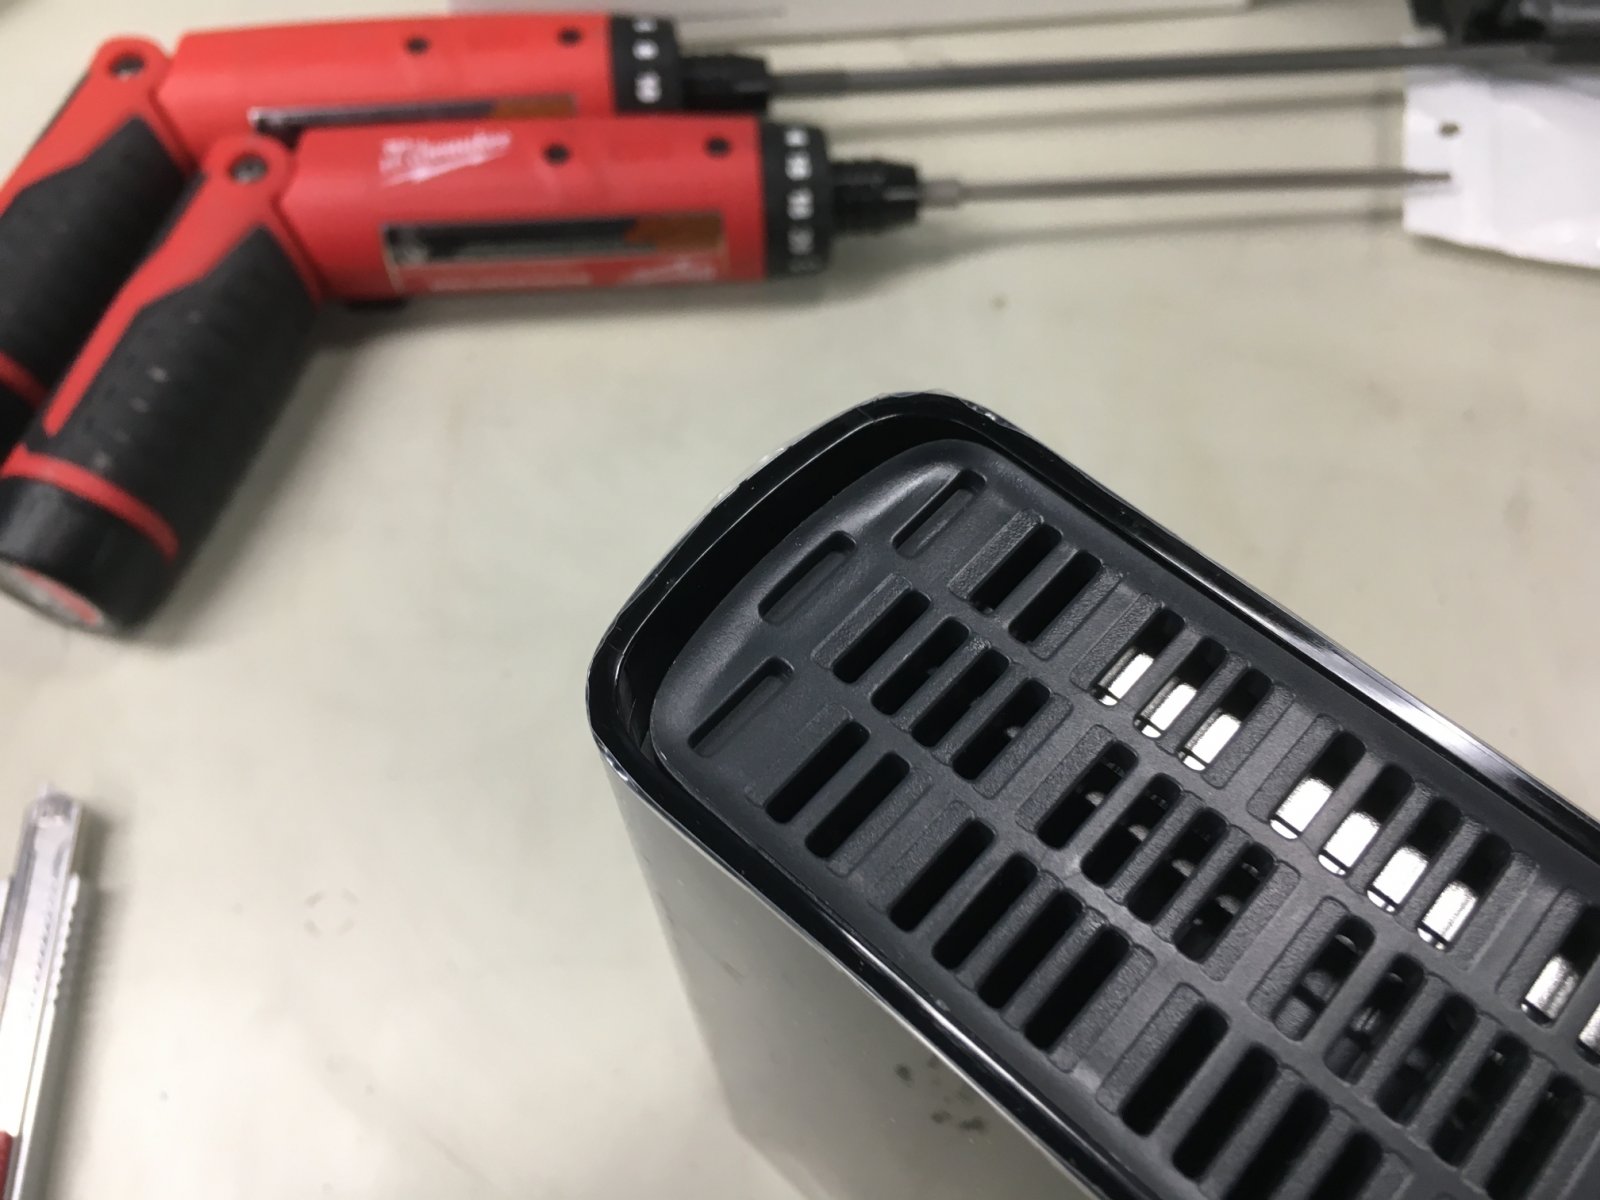
You don’t want the gap to be huge. That risks breaking the cover. You’re just looking to get the locks loose.
Now you flip the drive over and do the same thing on the bottom:
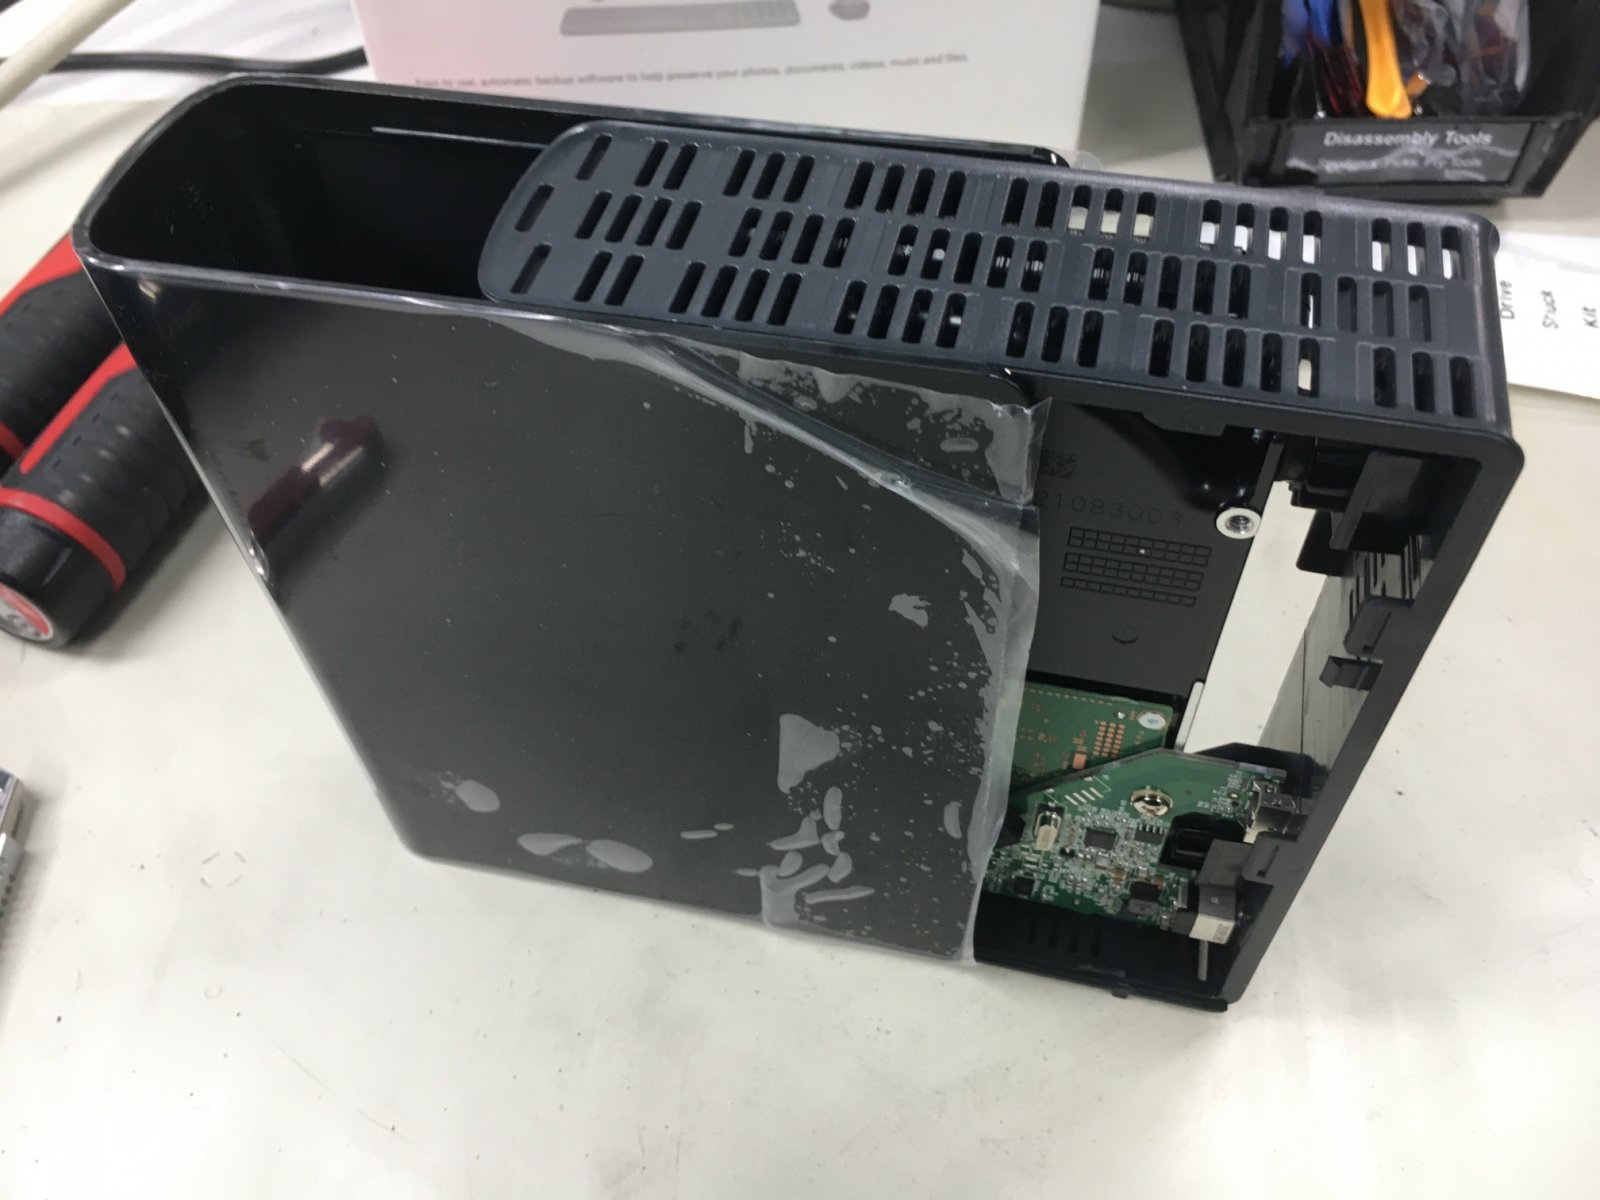
And finally the cover is actually loose:
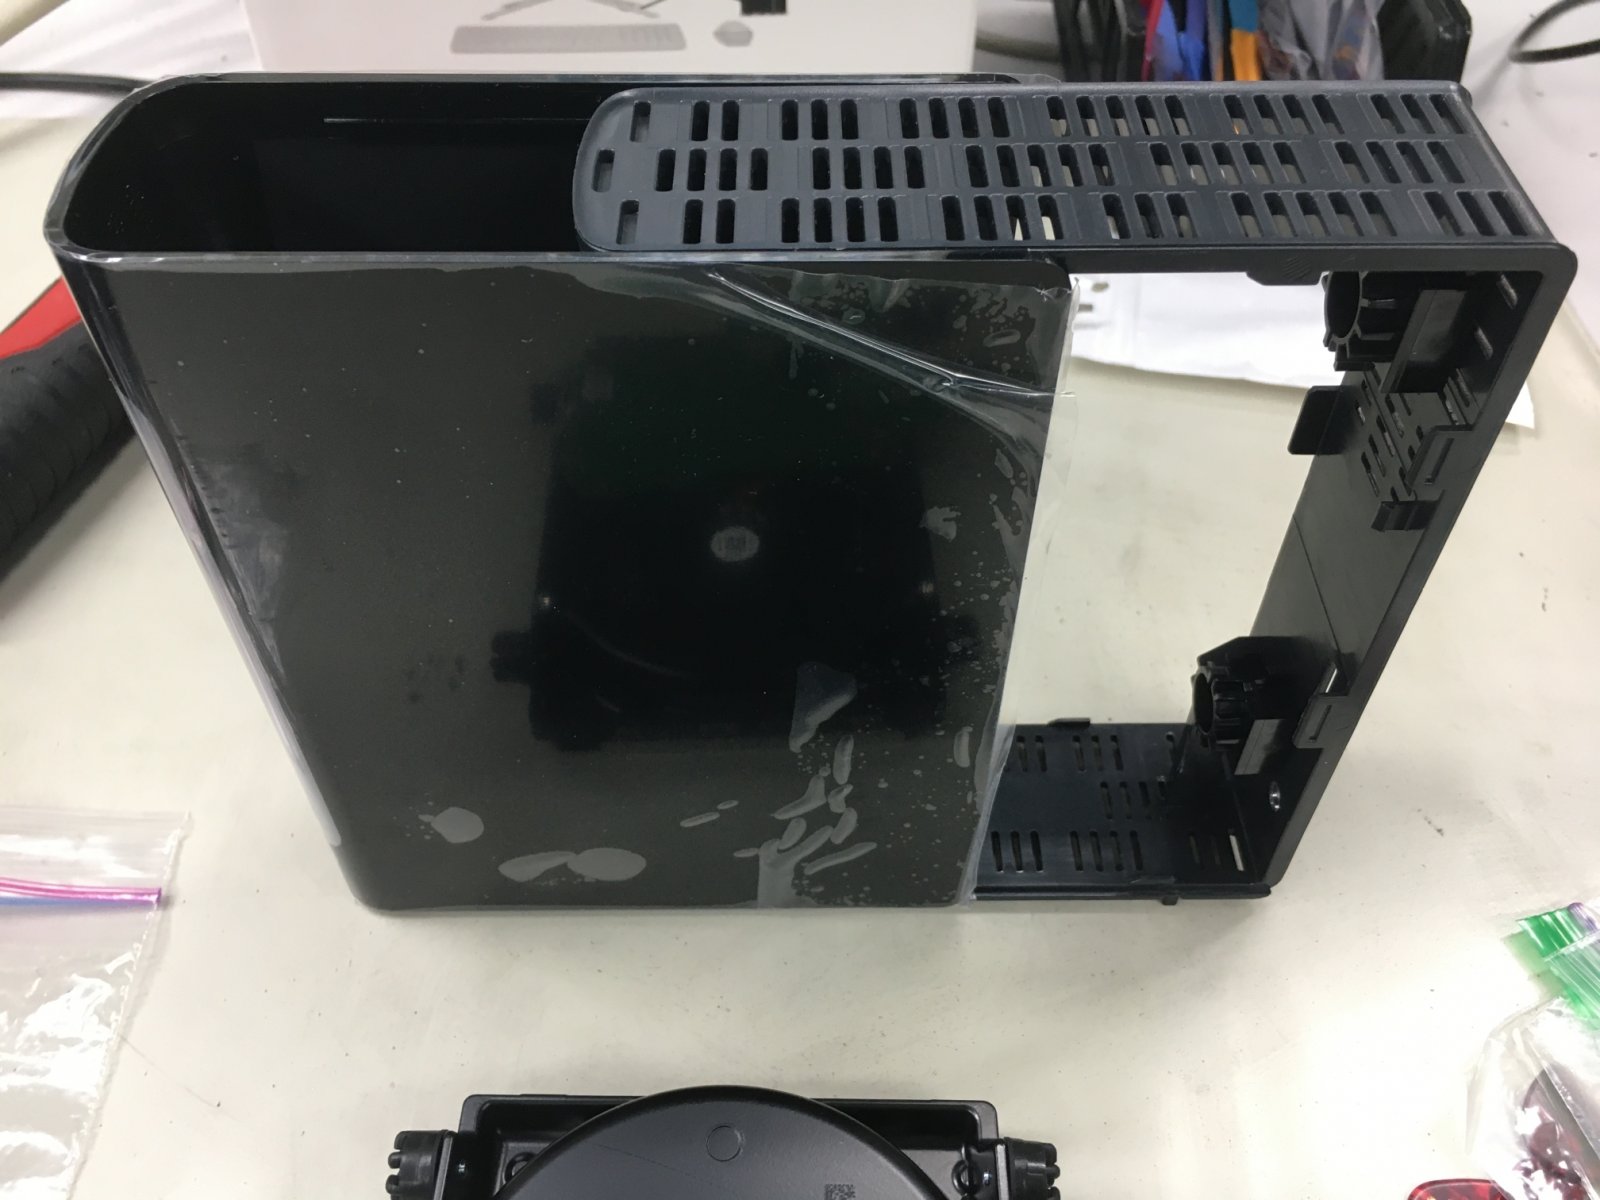
At this point, your cover should be unlocked, but these can be difficult to slide open. It is important that you slide these open in order to avoid damaging the cover. Pull gently and rock it back and forth a little:
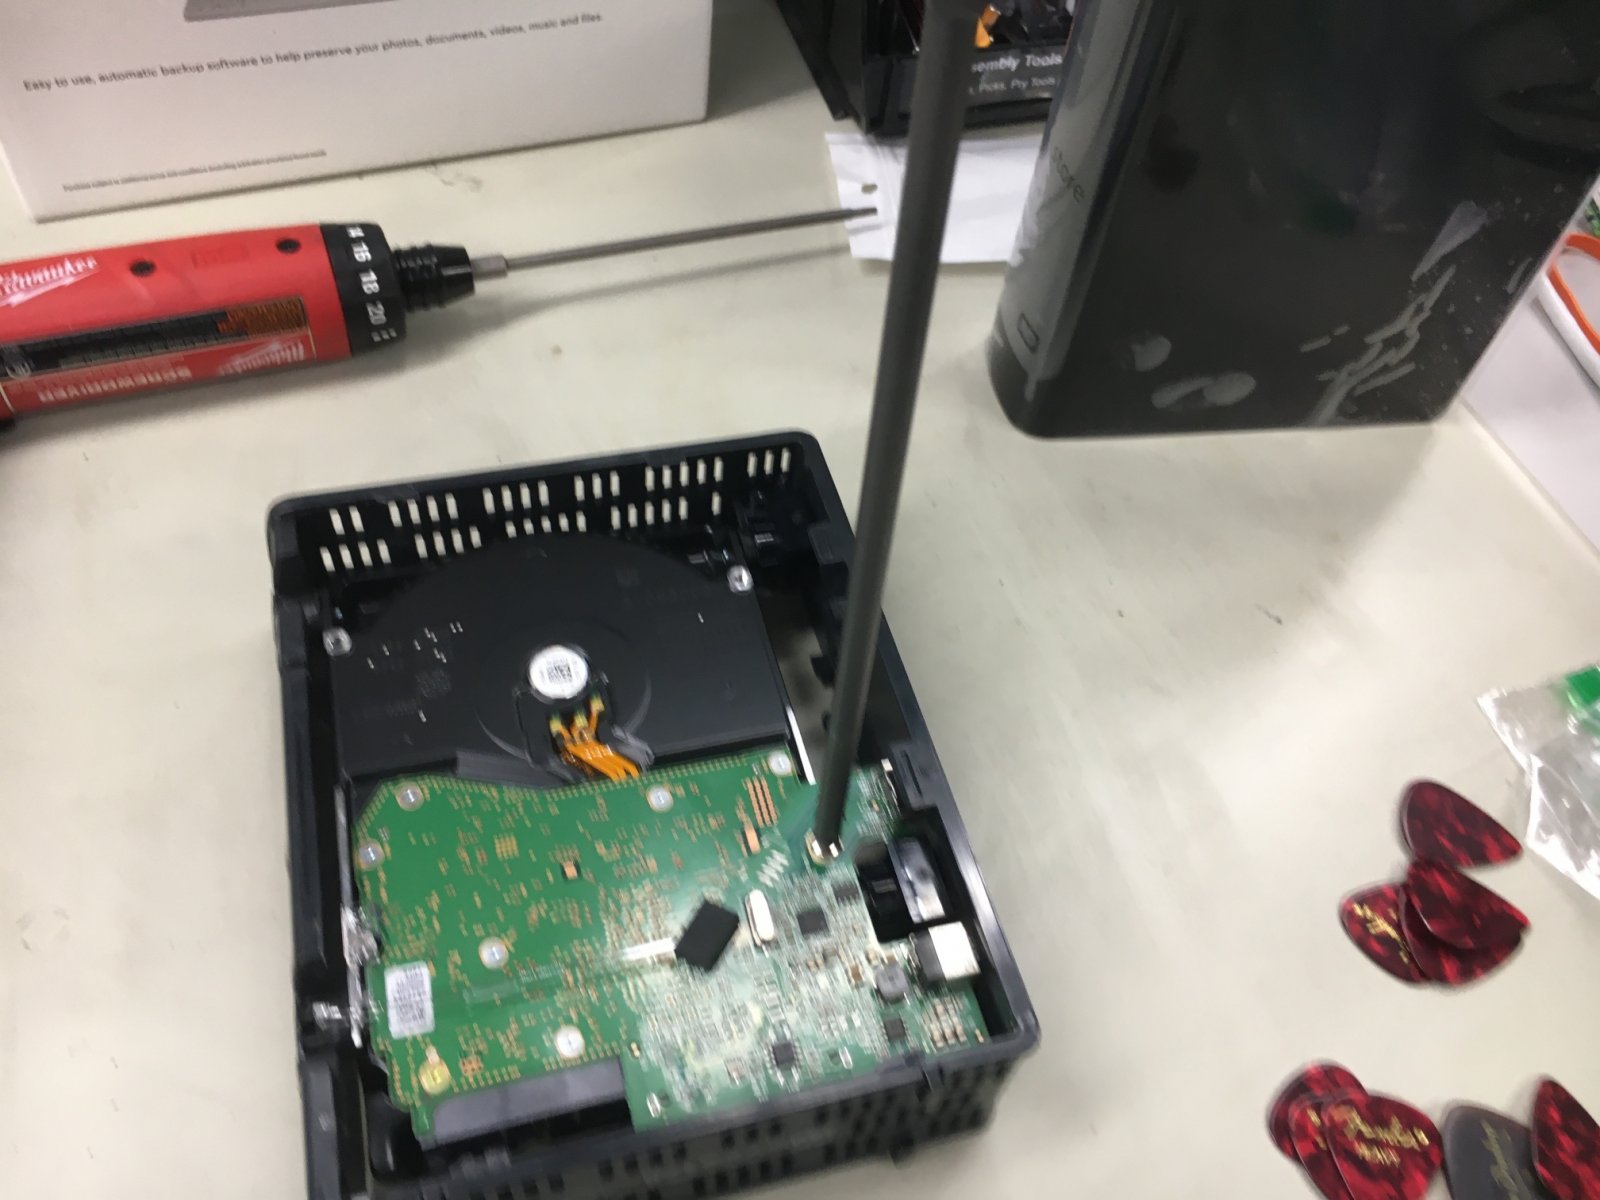
There is a Phillips #2 screw that fastens the USB adapter to the HDD PCB. This is a good point at which to remove it:
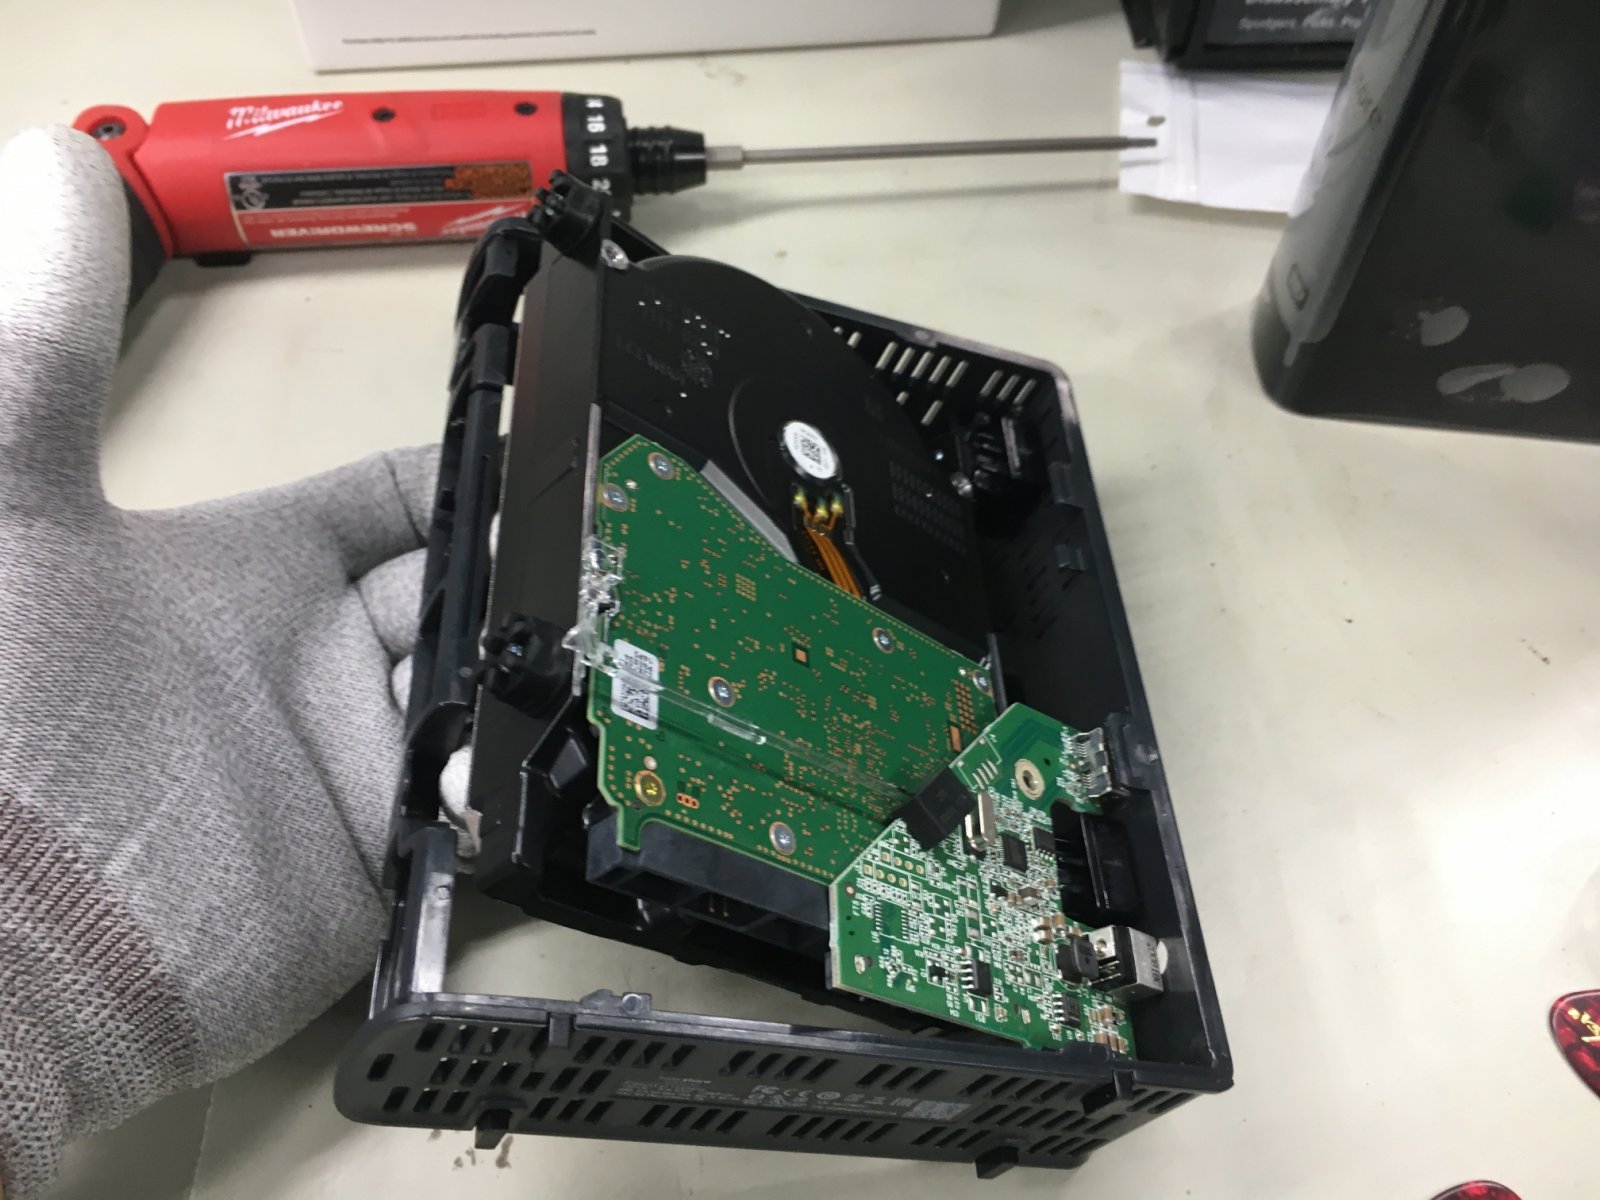
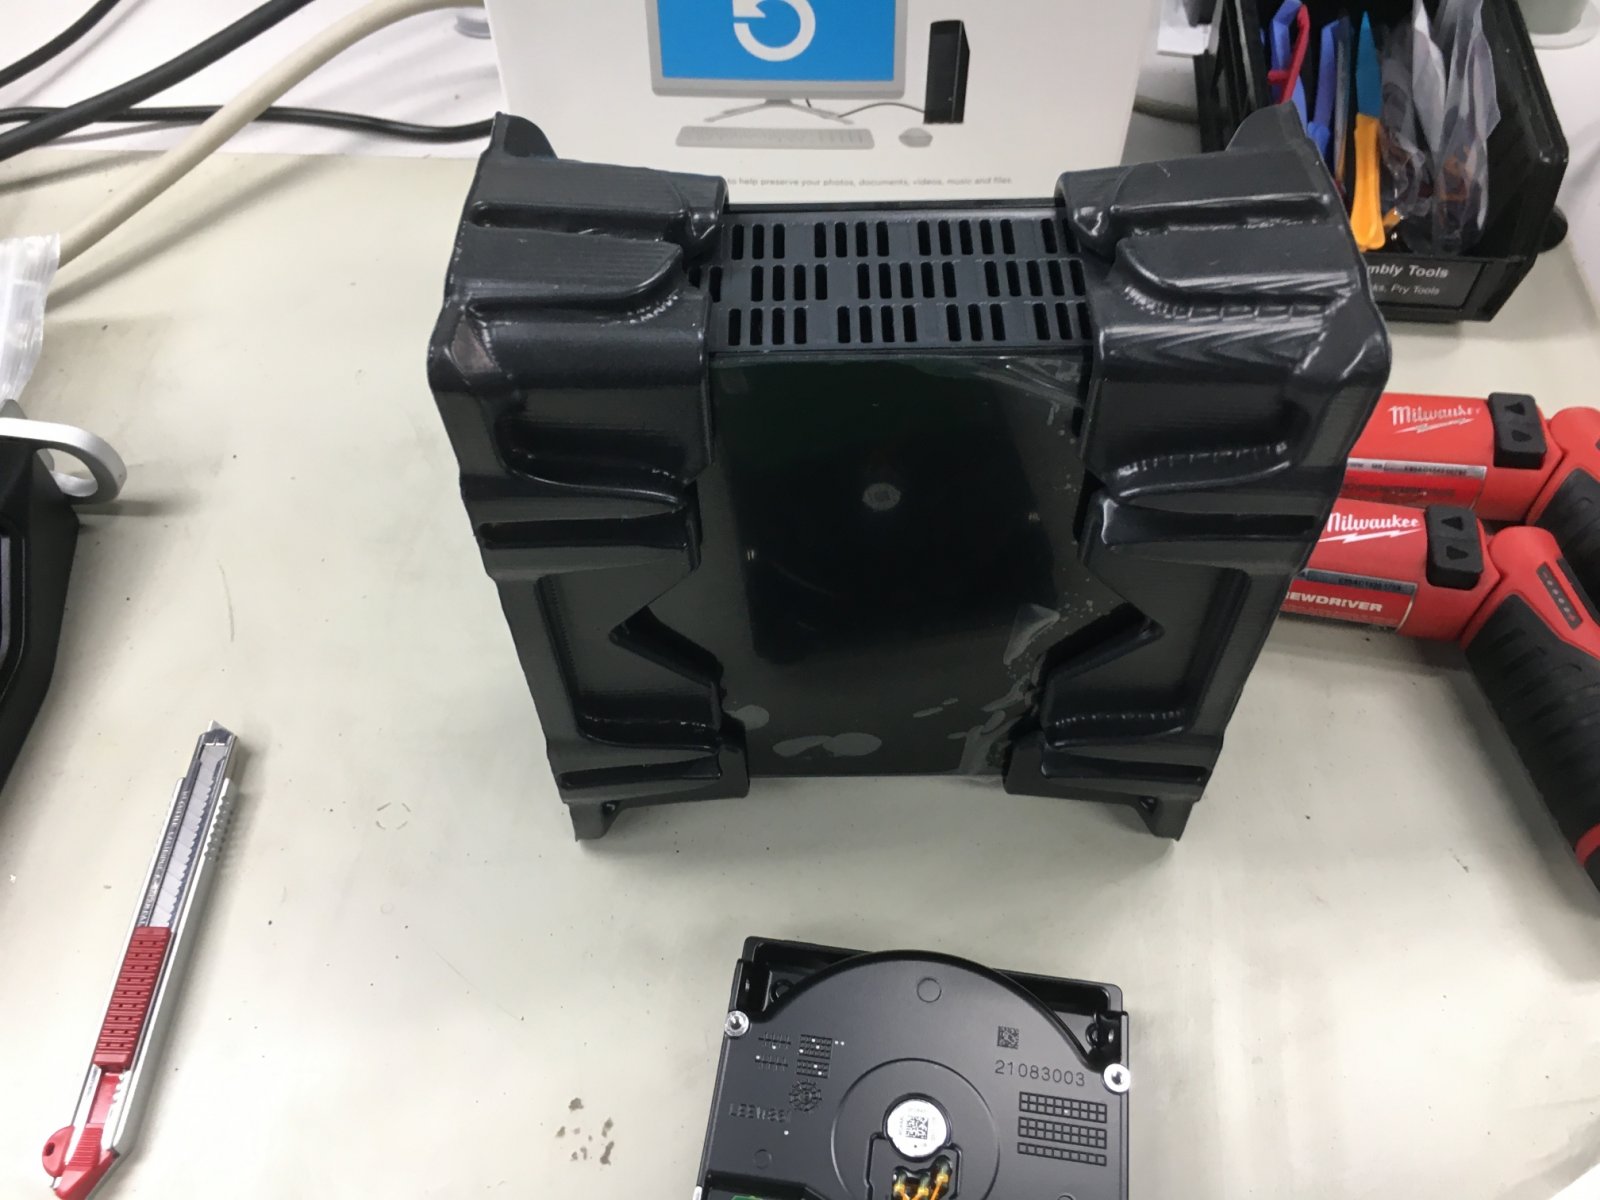
Now, carefully tilt the drive out of the frame. Lift it gently just enough to clear the frame. If you go too far, it is possible to damage connectors on the PCB. It will feel just a little uncomfortably tight, but it is absolutely fine to coax it out to this point, which is enough to remove everything:
Once the guts are removed, partially reassemble the plastic shell, making sure that the cover is sliding on the tracks:
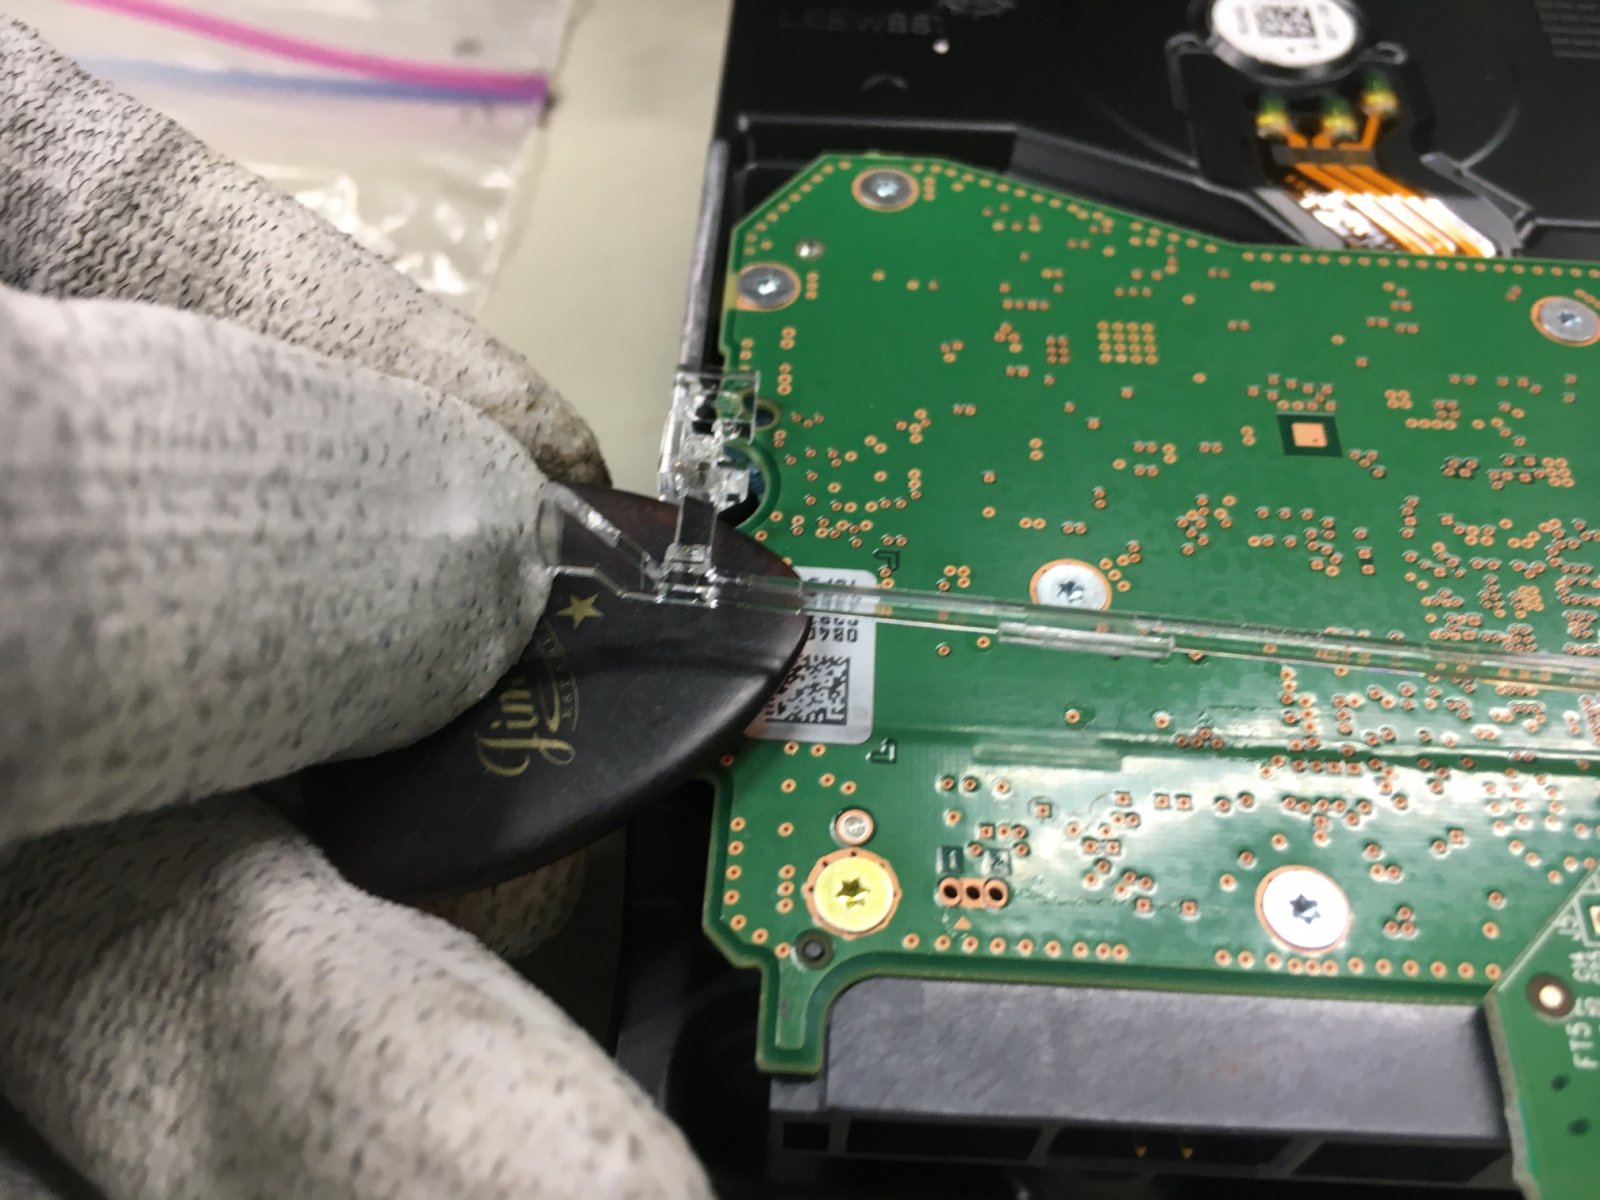
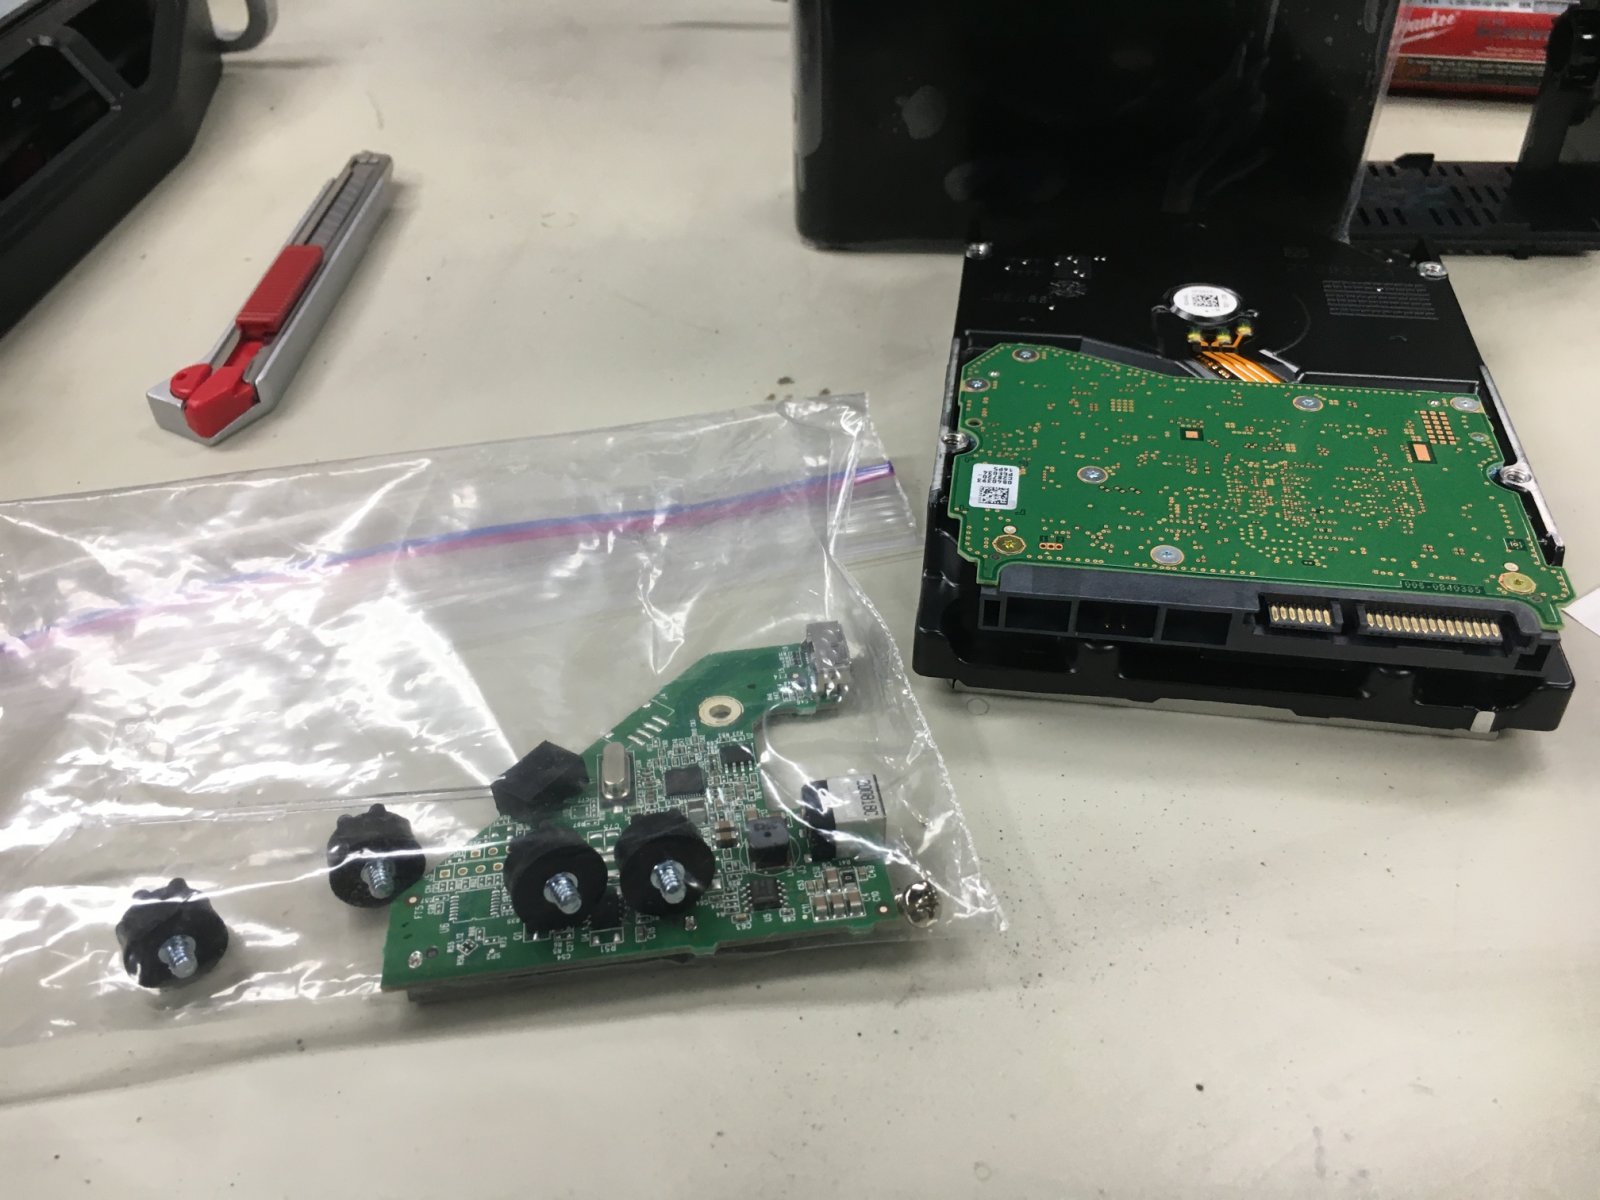
Next we move on to the drive assembly. Find a way to gently pry up and loosen the light pipe. It is press-fitted into one of the drive’s mounting screw holes:
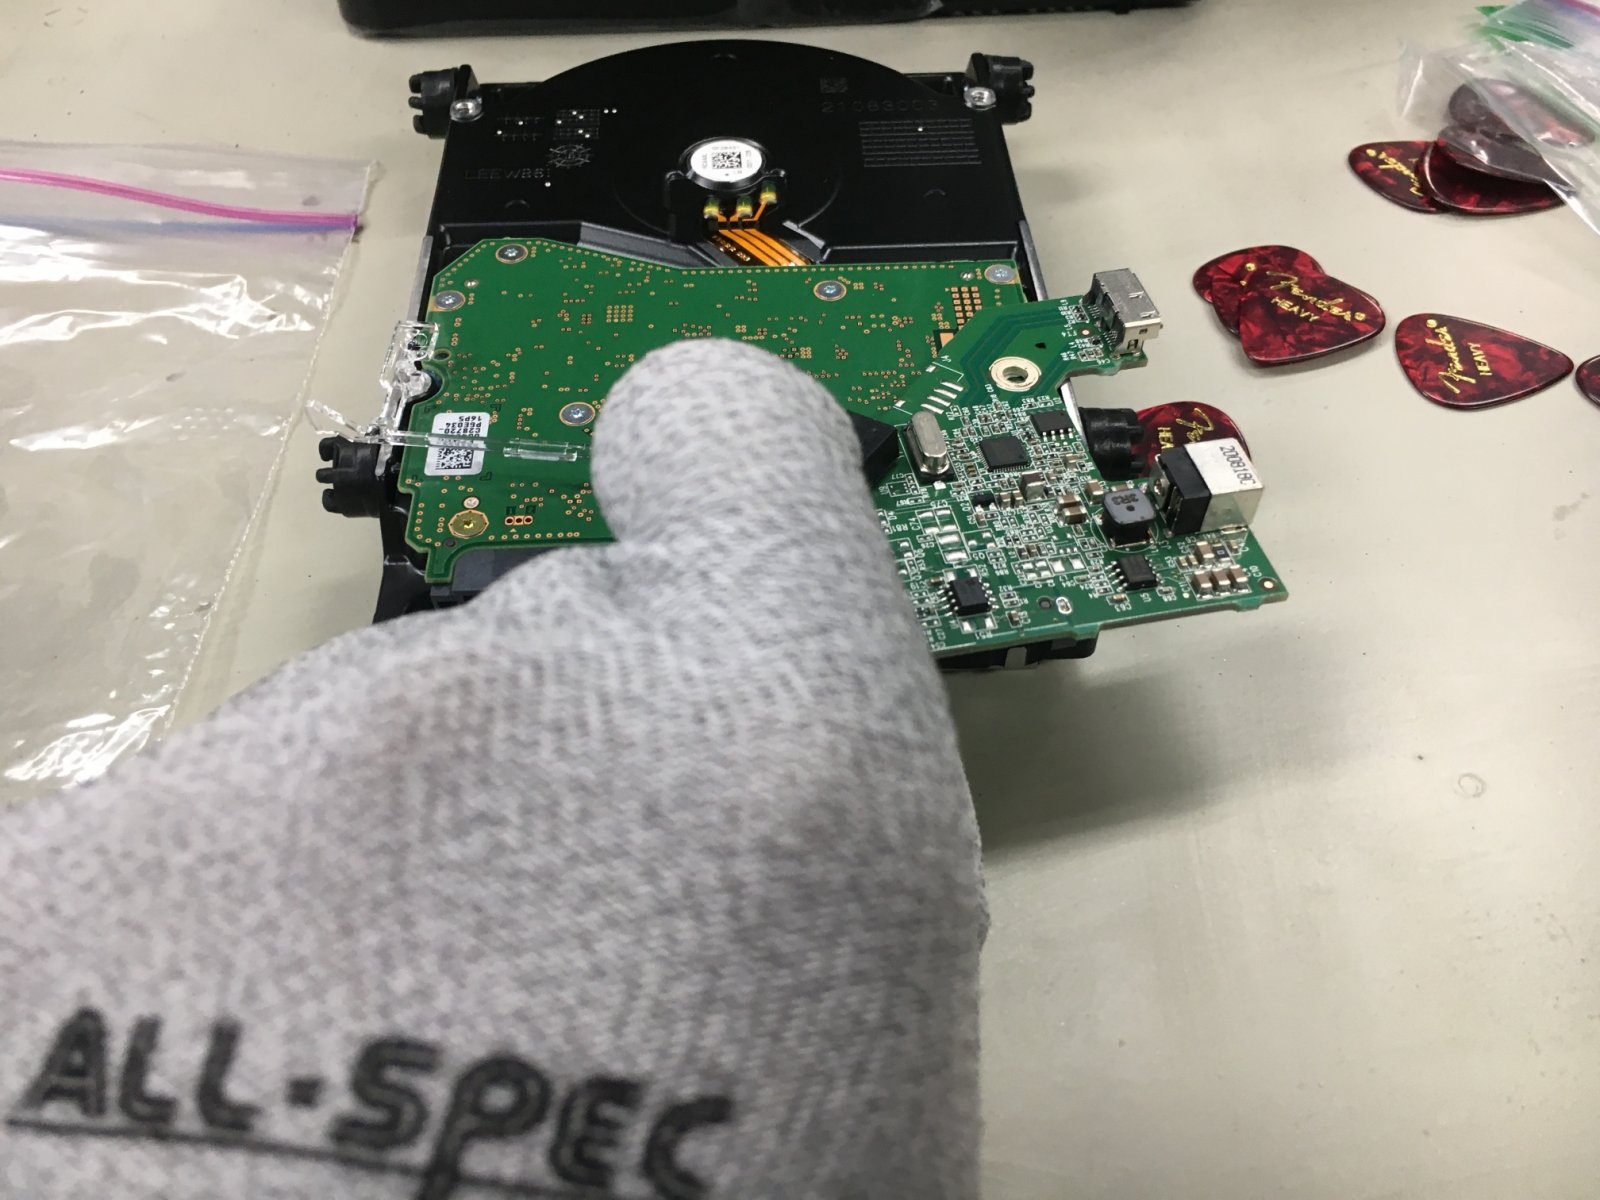
Next, gently rock the board back and forth to remove it from the drive’s power and SATA connectors. Try to avoid dislodging the light pipe from the PCB. Put the Phillips screw, the light pipe, and the PCB assembly into a baggie.
Remove the four T-10 screws and rubber grommets. Put them into the baggie as well.
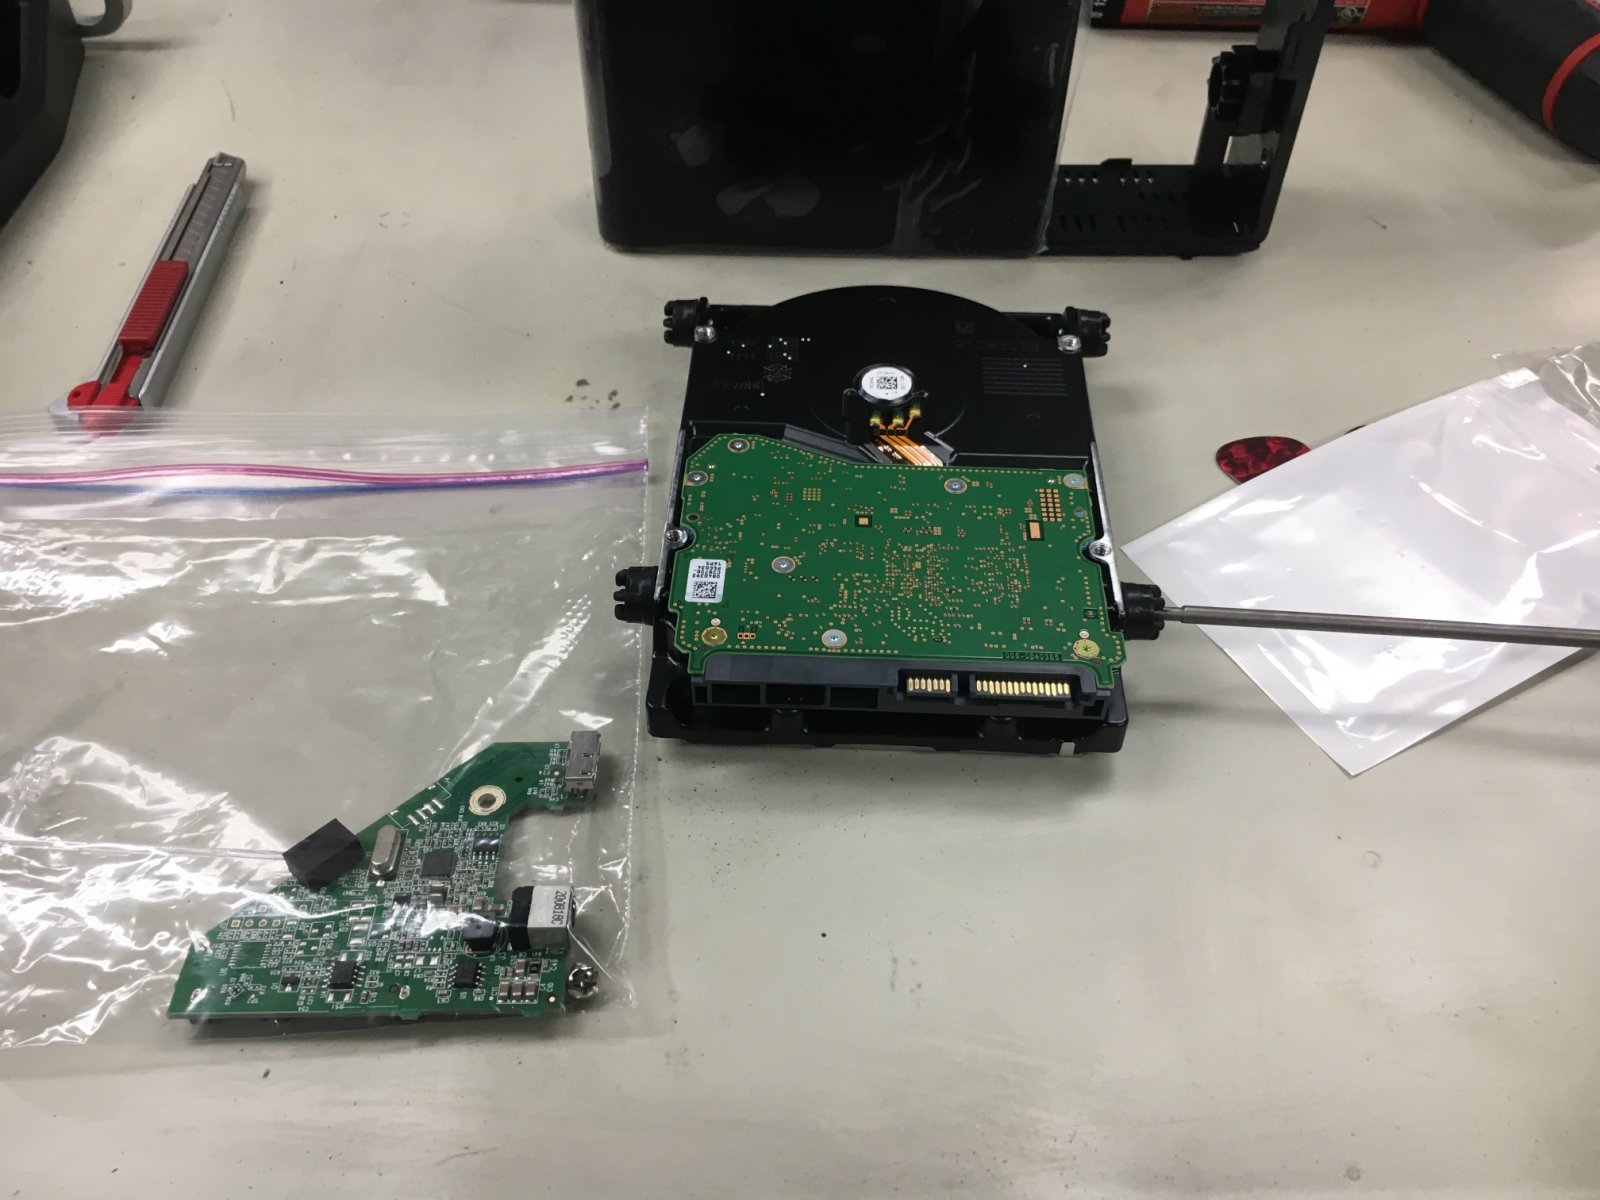
The baggie is your parts kit in case you ever need to send in the drive for RMA.
Drop the baggie inside the enclosure, and close up the enclosure. Don’t actually clip it shut.
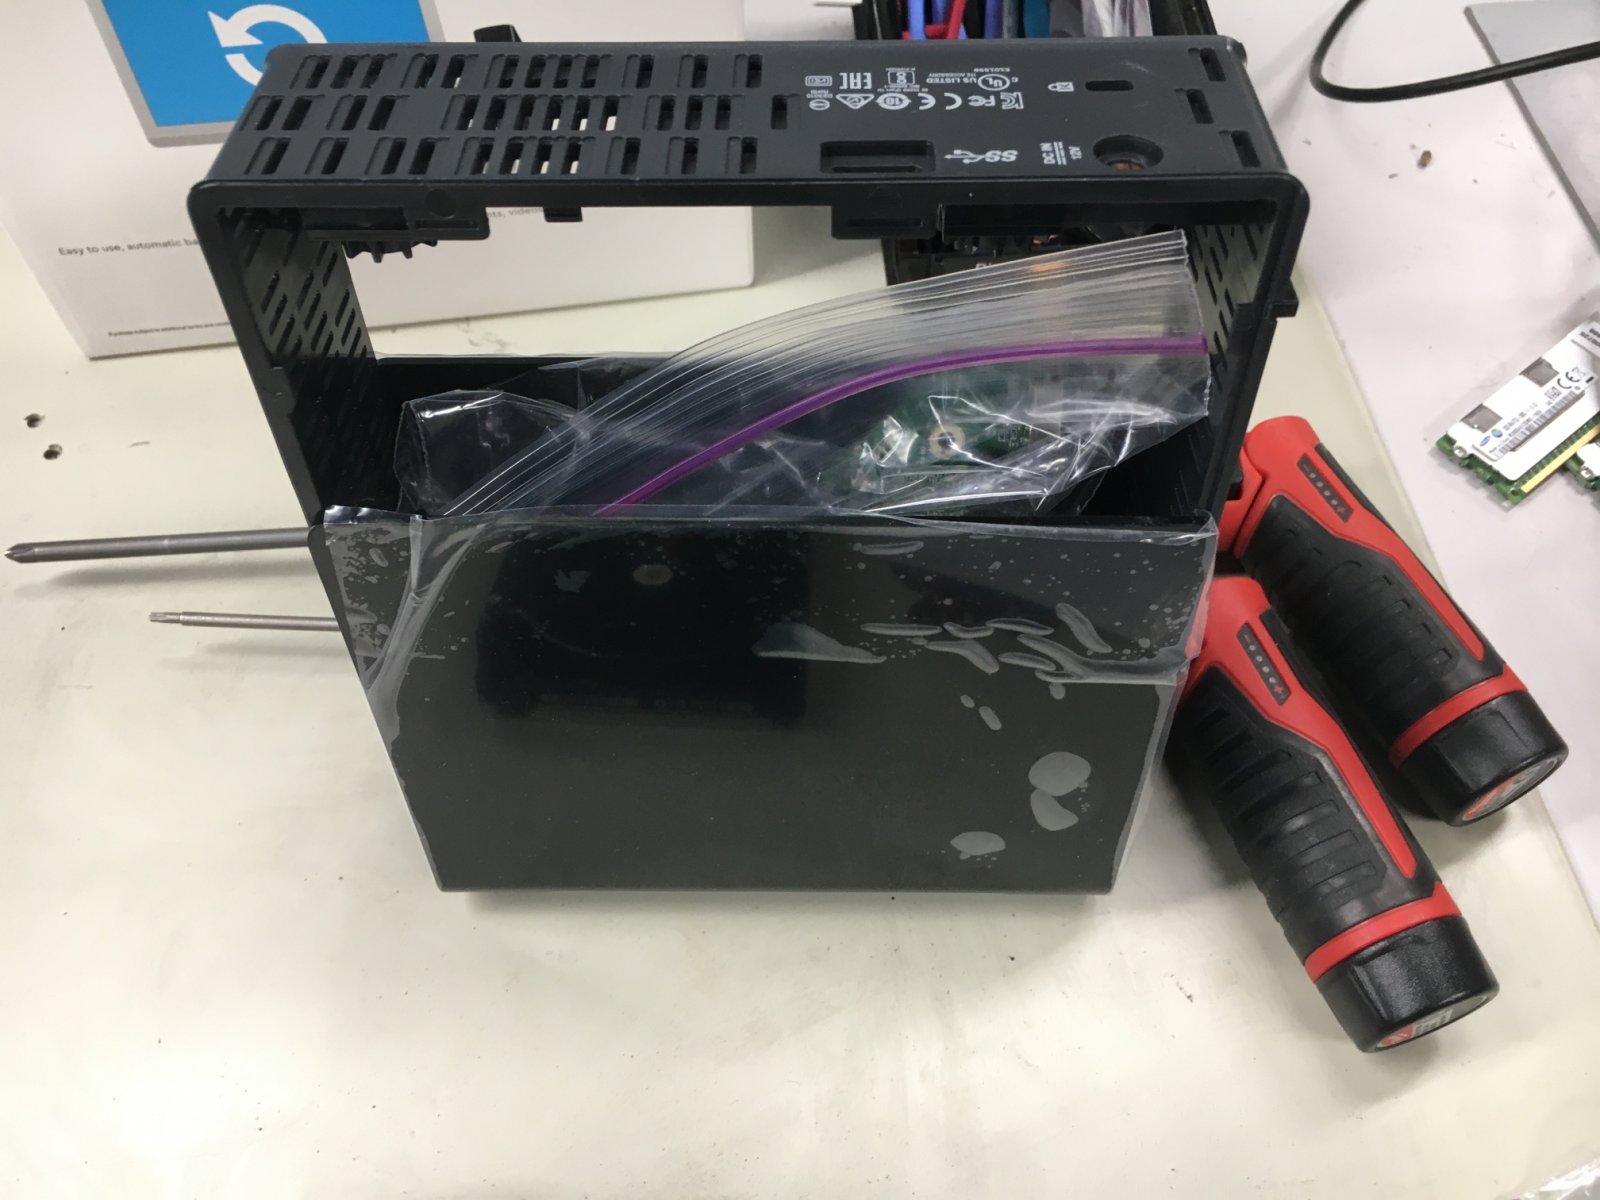
Put the enclosure back into its packing material and put it back into the box. You’re now all set to reverse this process in case you ever need to RMA the drive.
So that’s it. If you’ve done this correctly, there are no nicks or damage to any of the parts, nothing to give away that someone has ever removed the drive from the enclosure. Since you’ve probably got more than one drive, it is good to get into a “workflow” and do these steps in the order I’ve demonstrated, rather than leaving a pile of shucked cases and screws and stuff to clean up “at the end”.
And, of course, please enjoy your half price Black Friday drives.
Postscript (not the printer language): The ever vigilant @Etorix would like to remind everyone that it is a good idea to review TLER/ERC settings on these drives.
Checking for TLER, ERC, etc. support on a drive
One of the problems with consumer-grade hard drives is that most of them will hang in the event that they run into an error, and will internally retry the operation, possibly for a minute or more. For a desktop PC, where redundancy does not…

Additional note: It’s now 2022, and @Constantin made a comment about recycling the PSU’s. This prompted me to dig out a bunch of EasyStore boxes that are now out of warranty, and disassemble them for recycling. Since some people had asked, out of a sample set of 55 drives, zero of them have failed or had to be RMA’d.
