Be sure to follow all the steps especially in moving the system dataset before you export the main pool!
-
I decided to use dRAID1 instead of RAIDZ1 due to higher read performance, slightly slower writes, but way faster rebuild. My disks are huge so a Z1 rebuild would take a long time. The price I pay is giving up 50% of the capacity, so I get around 21.68 TiB from my 4 12 TB disks.
-
add nvme card to slot near 4 eth ports and chelsio 10G eth card to supermicro opposite the HBA. Put 1G eth cable into IPMI slot. Route the 10G SPI+ DAC cable to the UDM Pro 10G port. Note: SuperMicro documentation is terrible. To remove the riser, you have to lift the two black tabs in the back, and then you can pull straight up on the riser. There are NO screws you need to remove. So now 10G is the only way in/out of my system. Note: unluckily for me, changing ethernet cards like this can cause the Apps not Starting bug later, but I found a fix for that.
-
Config the NVME disk in TrueNAS as a new pool SSD. I used this to back up my existing data (which is modest at this point)
-
insert the 2 more disks into the supermicro, but don’t create a pool yet. Make sure they are recognized. They were. Flawless. To pre-test the newly added disks, see: Hard Drive Burn-in Testing | TrueNAS Community. Just make sure you are NOT specifying the old disks… WARNING: the system assigns different drive letters on EVERY boot.
-
save TrueNAS config (just to be safe). Always good to checkpoint things.
-
This is a good time to stop all the apps and then unset the app pool on the apps page. This is going to make it easier when you detach the pool later =.
-
Make sure there is a periodic snapshot task that snaps Main recursively. You can make the frequency once a week for example. You need this for the next step. I used the custom setting for timing so that the first one would be 5 minutes after I created the task. This meakes the next step easier since I will have an up to date snapshot. You must check “Allow taking empty snapshots.” The reason you need to check this is that the full filesystem replication makes sure every snapshot is there. If you recently snapshotted a dataset which didn’t change, this check will fail to create a snapshot and the sanity check will fail so you won’t be able to replicate the filesystem.
-
Use the GUI to copy everything in the main pool to SSD pool by using the ADVANCED REPLICATION button in Data Protection>Replication Tasks. Transport is LOCAL. “Full Filesystem Replication” is checked. Source and dest are the pool names: Main and SSD. Read only policy is set to IGNORE. You do NOT want to set this READ only. Replication schedule: leave at automatically. Pick the replication task you just configured for the replication task. Set retention to be same as source. Leave everything else at the default. Automatically will start the replication job right after the snapshot job above finishes. So less work for you.
-
While it is doing a full filesystem replica, it will unmount the SSD pool so if you ssh to the system, you will find that /mnt/SSD will be gone. So if you look at the Datasets page and refresh, it will give you an error about not being able to load quotas from SSD. This is only unavailable while doing the full filesystem replica.
-
If you click on the Running button, you can see the progress. You can also go to the Datasets page and expand the SSD pool and see that it is populating and that the sizes match up with the originals. You can also click on the Jobs icon in the upper right corner of the screen (left of the bells); that screen updates every 30 seconds to show you the total amount transferred.
-
Migrate system dataset from main pool to SSD pool (so I have a system when I disconnect the pool) using System >Advanced> System Dataset, then select the SSD pool and save.
-
Use GUI (Storage>Export/Disconnect) to disconnect MAIN pool (do not disconnect the SSD pool). If you get a warning like “This pool contains the system dataset that stores critical data like debugging core files, encryption keys for pools…” then you picked the wrong pool. Select to delete the data but do NOT select “delete the config information.” The config info is associated with the pool name, not the pool. You will get a warning with a list of all the services that will be “disrupted.” That’s to be expected.
-
You will need to type “main” (i.e., whatever your pool name is) below the checkboxes to confirm the destroy and disconnect… Make sure the middle selection is NOT checked. You want it just like above.
-
The export will take a little while.
-
When I first tried it, I got: "[EFAULT] cannot unmount '/mnt/main/user': pool or dataset is busy" and libzfs.ZFSException: cannot unmount '/mnt/main/user': pool or dataset is busy"
-
I tried it again and it said Kubernetes is still referencing main. So I did the same process a second time and it failed: [EFAULT] cannot unmount '/mnt/main/user': pool or dataset is busy. This is because I was ssh’ed into the truenas system and in my home directory.
-
So i killed my ssh and tried the export a third time. Remember to adjust the options as above each time!! The system will NOT default to this (it defaults to the last 2 options)
-
It worked! “Successfully exported/disconnected main. All data on that pool was destroyed.”
-
Storage now shows I have 4 unassigned disks!!! Perfecto!
-
Now click that “Add to pool” button! !
-
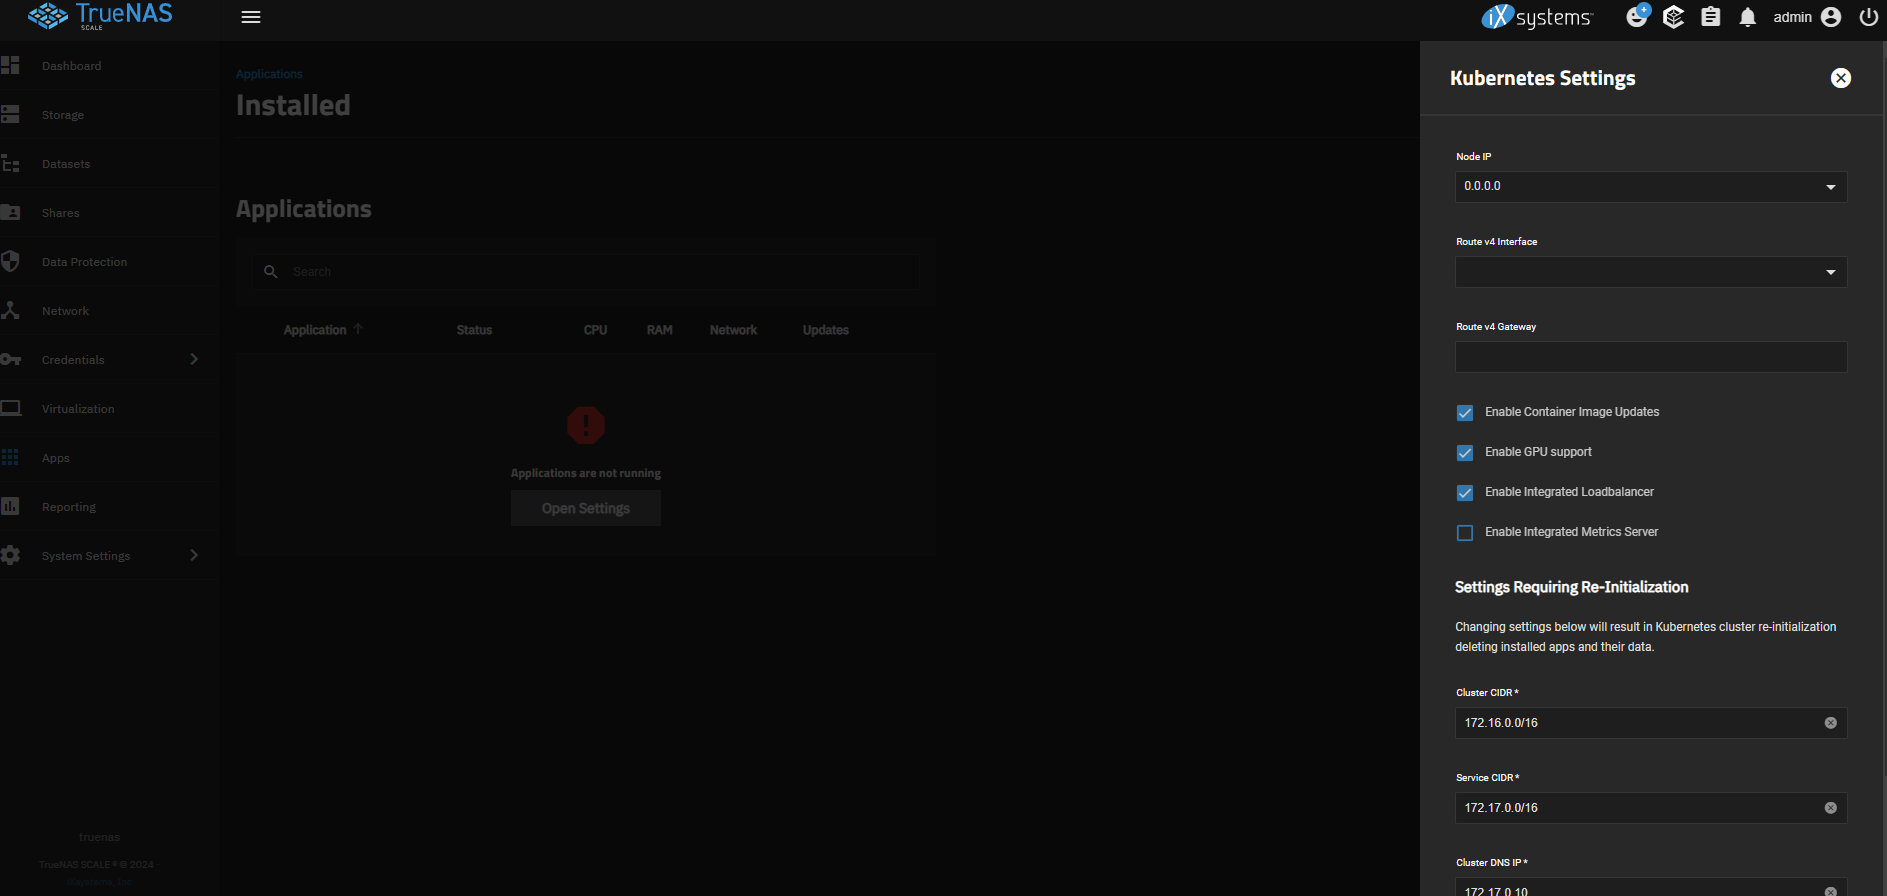
Use GUI (“New Pool”) to create a brand new main pool with all four disks with same name as my original main pool. Select Data>Layout of dRAID1 since I have large 12 TB disk drives and I want performance. Use the exact same name as before (including correct case). Data devices should be 2 (which uses 3 disks) and hot spare=1 and so children=4, vdev=1. t will show in the summary as: “Data: 1 × DRAID1 | 4 × 10.91 TiB (HDD)”. Then it says: “In order for dRAID to overweight its benefits over RaidZ the minimum recommended number of disks per dRAID vdev is 10.” But that’s not what I learned.
-
Some people believe “dRAID only make sense if you have multiple raidz# vdevs with hot spares, for more than 20 drives in total. And flexibility is even worse than raidz#.” This is a topic for another thread.
-
At this point, look at your SMB shares. They are preserved!!! So are the snapshot tasks, replication tasks, etc. in the Data Replication page. So looking great!!! It’s all downhill from here!
-
Just for safety, let’s export the config at this point. (at 12:25am on 4/25)
-
This is the time to periodically snapshot the SSD. Do the snapshot process we did above; a periodic snapshot of the SSD pool just like we did before. This sets you up for the transfer back to the main pool of the data that was there originally. So recursive, custom start time (weekly starting in a 15 minutes) to give us time to create the Replication Task that will start automatically after the SSD full recursive snapshot.
-
Use GUI again to copy data over from SSD pool to the new main pool. So same steps as before. We need to use the SSD snapshot and reverse the source and destination and use the SSD snapshots. So I just loaded the previous replication task and started with that, but when I went to advanced, it blanked it out! So I have to re enter everything from scratch!
-
It failed this time. I got the message: middlewared.service_exception.ValidationErrors: [EINVAL] replication_create.source_datasets: Item#0 is not valid per list types: [dataset] Empty value not allowed which sound like it thinks I’m trying to replicate from an empty source. I’m going to bring up the menu again, but this time I’m not going to try to load from the OLD job, but enter everything from scratch. I think this is a big in retrieving the old replication task job. So bring up the dialog and go straight to advanced and fill it out from scratch. Do not try to edit the old job.
-
I was right!!! Whew, what a relief. This is just a bug which I’ve reported.
-
Hit reload to see your SSD to main Replication Task. It’s status will be pending. It will run right after the SSD recursive snapshot is done. Hit reload and the periodic snapshot tasks will be “Finished” and the “SSD to main” replication task will be running.
-
You can monitor progress as before.
-
After the replication finishes, it’s time to move the system dataset to the new main pool using GUI using the process used above.
-
It says “Apps Service Stopped”. restart apps Service. Not sure how to do that. it isn’t in System>Services. No clue. Hopefully a reboot will fix it.
-
It wasn’t serving any SMB shares (the switch was flipped to off for all the shares) so I had to flip all the shares to enabled, and that did the trick!
-
Done.
-
Now disable that replication task (from SSD → main). And possibly from main → SSD if you want to use the SSD for a different use.
-
Reboot just to make sure there are no issues. There shouldn’t be, but I’d rather find out now than later.
-
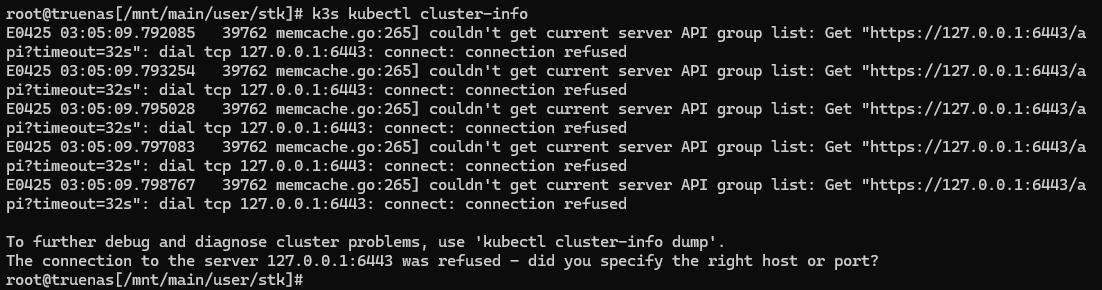
Reboot didn’t fix k3s not starting. I covered the fix for Apps not starting here.
-
Take a manual full system recursive snapshot of your new pool and save the system config.
-
Have a beer. You did it!
In a few days, check SMART errors on the new disks just to be safe using the GUI in Storage>Disks. But beware that the OS will not name the disks in the order in the server. Use lsblk before you put the disks into a pool to see which disks are in use and which are the two new ones. In my case, the new disks were sdb and sdc. You can also tell because if you look at the smart test results, there will be none for the new disks (but I think it’s a bug that I’m not seeing any smart results)! Sadly, manual SMART tests fail because SMART isn’t enabled even though the GUI says it is. Reported as a bug.
It seems the GUI is broken to enable SMART tests. Go to the CLI and type:
smartctl -s on /dev/sda and do for each disk. Then go to the GUI to start the tests. You can close the window after you start the test.