I’m going to address this as a TrueNAS Core (FreeBSD) user rather than as a TrueNAS Scale user, even though Manjaro (ARCH) Linux is my desktop OS. I’m hoping that the TrueNAS Scale Web page is sufficiently similar, thus, you should be able to find the disk that has failed.
Originally On Core I had to put together a bunch of BSD Commands to be able to find a failed disk when I got a notification that “wasn’t so obvious.” As a result I ended up building a table of a Disk Description (model and type), Serial Number, GPTID, GUID, associated pool and VDEV. This was a combination of information from a script I found to associate drive names I found on what is now the archived forum:
run this script after sSH’ing in:
and changing to “superuser”
myname@freenas.local:>su
myname@freenas.local: passwd
!/bin/sh
echo
echo $(basename $0) - Mounted Drives on $(hostname)
cat /etc/version
date
echo
diskinfo=“$(glabel status | tail -n +2 | awk ‘{split($3,a,“p”); print a[1],$1}’)”
echo “+========+==========================+==================+============================================+”
echo “| Device | DISK DESCRIPTION | SERIAL NUMBER | GPTID |”
echo “+========+==========================+==================+============================================+”
for d in $(echo “$diskinfo” | cut -d" " -f 1)
do
diskinf=$(diskinfo -v $d | grep '# Disk ')
diskdescription=$(echo “$diskinf” | grep ‘# Disk desc’ | cut -d# -f 1 | xargs)
diskserialno=$(echo “$diskinf” | grep ‘# Disk ident’ | cut -d# -f 1 | xargs)
diskgptid=$(echo “$diskinfo” | grep ^$d | cut -d" " -f 2)
printf “| %-6s | %-24s | %-16s | %-42s |\n” “$d” “$diskdescription” “$diskserialno” “$diskgptid”
echo “±-------±-------------------------±-----------------±-------------------------------------------+”
done
I don’t see any BSD commands in this script so it may work as is under SCALE as long as the file structure is the same in SCALE. This will give you a table to start with.
Now the really neat script (and main command) that associates disks and their relationship to the zfs structure is this one:
:>zdb -C -U /data/zfs/zpool.cache
On CORE, this has to be run as root, or with amplified permissions. This will give you an MDS Configuration, structured by indents, that reminds me of an XML file with lots of information, and by intuition, the very structure of the ZFS database structure. Using this information by noting similar indices from this output and output of the above script you’ll get just about all the “references” to the various ways that a zpool failure status will be reported to you.
So much for doing it the “hard way.”
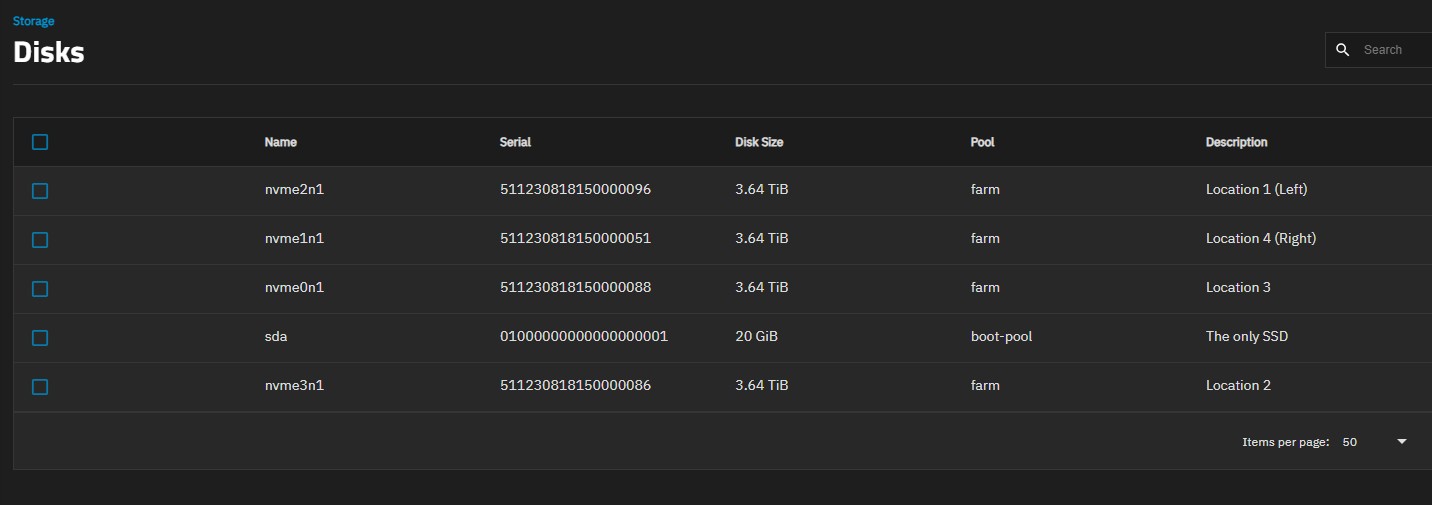
Now the “quick” way that might well get you the relationship of a serial number to a GUID or a device location is to go to the Dashboard, click on the small “>” arrow on the right side of the “POOL” box which will replace it with a VDEV box, and to the right of each VDEV you’ll see a similar “>” that will take you to info for each disk including the GUID and s/n of each disk on line. Now, if you know something already about the physical disks, and you got a GUID or LUID, you’ll be able to detect the failed one, as it won’t be online. The relationship of gptId’s can be found by doing a >zpool status and noting the table presented,
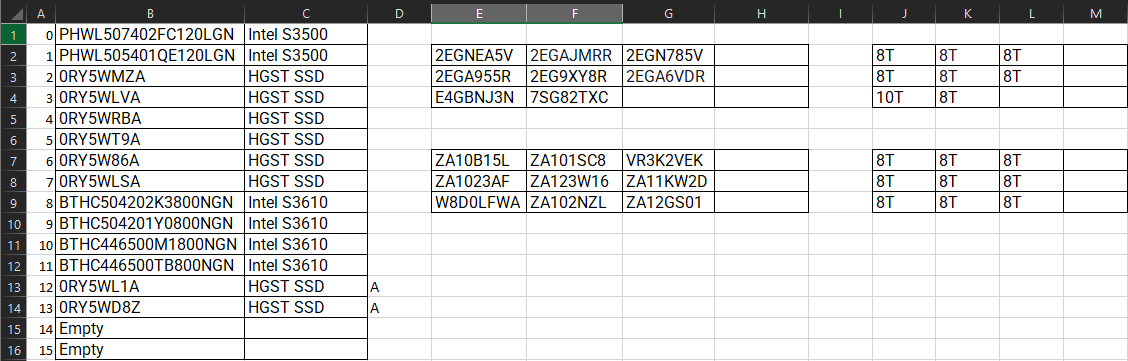
As far as finding the failed disk in your trays, that is a result of “good housekeeping” that should start when you put the hardware together. My project consists of 10 data disks. Visibly eack bay has a label I printed using mailing labels created with the gnome program glabels. Each label contains the Serial Number, gptid, guid and date of installation. On the edge of the tray enclosure I have a small label that indicates the common device name; in BSD parlance, /da0, da1, adad0,ada1… My system is an old HP Proliant Gen 7 that “grew” over the years. The original unit had SATA dev (CAM) namings. As it grew, I added an HBA and then had /daX and /adaX devices. I added a couple of 4-bay SAS cages from Athena Power that Newegg was handling on and off. Realizing the SATA controller on the Proliant was holding me back, I just added a SAS multiplier and moved control of the cage built into the Proliant on the the SAS multiplier and now have the ability to add 8 more drives if my media collection grows substantially more. With this, I had to learn how to read SAS configurations using the mpsutil commands, which can help you locate physical location to info like the SSN.