Hey everyone, I wrote a tutorial on how to set-up Nginx Proxy Manager with a DuckDNS domain in TrueNAS Scale and configure it so you can point subdomain addresses like https://immich.mydomain.duckdns.org to your local server IP address like 192.168.68.113:30041 and have Let’s Encrypt SSL certificates for HTTPS without having to buy a domain for all your applications that have WebUIs. I also included specific instructions on the extra steps needed to set-up the Nginx Proxy host for Immich specifically.
Keep in mind that my server isn’t port forwarded and available to the public, I am using Tailscale to connect my devices to it. I am also using the latest Electric Eel release.
Interesting. While I use a Fully Qualified Domain Name instead of a subdomain of DuckDNS, that difference doesn’t apply to the comments below…
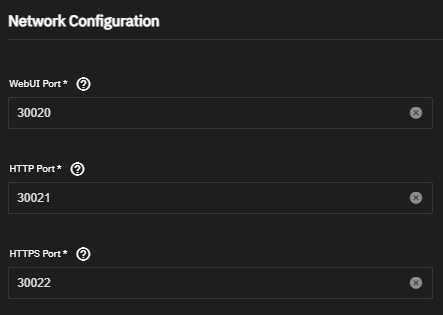
When I installed the Nginx proxy server, the following were the default ports:
It was a matter of setting up port forwarding at the router level so that port 80 points to port 30021 and port 443 ports to port 30022.
Also, how are you keeping your public IP address up to date? Since I’m on a residential ISP, the method I’m using is DDNS Updater which does include support for Duck DNS for updating the DNS record.
Yes, it took me a while to learn this, but I wanted to make sure that several apps (Audiobookshelf, Kavita, Uptime Kuma, Linkding) were accessible to the outside world using secure certificates, plus I wanted to force using https for the connection. Having a VPN connection ends up using more processing power which affects battery life when I’m listening to a audiobook while I’m mobile.
As my server is not accessible to the outside world and I use Tailscale to connect to it through VPN outside of my home I was able to configure my router to give my server a fixed local IP address (192.168.68.113) and just have DuckDNS point to that local IP address.
Therefore I do not need a DDNS Updater currently, although if I ever did open my server to the public you are correct that I would need something like that. I might have to do that sometime in the future since Samsung Android likes to kill the Tailscale background app in my family’s phone (for battery saving) which makes it a bit of a pain sometimes.
Very well written guide how to setup local https access. I did this about 2 months ago (following a youtube video from Tech the lazy automator). It’s really nice and easy to remember all urls for easy access.
2 weeks ago I started using pihole to setup my own dns server. This way you’re free to create whatever url you’d like. I have my app accesible at app.homelan. But off course you can create your own with pihole.
These are the steps to setup pihole correctly:
install pihole with the correct network settings (select hose when you have multiple network adapters)
verify that network settings are correct in pihole (look for primary ip address under settings>system settings)
change your router dns (local lan and wan) to point to your truenas ip.
go back to pihole: go to tools>network. Most recent lines should be green: this means traffic is going through your own dns.
go to settings>local dns and create your own domain names (pointing to your nginx ip. The difference with duckdns is that you can’t use a wildcard. After that create the proxy entries in nginx to point to ip:port of each created domain.
Pihole is especially useful if you use tailscale/wireguard. Personally I prefer wireguard because I can select which apps use the tunnel. So basically I never turn it off. This is especially handy for my wife, because she doesn’t want to check all those things.
You can also keep using duckdns. They’ll both work side by side. And as a added benefit you’ll get control over ad filtering and website blocking (I block facebook, youtube and tiktok for my kids).
I neede to disable a bit more settings to disable dns over https in my router, but for basic dns routing pihole is fairly easy to configure.
yeah, you can only use self signed certificates with pihole dns, that’s why I still use duckdns. installing nextcloud was so much easier with my duckdns secured domain!
Some day I’ll go public with my own domain, but I still have to figure out how to do this securely. I’m still from the port forwarding generation and only recently stop doing so. For now wireguard works really well (almost the same as tailscale), but I’d like immich to go public in order to share albums directly with friends and family.
and regarding my kids… by the time they figure out how to unblock pihole they’ve earned their stripes For now big data and china are having a blast at all that free data that’s flowing their way. It’s astonishing our governments don’t do anything to stop it. I honestly think that in 10-20 years the world will be ruled by people that grew up without social media and actual RL social skills.