Home Assistant - How I ditched the VM and embraced The Container

A while ago, I’ve set up Traefik to be able to publicly expose some of the services on my TrueNAS, and for the Crowdsec middleware to work with Home Assistant, I needed to feed it HA logs to detect bruteforce attempts. Problem? My Home Assistant was in a virtual machine, thus no direct access to the filesystem. I really did not want to set up a convoluted method of ssh-ing into it and tailing the logs to the host, so I switched to the container installation. I’ve been running it for a month or so and am quite happy with how the migration turned out.
Per @kris ’ suggestion on Youtube, here is a write up of how I did it.

Btw, since this was discussed on the T3 podcast - Home Assistant Supervised does not support LXC/Incus containers nor will it install inside one, it will just error out.

Prerequisites:

  1. Home Assistant Container
    I really did not want to run the container that will face the internet as privilleged and root with mounts to to system’s internals like the official guide wants you to (Linux - Home Assistant), nor did I really like the app from Truenas catalog as it’s also running as root, so I opted for using the image from linuxserver.io.
    I’m also used to editing Home Assistant config through a web editor, so I set it up together with a code server container, also from linuxserver.io.
    Here is the compose config that I used in Dockge:
services:
  homeassistant:
    image: linuxserver/homeassistant:latest
    container_name: homeassistant
    security_opt:
      - no-new-privileges:true
    volumes:
      - type: bind
        source: ${apps_storage}/homeassistant/config
        target: /config
      - type: bind
        source: ${apps_storage}/homeassistant/ssh
        target: /config/ssh
      - type: bind
        source: ${apps_storage}/homeassistant/secrets/secrets.yaml
        target: /config/secrets.yaml
      - type: bind
        source: ${apps_storage}/homeassistant/backups
        target: /config/backups
    network_mode: host
    environment:
      - PUID=${USER_ID}
      - PGID=${USER_ID}
      - TZ=${timezone}
    restart: unless-stopped
  code-server:
    image: linuxserver/code-server:latest
    container_name: code-server
    security_opt:
      - no-new-privileges:true
    environment:
      - PUID=${USER_ID}
      - PGID=${USER_ID}
      - HASHED_PASSWORD=${HASHED_PASSWORD}
      - TZ=${timezone}
      - DEFAULT_WORKSPACE=/homeassistant
    volumes:
      - type: bind
        source: ${apps_storage}/homeassistant/code-server
        target: /config
      - type: bind
        source: ${apps_storage}/homeassistant/config
        target: /homeassistant
      - type: bind
        source: ${apps_storage}/homeassistant/secrets/secrets.yaml
        target: /homeassistant/secrets.yaml
      - type: bind
        source: ${apps_storage}/homeassistant/backups
        target: /homeassistant/backups
    ports:
      - 8124:8443
    restart: unless-stopped
networks: {}

Pay attention to the ${variables}, you will want to specify them in .env in Dockge.

Note that I chose to use the bind mounts because I wanted each mount to be its own ZFS dataset, as volume mounts will happily create the source directory if it doesn’t already exist (in case you mess something up), which I didn’t really want.
Secrets file is in a separate secrets dataset because I had to mount whole config dataset for Crowdsec for it to read Home Assistant’s logs, and I didn’t want it to have access to the secrets file too.
Backup dataset is separate because that’s where my HAOS VM used to save its backups over SMB, so I decided to keep that dataset but just as a bind mount.
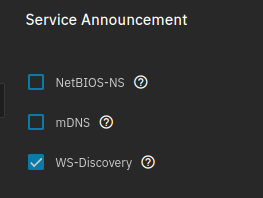
Also, if you want working mDNS discovery, in TrueNAS Web UI, you will need to go to Network - Global Configuration and uncheck the mDNS Service Announcement:

  1. Zigbee

For zigbee, I’m using zigbee2mqtt and mosquitto, which are both available in the TrueNAS Apps Catalog, as I didn’t want to give HA container privilleged access to USB devices.
I’ve been using zigbee2mqtt before I switched from the VM due to its better compatibility with zigbee devices, but if you are coming from ZHA (Home Assistant’s builtin Zigbee integration), last time I checked (which was a while ago), you basically need to start from scratch and manually re-add all your zigbee devices to a fresh zigbe2mqtt-created network.
Devices get exposed to Home Assistant via the “MQTT” integration.
I won’t go into detail on how to set those 2 containers up other than to suggest to read the tooltip for the port field in the zigbee2mqtt configuration, but if you have a question, leave a comment.

  1. Bluetooth

As there is, to me knowledge, no equivalent to zigbee2mqtt for bluetooth, I decided to instead opt for an ESP32 bluetooth proxy.
Setting those up is easy - buy a generic ESP-32 board, which cost a few dollars, plug it into your computer, flash it with Bluetooth Proxy firmware by visiting this page in a Chromium-based browser Ready-Made Projects — ESPHome, give it credentials to your 2.4GHz Wi-Fi network, add it to your Home Assistant via the ESPHome integration, and you are good to go.

  1. ESPHome Device Builder

Only needed if you have devices that require custom compiled ESPHome firmware. You don’t need this for bluetooth proxy or Voice PE, as they get their firmware updates from Home Assistant servers.
ESPHome is available as a docker container, which I’ve installed through Dockge, although it is available in the App Catalog. But again, I want to run it as non-root, so I’m going the compose route.

services:
  esphome:
    container_name: esphome
    image: ghcr.io/esphome/esphome
    security_opt:
      - no-new-privileges:true
    user: ${USER_ID}:${USER_ID}
    ports:
      - 6052:6052
    volumes:
      - type: bind
        source: ${apps_storage}/esphome/config
        target: /config
      - type: bind
        source: ${apps_storage}/esphome/cache
        target: /.cache
    restart: unless-stopped
    environment:
      - TZ=${timezone}
      - ESPHOME_DASHBOARD_USE_PING=true
      - USERNAME=admin
      - PASSWORD=${password}
      - PLATFORMIO_CORE_DIR=/config/.esphome/.platformio
      - PLATFORMIO_GLOBALLIB_DIR=/config/.esphome/piolibs
networks: {}

I couldn’t get mDNS discovery working with this one, so I had to assign static DHCP leases to my ESPHome devices in the router, as well add this to configuration for ESPHome devices:

  use_address: DEVICE_IP_HERE

which goes under the wi-fi section.
It will look something like this:

wifi:
  ssid: !secret wifi_ssid
  password: !secret wifi_password
  use_address: 192.168.0.123

You also won’t get notifications in Home Assistant itself every time new ESPHome version comes out, but it’s not a big deal to me as it’s rare I need to update the firmware version at all.

  1. Wyoming Piper for Text to Speech

If you use Home Assistant’s voice assistant satellites, such as Voice PE, then Wyoming Piper for local TTS is available as a docker container: https://hub.docker.com/r/rhasspy/wyoming-piper

Again, it’s nothing hard to set up, you can just convert the example command from the docker hub page to compose on the home page of Dockge, although you may want to change the default voice option to something nicer, like en_GB-alba-medium.

  1. Whisper.cpp for local Speech to Text with GPU acceleration

I have an Intel Arc A380 in my TrueNAS box mainly for Jellyfin transcoding, but since that uses only Media Engine part of the chip, I’ve set it up to do some compute by running local speech to text.
Speed is quite good, accuracy too, especially in noisy environments, takes only a second to process a simple request with the large-v2 model, less than a second with large-v3-turbo.
Compose config and stuff is available here: GitHub - tannisroot/wyoming-whisper-cpp-intel-gpu-docker: Run an Intel GPU-accelerated Wyoming protocol speech-to-text service for your Home Asssistant in Docker

I wrote this somewhat in a haste, so if I missed something or you have any questions, feel free to leave a comment.

Update: I was able to bypass the need for running home assistant in host networking mode by using the macvlan network driver.
This allowed me to re-enable mDNS discovery in TrueNAS and still have auto-discovery in Home Assistant.
I removed:

network_mode: host

and added

services:
  homeassistant:
...
    networks:
      homeassistant:
        ipv4_address: 192.168.0.242
...
networks:
  homeassistant:
    driver: macvlan
    driver_opts:
      parent: br0
    ipam:
      config:
        - subnet: 192.168.0.0/24
          ip_range: 192.168.0.240/29
          gateway: 192.168.0.1
          aux_addresses:
            host: 192.168.0.241

(to use br0 you need to have a bridge interface configured on TrueNAS)
To be able to access services on the host, create and configure a macvlan by running these commands on the host:

ip link add ha-host-shim link br0 type macvlan mode bridge
ip addr add 192.168.0.241/32 dev ha-host-shim
ip link set ha-host-shim up
ip route add 192.168.0.240/29 dev ha-host-shim

Change the subnet to the one used in your local network of course.

1 Like

Thanks for the info.

I just installed HomeAssistant for the first time ever today as an appliance VM under Incus. I like how easily it found smartstuff around the house. It didn’t find my Tapo smart plugs initially, but I was pleased to see TP-Link seems to support HA very well.

Once I saw 3 different devices for my TV and 2 for the Shield, I just scratched my head and closed the page. I’ll mess with it more another day :slight_smile:

Time machine uses mDNS wont turning it off make timemachine not work?

Also durring onboarding when Im trying to follow what you did I get “Failed to save: Unknown command.”

If you meant to reply to me, I can’t say whether turning off mDNS discovery for TrueNAS itself will break timemachine. However on Linux and Windows machines I am able to just manually input local NAS IP.
As for the error you mentioned, I can’t help without logs. My guess is it’s probably permissions.

Thank you for sharing your install logic!

I have a question, why did you choose for using the image from linuxserver.io and not the one from the Home Assistant project?

I don’t understand the differences between the two. Linuxserver git page and doc is not explicit on this point (or I’am reading at the wrong place).

Unlike the Home Assistant docker image, you can run the Linux Server image as a non-root user with PUID/PGID envars, it’s what linuxserver.io images are known for.
My Home Asssistant instance is publicly exposed and it’s unacceptable for me to run something that is internet-facing as a privilleged root container like HA docs suggest.

1 Like

Thx.

That’s probably why my attempts to run official docker image with PUID/PGID were a huge fail :sweat:

I think you were right. I got the Homeassistant docker to load with no errors after I recreated the datasets. now to try to follow the rest of it thanks.

I need to run Zwave JS for my Zooz 700 controller Here is the docker compose example for anyone interested.
https://zwave-js.github.io/zwave-js-ui/#/getting-started/docker?id=run-as-a-service

Update: I was able to bypass the need for running home assistant in host networking mode by using the macvlan network driver.
This allowed me to re-enable mDNS discovery in TrueNAS and still have auto-discovery in Home Assistant.
I removed:

network_mode: host

and added

services:
  homeassistant:
...
    networks:
      homeassistant:
        ipv4_address: 192.168.0.242
...
networks:
  homeassistant:
    driver: macvlan
    driver_opts:
      parent: br0
    ipam:
      config:
        - subnet: 192.168.0.0/24
          ip_range: 192.168.0.240/29
          gateway: 192.168.0.1
          aux_addresses:
            host: 192.168.0.241

(to use br0 you need to have a bridge interface configured on TrueNAS)
To be able to access services on the host, create and configure a macvlan by running these commands on the host:

ip link add ha-host-shim link br0 type macvlan mode bridge
ip addr add 192.168.0.241/32 dev ha-host-shim
ip link set ha-host-shim up
ip route add 192.168.0.240/29 dev ha-host-shim

Change the subnet to the one used in your local network of course.
And don’t forget to make the last series of command persistent by adding it to Postinit scripts.

2 Likes

This is interesting I went the route of changing

avahi-daemon.conf

to this

[server]
use-ipv4=yes
use-ipv6=yes
disallow-other-stacks=no

I think my concern is that it wont persist through updates.

I’m curious why you needed to run these commands. I create the macvlan network in my compose file, and it (seems to) work just fine. I’ve never needed to run additional commands on the host. I am missing something?

EDIT: Nevermind. I get it now - I’m using maclvan but the only container I need to reach the host is on a vlan created by using br0.88 and it can reach the host without issue. I tried another container that is using macvlan attached to br0 and it can not reach the host.

If you edited this file on TrueNAS, it will not persist through updates.

Yea I changed it back.

How can I do the macvlan and let mDNS trafic through and alos let the container talk to the host?

This is described in my update comment.
If you have issues applying it to your docker compose, let me know.

I think I got my docker working but I am having trouble connecting outside of the macvlan.

ie for my matter server or my zwavejs container or my homekit devices

This is how my container is setup


networks:
  homeassistant_net:
    driver: macvlan
    driver_opts:
      parent: br0
    ipam:
      config:
        - subnet: 192.168.1.0/24
          gateway: 192.168.1.1

services:
  homeassistant:
    image: linuxserver/homeassistant:latest
    container_name: homeassistant
    security_opt:
      - no-new-privileges:true
    volumes:
      - /mnt/floki/configs/home-assistant/config:/config
      - /mnt/floki/configs/home-assistant/ssh:/config/ssh
      - /mnt/floki/configs/home-assistant/secrets/secrets.yaml:/config/secrets.yaml
      - /mnt/floki/configs/home-assistant/backups:/config/backups
    networks:
      homeassistant_net:
        ipv4_address: 192.168.1.241
    environment:
      - PUID=568
      - PGID=568
      - TZ=America/Chicago
    restart: unless-stopped
  code-server:
    image: linuxserver/code-server:latest
    container_name: code-server
    security_opt:
      - no-new-privileges:true
    environment:
      - PUID=568
      - PGID=568
      - HASHED_PASSWORD=password
      - TZ=America/Chicago
      - DEFAULT_WORKSPACE=/homeassistant
    volumes:
      - /mnt/floki/configs/home-assistant/code-server:/config
      - /mnt/floki/configs/home-assistant/config:/homeassistant
      - /mnt/floki/configs/home-assistant/secrets/secrets.yaml:/homeassistant/secrets.yaml
      - /mnt/floki/configs/home-assistant/backups:/homeassistant/backups
    ports:
      - 8124:8443
    networks:
      homeassistant_net: {}
    restart: unless-stopped
  postgres:
    image: postgres:latest
    container_name: postgres
    restart: unless-stopped
    volumes:
      - /mnt/floki/configs/home-assistant/pgdata:/var/lib/postgresql/data
    environment:
      POSTGRES_USER: homeassistant
      POSTGRES_PASSWORD: password
      POSTGRES_DB: homeassistant
    ports:
      - 5432:5432
    networks:
      homeassistant_net: {}

I think your matter and zwave-js containers need to be connected to the same macvlan network. When I was using the container for Home Assistant, all my other related containers were in the same compose file. But I only learned enough Docker to get things I needed to work, so someone more knowledgeable will likely have a better answer.

I believe your Home Kit devices should be showing up. When I had HA attached to a macvlan, discovery just worked. I didn’t have to make any other special configuration. But I was also using the official containers (running as root), so I didn’t need to add all the special permissions required when using stuff from LinuxServer.

Another thing I don’t know if it matters is that I didn’t need any port mapping in my compose when I was using macvlan.

My old compose file, for example

This hasn’t been used since the Anglefish days…

version: '3.7'
networks:
  vlan:
    driver: macvlan
    driver_opts:
      parent: ens3
    ipam:
      config:
        - subnet: 10.10.1.0/24

services:
  appdaemon:
    image: acockburn/appdaemon:latest
    container_name: appdaemon
    volumes:
      - /mnt/ssd/appsappdaemon/conf:/conf
      - /etc/localtime:/etc/localtime:ro
    dns: 10.10.1.6
    networks:
      vlan:
        ipv4_address: 10.10.1.17
    restart: unless-stopped

  esphome:
    image: esphome/esphome:latest
    container_name: esphome
    volumes:
      - /mnt/ssd/apps/esphome/config:/config
      - /etc/localtime:/etc/localtime:ro
    dns: 10.10.1.6
    networks:
      vlan:
        ipv4_address: 10.10.1.21
    restart: unless-stopped
    stop_signal: SIGINT

  homeassistant:
    image: homeassistant/home-assistant:stable
    container_name: homeassistant
    volumes:
      - /mnt/ssd/apps/homeassistant/config:/config
      #- /mnt/media/emby/music/google:/media
      - /etc/localtime:/etc/localtime:ro
    dns: 10.10.1.6
    networks:
      vlan:
        ipv4_address: 10.10.1.18
    restart: unless-stopped

  mosquitto:
    image: eclipse-mosquitto:latest
    container_name: mosquitto
    volumes:
      - /mnt/ssd/apps/mosquitto/config:/mosquitto/config
      - /mnt/ssd/apps/mosquitto/data:/mosquitto/data
      - /mnt/ssd/apps/mosquitto/log:/mosquitto/log
      - /etc/localtime:/etc/localtime:ro
    dns: 10.10.1.6
    networks:
      vlan:
        ipv4_address: 10.10.1.16
    restart: unless-stopped

  whatsupdocker:
    image: fmartinou/whats-up-docker
    container_name: wud
    environment:
      - WUD_SERVER_ENABLED=true
      - WUD_TRIGGER_MQTT_MOSQUITTO_URL=mqtt://mosquitto:1883
      - WUD_TRIGGER_MQTT_MOSQUITTO_HASS_ENABLED=true
    volumes:
      - /etc/localtime:/etc/localtime:ro
      - /var/run/docker.sock:/var/run/docker.sock
    dns: 10.10.1.6
    networks:
      vlan:
        ipv4_address: 10.10.1.20
    restart: unless-stopped

  zwavejs:
    image: zwavejs/zwave-js-ui:latest
    container_name: zwavejs
    devices:
      - /dev/serial/by-id/usb-0658_0200-if00:/dev/zwave:rmw
    volumes:
      - /mnt/ssd/apps/zwavejs/store:/usr/src/app/store
      - /etc/localtime:/etc/localtime:ro
    dns: 10.10.1.6
    networks:
      vlan:
        ipv4_address: 10.10.1.15
    restart: unless-stopped
    stop_signal: SIGINT
    tty: true
1 Like

troy thanks Im a little stuck.

I got the macvlan running, but I cant ping outside of it.

You can do that with their image as well.

    user: 568:568

Just specifiy the user to run as in your compose.yaml.

Have you tried this yourself? I remember trying it a while ago and the container wouldn’t start, they have (had?) some sort of init system that requires root.
See

Seems also like it’s straight up unsupported for the official container. Even if it works now, it may break again later.
Sure, linuxserver.io images are not official, but at least the non-root functionality is actually supported.

Yeah, that’s how I run it.

services:
  ha:
    image: ghcr.io/home-assistant/home-assistant:stable
    container_name: ha
    restart: unless-stopped
    volumes:
      - ${CONFIG_PATH}:/config
    #      - /etc/localtime:/etc/localtime:ro
    #      - /run/dbus:/run/dbus:ro
    #    privileged: true
    network_mode: host
    deploy:
      resources:
        limits:
          memory: 4G
    user: 568:568
    env_file:
      - .env
x-dockge:
  urls:
    - https://ha.domain.co
networks: {}

Okay I got it all working and here is a script for how I did it.

#!/bin/bash

=== Configuration ===

PARENT_INTERFACE=“br0” # your main network interface
SHIM_NAME=“ha-host-shim” # shim interface name
SHIM_IP=“192.168.1.2/32” # IP for the shim (must be unique on your LAN)
LAN_SUBNET=“192.168.1.0/24” # your LAN subnet
GATEWAY=“192.168.1.1” # your router IP
DOCKER_NETWORK_NAME=“homeassistant_net” # name for the Docker MacVLAN network

=== Commands ===

echo “Creating shim interface…”
ip link add “$SHIM_NAME” link “$PARENT_INTERFACE” type macvlan mode bridge

echo “Assigning IP address to shim…”
ip addr add “$SHIM_IP” dev “$SHIM_NAME”

echo “Bringing shim interface up…”
ip link set “$SHIM_NAME” up

echo “Adding route to LAN through shim…”
ip route add “$LAN_SUBNET” dev “$SHIM_NAME”

echo “Creating Docker MacVLAN network…”
docker network create -d macvlan
–subnet=“$LAN_SUBNET”
–gateway=“$GATEWAY”
-o parent=“$PARENT_INTERFACE”
–attachable
“$DOCKER_NETWORK_NAME”

I got help from chat gpt top put it all into a script.

This should be easy to save to a sh file and run on truenas.