Hello, everyone,
I recently found a great docker container based on a well-known script for dynamically cooling hard drives.
Below I explain the steps that I took:
First we need to configure “lm-sensors” by running the following shell command
sudo sensors-detect
Always press enter, up to “Do you want to add these lines automatically to /etc/modules?”
At this point write yes and press enter again.
Now run:
sudo /etc/init.d/kmod restart
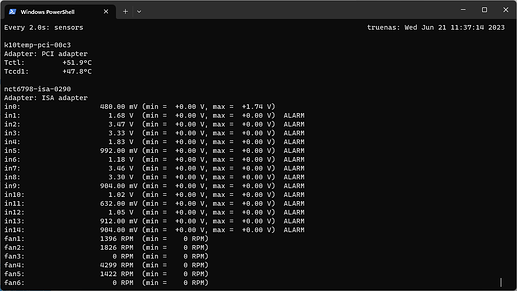
At this point we run the following command, and look for the fans we want to use to cool the hdds. You can slow them down with your finger.
watch sensors
Mine are fan1 and fan5.
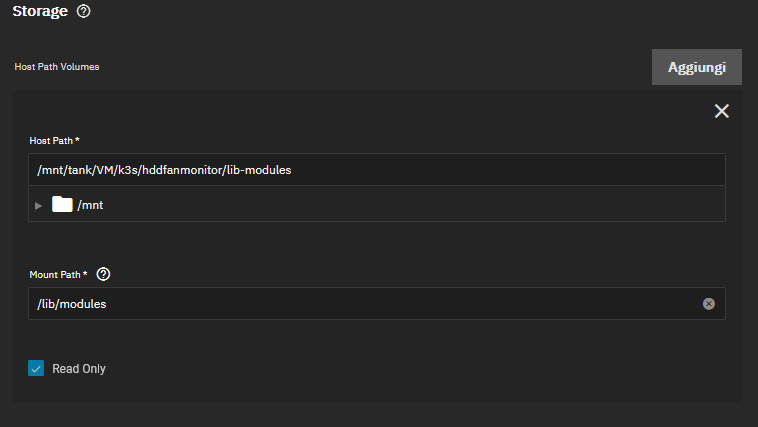
In order to make this container work, we need to create a symbolic link to /lib/modules. Here is mine (you have to adapt it to your case).
sudo ln -s /mnt/tank/VM/k3s/hddfanmonitor/lib-modules /lib/modules
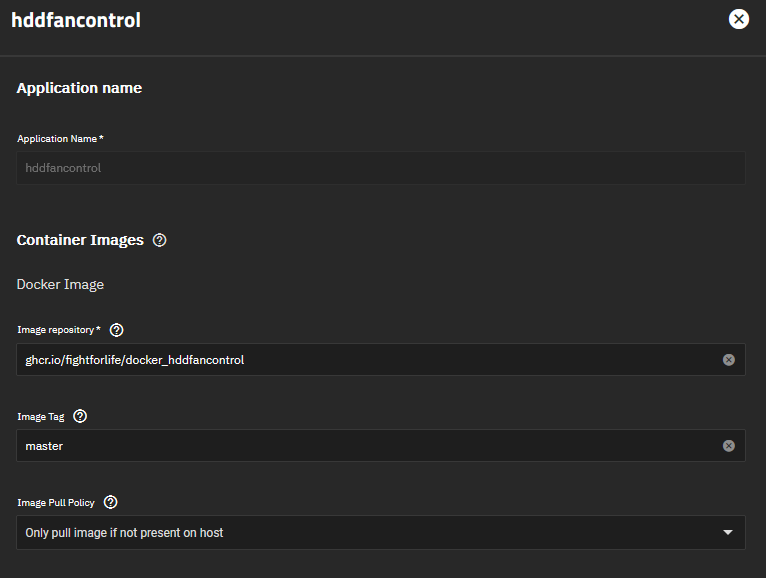
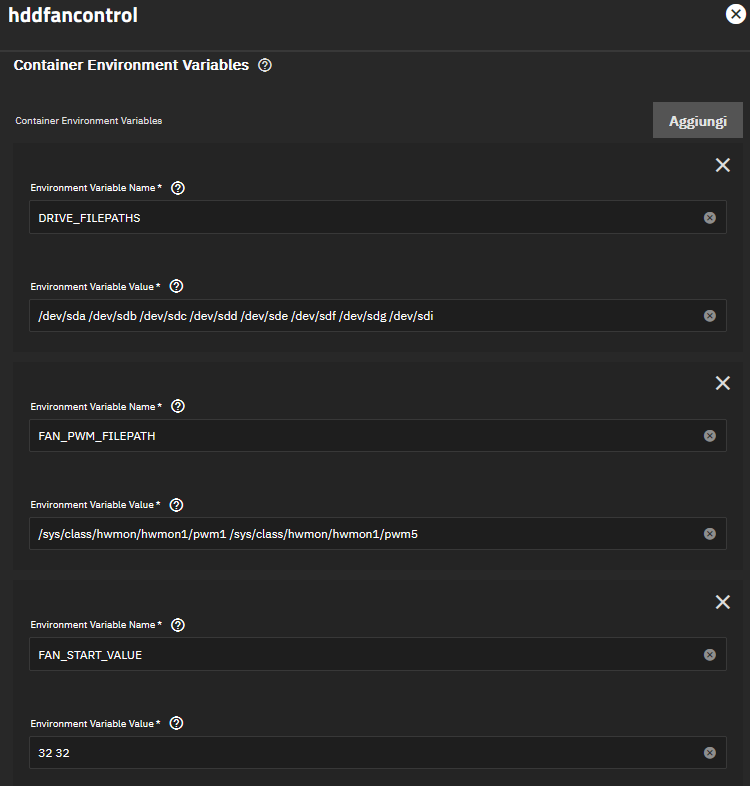
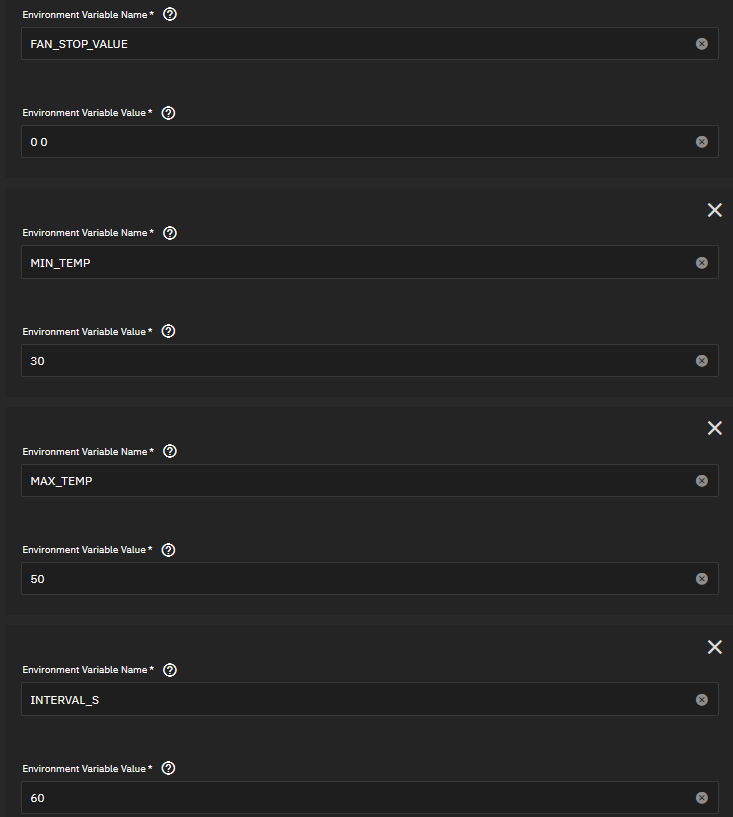
Now we can finally create our app, adapting it to the docker compose
version: "3"
services:
hddfancontrol:
image: ghcr.io/fightforlife/docker_hddfancontrol:master
restart: unless-stopped
volumes:
- /lib/modules:/lib/modules:ro
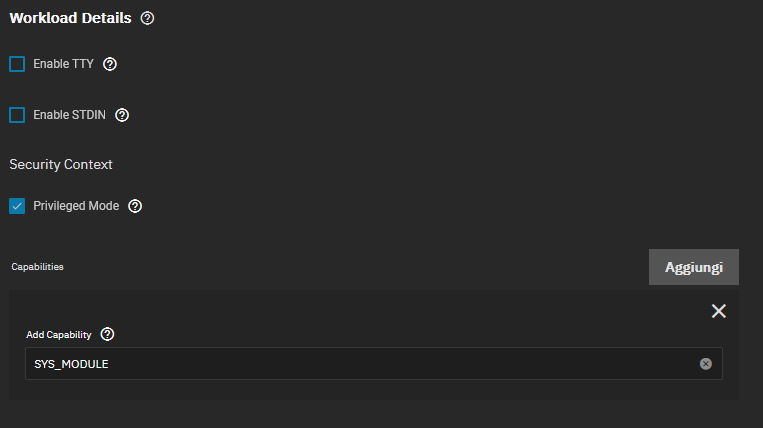
privileged: true
cap_add:
- SYS_MODULE
environment:
- DRIVE_FILEPATHS=/dev/sdb1 /dev/sdc1 /dev/sdd1
- FAN_PWM_FILEPATH=/sys/class/hwmon/hwmon2/pwm1 /sys/class/hwmon/hwmon2/pwm2
- FAN_START_VALUE=70 80
- FAN_STOP_VALUE=20 30
- MIN_TEMP=40
- MAX_TEMP=60
- MIN_FAN_SPEED_PRCT=0
- INTERVAL_S=60
- CPU_PROBE_FILEPATH=/sys/devices/platform/coretemp.0/hwmon/hwmon0/tempY_input
- CPU_TEMP_RANGE=50 70
- SPIN_DOWN_TIME_S=900
- VERBOSITY=debug
- LOG_FILEPATH=/var/log/hddfancontrol.log
- TEMP_QUERY_MODE=smartctl #hddtemp,hdparm,drivetemp,smartctl
You can get an idea from these pictures.
I hope I have been helpful
UPDATE 16/08/2024
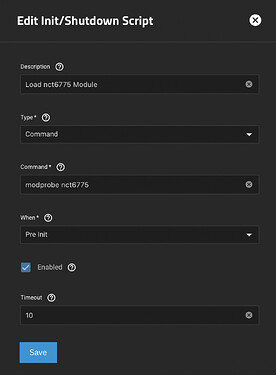
You can safely skip the sym-link trick (/lib/modules) by externally loading the module for your PWM controller. To make it automatic and persistent to updates, adapt this code to your motherboard.
UPDATE 26/06/2023
The container has been updated. If you have an error in the logs referring to “hddtemp,” know that it has been deprecated.
Use an alternative, such as smartctl. Set it as environment variable.
TEMP_QUERY_MODE=smartctl
#hddtemp,hdparm,drivetemp,smartctl
Note TrueNAS Scale 23.10+
If you get the error “OSError: [Errno 30] Read-only file system: ‘/sys/class/hwmon/hwmon2/pwm1_enable’”, please enable ‘Provide access to node network namespace for the workload’
UPDATE 13/03/2024
If you wish to use the disk name ‘/dev/disk/’ instead of '/dev/sd’, create a symbolic link to ‘/dev’ as you did before with ‘/lib/modules’
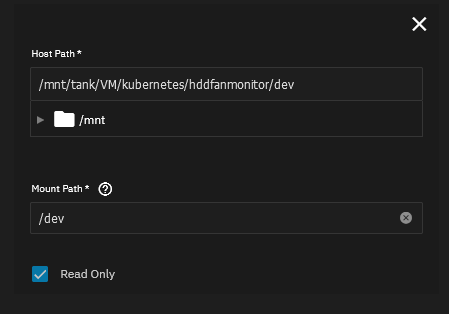
example: /dev/disk/by-id/wwn-0x50014ee2c03f0711
