Introduction
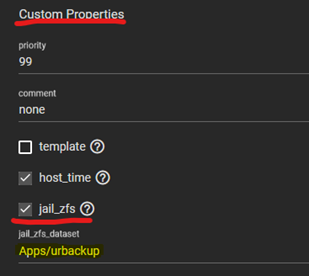
These instructions describe how to install UrBackup inside a jail and allowing it to directly manage the assigned ZFS dataset from within a jail. This allows UrBackup take advantage of the ZFS functions such as snapshots and deduplication which greatly improves the space management for backups.
This tutorial is lengthy, as I tried to describe as many steps as I could, but it is not complicated. I divided it in the following parts in an effort to make it easier to follow:
Part I – Datasets
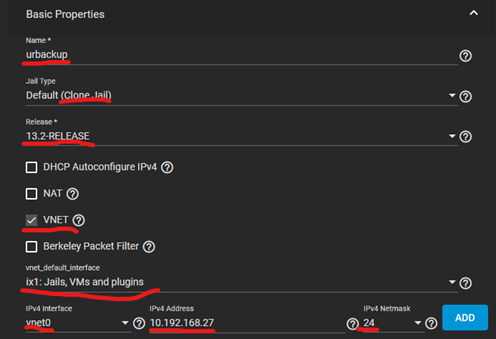
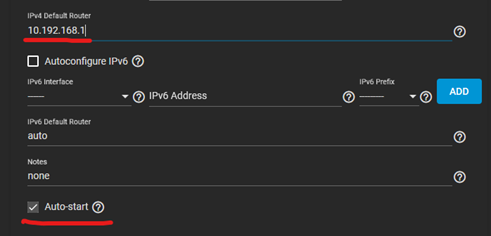
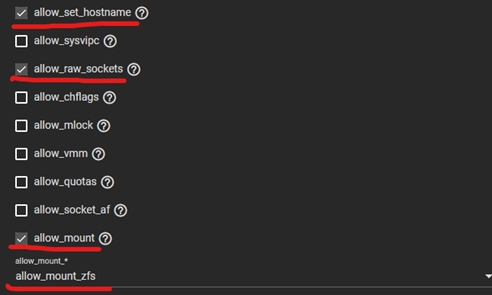
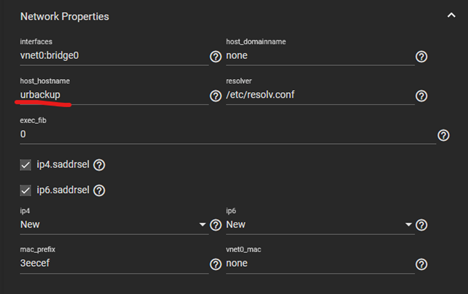
Part II – Jail creation
Part III – Installation
Part IV – Recover data from TrueNAS host
Part V – Upgrades.
It is worth noting that this method assigns some “jailed datasets” to be used by UrBackup. The “jailed” datasets will be managed exclusively by the jail and will become unavailable to the truenas Host. This means that the Truenas host will not be able to browse or “ls” into the datasets (from terminal) or edit its permissions (from the web ui).
This is a normal behavior, but it caught me by surprise as this is my first time using this feature. However, data saved in these “jailed” datasets are not being held hostage by the jail. I will provide Instructions at the end of the tutorial on how to recover and access the datasets from the Truenas host in case the jail is ever deleted or corrupted.
Some other important things to point out are:
- These instructions use both the web UI and the CLI terminal.
- I assume the reader has some understanding on how folder paths work and has basic knowledge on how to use the command line. All required commands will be provided on this tutorial but they may have to be adjusted to match the user’s environment.
- Creation of datasets is beyond the scope of this tutorial. Please refer to Creating Datasets | TrueNAS Documentation Hub if user is interested in learning about this topic.
- I assume you already know how to use text editors in a terminal (vi or nano for example). The use of these text editors is beyond the scope of this tutorial.
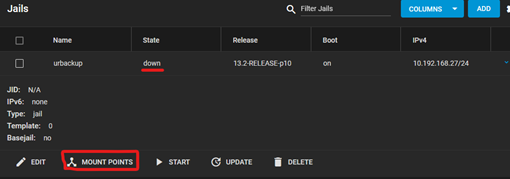
- The jail in this tutorial will use a static IP 10.192.168.27/24. Please adjust the ip to match your system.
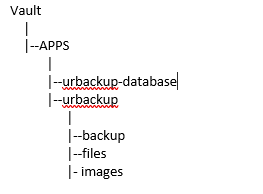
- My main pool is called “Vault”. Please adjust the name to match your system.
- My main Dataset is called “Apps”. All new datasets listed in part I of this tutorial will be created as child datasets of “Apps”. Please adjust to match your system.
- Urbackup will run as “root” user to avoid permission problems.
- I put a lot of time into researching and writing this set of instructions but mistakes should be expected. I welcome any comments, suggestions or corrections as the last thing I want is to spread inaccurate information.
- While this method worked for me, I cannot guarantee that it will work in every environment. I don’t do this for a living (far from it) and I didn’t develop Urbackup, TrueNAS or FreeBSD. By following this set of instructions you assume responsibility for researching anything you don’t understand and for taking care of your own data.
This tutorial is based on information found on the following resources:
https://www.urbackup.org/administration_manual.html
Lets’s begin.