So you want to securely host services on your TrueNAS? Without opening ports on your router and still having easy to remember valid domains with SSL certificates? If so, this guide may be for you. There are many ways to accomplish this, but in this guide we’ll be leveraging the following:
- TrueNAS SCALE
- Cloudflare Managed Domain DNS
- Tailscale App
- Nginx Proxy Manager App
When finished, you will be able to quickly add new services through the Cloudflare DNS Management and Nginx Proxy Manager (NPM) app, that are fully accessible to your Tailscale-connected devices as https://service.mydomain.com
NOTE:
In my example I use Cloudflare for DNS and Let’s Encrypt certificate generation. However this process will work equally well with any other provider that Nginx Proxy Manager can use for Let’s Encrypt DNS Challenges. Adjust to fit your specific provider accordingly.
Ready to begin? Let’s dive in.
Create your Tailscale Account.
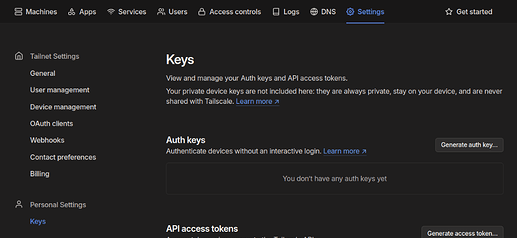
Navigate to the Tailscale website and setup your account to get started. Once you have an account created, navigate to Settings → Personal Settings → Keys and click on “Generate auth key”
Keep the defaults settings on the key, optionally you can make the key “Reusable” if you want to use it for more than one Tailscale auth. I.E. in the case of setting up two TrueNAS systems. Once the key has been generated, go ahead and save it and proceed over to your TrueNAS UI to continue with the setup.
Setup Tailscale on TrueNAS:
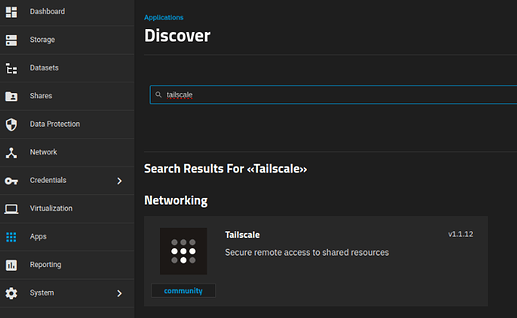
Next up, browse to the Apps catalog on TrueNAS and locate the Tailscale Application.
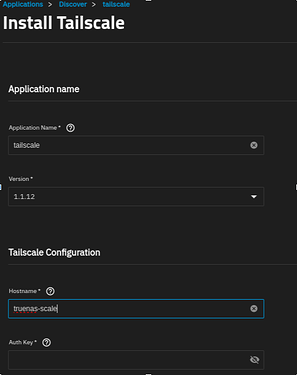
Start an installation of Tailscale. Copy your previously saved Auth Key into the field in the wizard, and change the hostname if you like (For easier identification on your Tailscale management account). You can keep the rest of the Tailscale setting as their defaults.
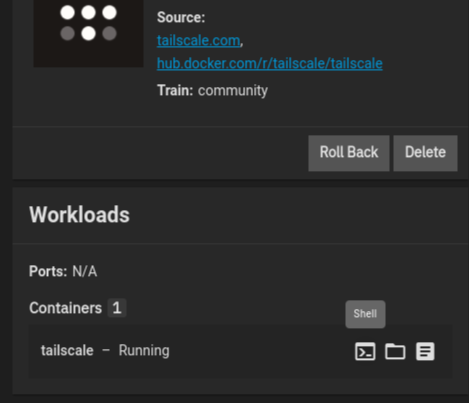
Once Tailscale is successfully deployed, you will see it listed as Running, and if you browse to your Machines in the Tailscale management UI, you will see the new TrueNAS listed there as well.
Deploying Nginx Proxy Manager
Next up, we will be deploying Nginx Proxy Manager on the TrueNAS system. Follow the same process to locate NPM in the App catalog, and click Install. You won’t need to change any of the default App settings for NPM, so click Install again to take the defaults and allow it to deploy.
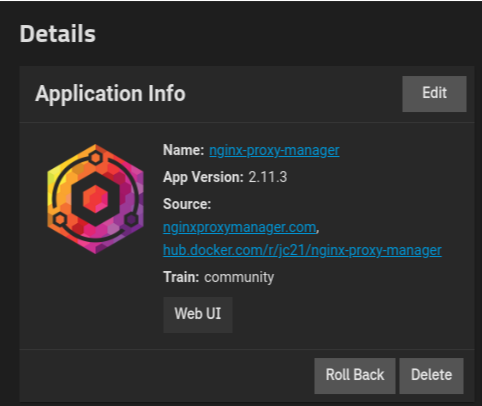
One the application is running, you can click the “Web UI” button to log into the NPM Web Interface, and setup your own username / password.
NOTE: The default username / password is:
admin@example.com
changeme
Once you have your credentials setup, you can close NPM and we’ll circle back to that in a moment. For now lets move on.
Stitching it together
Now that you have Tailscale and NPM setup, we have a few steps to do in order to stitch things together so that you can host services in NPM properly for your other local web applications. We will next be setting up Tailscale to forward http and https traffic via its IP over to the NPM application, where we can next setup domains, certs and proxy hosts.
To continue, open up the TrueNAS UI and navigate to the Tailscale App (which should still be running)
Under the “Workloads” widget, locate the Shell button and click it to launch a shell inside the Tailscale Container. Run the following commands to forward port 80 and port 443 over to the NPM Service:
#tailscale serve --bg --tcp 80 tcp://localhost:30021
#tailscale serve --bg --tcp 443 tcp://localhost:30022
These commands will set up Tailscale to automatically forward http and https traffic arriving on its local addresses to the corresponding http and https ports that Nginx Proxy Manager is waiting for requests on. These settings are persistent and will survive reboots or upgrades of Tailscale. This only needs to be done once.
Lastly before you close the session, run the command tailscale ip to get the IPv4 and IPv6 address of your local connection. Write those down somewhere, we will use them in subsequent steps.
To confirm this worked, on a device connected to your Tailscale network you can open a browser session to http://<tailscale ip>. You should see a “It’s Working” message which is being served by Nginx Proxy Manager. If so, then congratulations you are ready to proceed to the next steps.
Adding a new Host, Cert and Service
Now that all the initial setup is finished, you can easily add new services to NPM which your other Tailscale devices can access securely over https. To do so, follow these steps for as many services as you need.
Step 1: Create a DNS Record:
If you are using Cloudflare, browse to your DNS Records page and create a new A (IPv4) or AAAA (IPv6) records for your desired service name that point to the IPs you saved from the “tailscale ip” command previously. When you have done this properly you should have a record that looks like “myservice.mydomain.com → 100.XXX.XXX.XXX”.
Step 2: Add Proxy Host to NPM
With DNS properly created, you can next log into the Nginx Proxy Manager WebUI and start adding your proxy hosts and SSL certs.
Navigate to Hosts → Proxy Hosts and click Add Proxy Host.
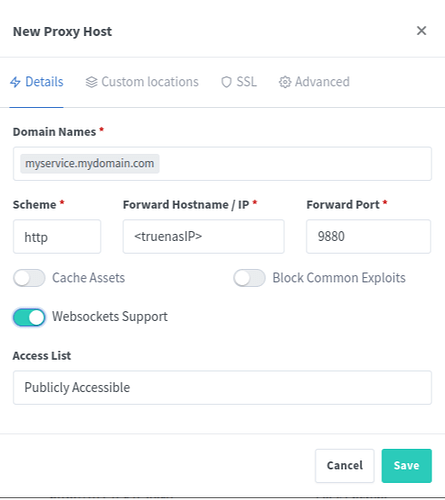
On the pop-up window, add the domain name, IP address and Forward port of the service you wish to proxy traffic for. If the service is hosted on the same TrueNAS, you can use the TrueNAS IP/Port combination here, or you can point at services hosted on other IP addresses on your network.
Example:
You are running Immich on your TrueNAS. Clicking the WebUI button for Immich in TrueNAS shows it using http://192.168.10.10:30041 (The TrueNAS IP and Port number for Immich). You’d enter a forward IP of 192.168.10.10 and Port of 30041.
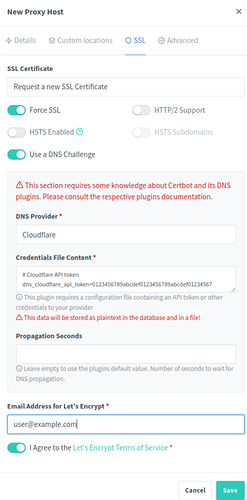
Next switch to the SSL tab and select the option to Request a new SSL Certificate. With most Apps you will want to set Force SSL to be enabled. Lastly select Use a DNS Challenge and pick your provider. In this case Cloudflare. Update the dns_cloudflare_api_token= to use your correct key.
Note:
You can create your API token on the Cloudflare management site, just be sure to select the option to Edit zone DNS when creating the token. Save it for later in case you wish to add multiple proxy hosts, you will need to re-enter it each time.
Click Save and NPM will go through the process of creating the proxy and setting up a Let’s Encrypt certificate for the domain name.
That’s it! Assuming everything was successful, it should now be possible to browse to your newly created domain over https with a valid SSL certificate and see your Web App load up.
Final Thoughts:
There are many ways to accomplish the same thing, this is but one solution. Users can also use similar methods with NPM to expose services to the outside world directly (Not something we recommend on TrueNAS in general). You can use other VPN technologies or even alternative Proxy servers. Hopefully this guide provides enough information for you to adapt and find the solution that suits your specific needs the best.
Bonus Topic (Exit Node)
Using the --advertise-exit-node flag on Tailscale within the container will allow your TrueNAS Tailscale instance to act as a more traditional VPN. Tailscale will warn you about IP port forwarding, which TrueNAS already enables by default.
If you go this route, enable via the Tailscale client, and then in the Tailscale management UI, be sure to go click the TrueNAS system and enable the Exit node on that side.
Once that is done, you can now access your local network as if using a traditional OpenVPN setup
