Troubleshooting and Additional Information
 Permission denied
The following errors (or similar) when trying to download, extract, or install HAOS using the TrueNAS shell are typically caused by insufficient user permissions.
haos_ova-9.5.qcow2.xz: Permission denied
Cannot write to ‘haos_ova-9.5.qcow2.xz’ (Permission denied).
unxz: haos_ova-9.5.qcow2: Permission denied
qemu-img: /dev/zvol/tank/vm/haos: error while converting raw: Protocol driver 'host_device' does not support image creation, and opening the image failed: Could not open '/dev/zvol/tank/vm/haos': Permission denied
You may need to run the commands as root or use sudo
sudo wget https://github.com/home-assistant/operating-system/releases/download/9.5/haos_ova-9.5.qcow2.xz
sudo unxz haos_ova-9.5.qcow2.xz
sudo qemu-img convert -O raw haos_ova-9.5.qcow2 /dev/zvol/tank/vm/haos
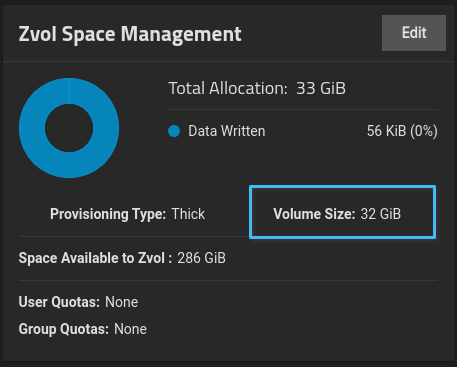
Cannot grow device files
This can happen when the ZVOL is not sized correctly.
qemu-img: /dev/zvol/tank/vm/haos: error while converting raw: Cannot grow device files
Confirm the size of your ZVOL is at least 32 GiB
VM is booting to the UEFI Interactive shell
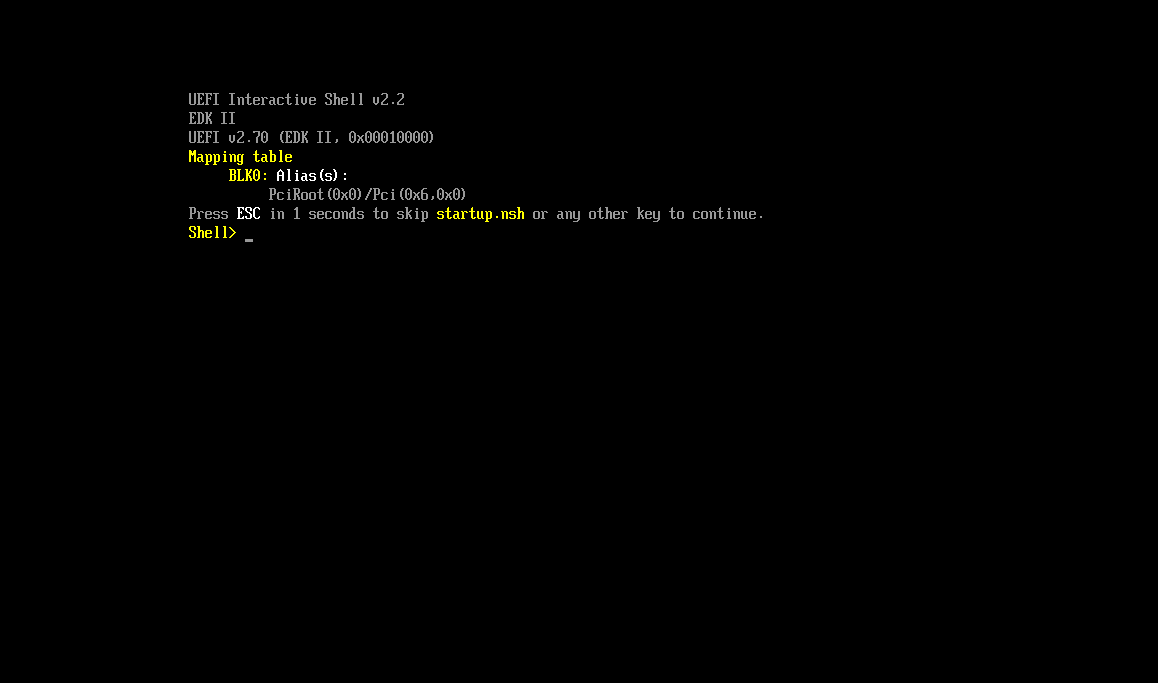
This happens if we use the incorrect path when writing the HAOS image to our zvol. Notice in the following command that the path starts with /dev/zvol
qemu-img convert -O raw haos_ova-11.5.qcow2 /dev/zvol/tank/vm/haos
If you’re still having trouble, please reply with the exact command you used for this step.
 Using the ConBee II Zigbee Gateway
The ConBee II needs to be attached to the VM in a specific way. Currently, TrueNAS lacks a method to handle such a device using USB passthrough. If you are using the ConBee II, it is recommended to use PCI passthrough for the USB controller to which the ConBee is connected.
Alternatively, you can use a script to start your VM. The script will correctly attach the ConBee II to your VM before Home Assistant or any add-ons have a chance to start. It is annoying, but if you don’t restart your VM very often, this may be a suitable workaround.
Click to Show Script
start_haos.sh
- Save this script to your TrueNAS and make it executable.
- Edit line 4 and set the name of your VM.
- Using the TrueNAS shell, run the script to start your VM.
#!/usr/bin/env bash

## Set the name of your VM
VM='HAOS'


if [ ${EUID} -ne 0 ]; then
  echo "Please run this script as root or using sudo" ; exit
elif [ -z "${CONBEE:="$(ls /dev/serial/by-id/*ConBee_II*)"}" ]; then
  echo "ConBee II not found" ; exit
fi

## HEREDOC: ConBee_II.xml
read -r -d '' XML << END_XML
<serial type="dev">
  <source path="${CONBEE}"/>
  <target type="usb-serial" port="1">
    <model name="usb-serial"/>
  </target>
  <address type="usb" bus="0" port="4"/>
</serial>
END_XML

# create a temporary file containing the ConBee II HEREDOC
conbee_xml=$(mktemp -t conbee.xml.XXXXX)
echo "${XML}" > "${conbee_xml}"

# get id and use it to start the VM
id=$(/usr/bin/midclt call vm.query | /usr/bin/jq -r '.[] | select(.name == "'"${VM}"'") | .id')
/usr/bin/midclt call vm.start "${id}" &> /dev/null
sleep 1

# get VM name and use it to attach the ConBee II
name=$(/usr/bin/virsh -c "qemu+unix:///system?socket=/run/truenas_libvirt/libvirt-sock" list --name | /usr/bin/grep "${VM}")
/usr/bin/virsh -c "qemu+unix:///system?socket=/run/truenas_libvirt/libvirt-sock" attach-device "${name}" "${conbee_xml}"

# remove the temporary file
rm "${conbee_xml}"
The ConBee II will then be visible inside the VM as follows:
/dev/serial/by-id/usb-QEMU_QEMU_USB_SERIAL_1-0000:00:03.7-4-if00-port0