Some Insights (and generalizations) on the OpenZFS Write Throttle

If you’re wondering “why do the writes to my TrueNAS system start off really fast, but slow down after a few seconds?” then this post may help elaborate a little bit on the nature of the OpenZFS “Write Throttle” - the mechanism by which TrueNAS adjusts the incoming rate so that your system is still able to respond to remote requests in a timely manner while not overwhelming your pool disks.

The below comments should be considered for users who have made no changes to their tunables. I’ll talk about those later, possibly in a separate resource - we’re sticking with the defaults for this exercise.

(Be Ye Warned; Here Thar Be Generalizations.)

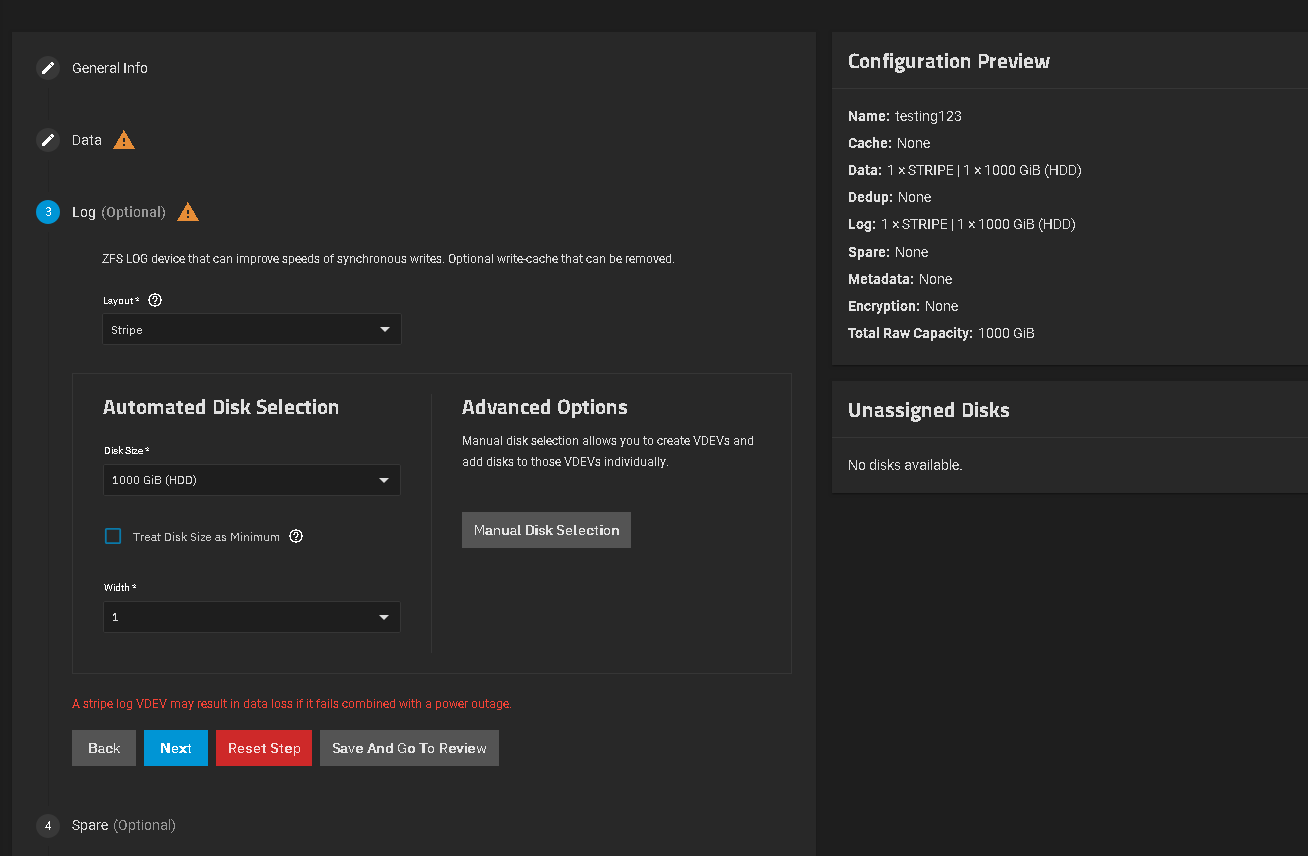
The maximum amount of “dirty data” - data stored in RAM or SLOG, but not committed to the pool - is 10% of your system RAM or 4GB , whichever is smaller. So even a system with, say, 192GB of RAM, will still by default have a 4GB cap on how much SLOG it can effectively use.

ZFS will start quiescing and closing a transaction group when you have either 20% of your maximum dirty data pending (820MB with the 4GB default max) or after 5 seconds have passed .

The write throttle starts to kick in at 60% of your maximum dirty data or 2.4GB . The curve is exponential, and the midpoint is defaulted to 500µs or 2000 IOPS - the early stages of the throttle are applying nanoseconds of delay, whereas getting yourself close to 100% full will add literally tens of milliseconds of artificial slowness. But because it’s a curve and not a static On/Off, you’ll equalize your latency-vs-throughput numbers at around the natural capabilities of your vdevs.

Let’s say you have a theoretical 8Gbps network link (shout out to my FC users) simply because that divides quite nicely into 1GB/s of writes that can come flying into the array. There’s a dozen spinning disks set up in two 6-disk RAIDZ2 vdevs, and it’s a nice pristine array. Each drive has lots of free space and ZFS will happily serialize all the writes, letting your disks write at a nice steady 100MB/s each. Four disks in each vdev, two vdevs - 800MB/s total vdev speed.

The first second of writes comes flying in - 1GB of dirty data is now on the system. ZFS has already forced a transaction group due to the 64MB/20% tripwire; let’s say it’s started writing immediately. But your drives can only drain 800MB of that 1GB in one second. There’s 200MB left.

Another second of writes shows up - 1.2GB in the queue. ZFS writes another 800MB to the disks - 400MB left.

See where I’m going here?

After twelve seconds of sustained writes, the amount of outstanding dirty data hits the 60% limit to start throttling, and your network speed drops. Maybe it’s 990MB/s at first. But you’ll see it slow down, down, down, and then equalize at a number roughly equal to the 800MB/s your disks are capable of.

That’s what happens when your disks are shiny, clean, and pristine. What happens a few years down the road, if you’ve got free space fragmentation and those drives are having to seek all over? They’re not going to deliver 100MB/s each - you’ll be lucky to get 25MB/s.

One second of writes now causes 800MB to be “backed up” in your dirty data queue. In only three seconds, you’re now throttling; and you’re going to throttle harder and faster until you hit the 200MB/s your pool is capable of.

So what does all this have to do with SLOG size?

A lot, really. If your workload pattern is very bursty and results in your SLOG “filling up” to a certain level, but never significantly throttling, and then giving ZFS enough time to flush all of that outstanding dirty data to disk, you can have an array that absorbs several GB of writes at line-speed, without having to buy sufficient vdev hardware to sustain that level of performance. If you know your data pattern, you can allow just enough space in that dirty data value to soak it all up quickly into SLOG, and then lazily flush it out to disk. It’s magical.

On the other hand, if your workload involves sustained writes with hardly a moment’s rest, you simply need faster vdevs. A larger dirty data/SLOG only kicks the can down the road; eventually it will fill up and begin throttling your network down to the speed of your vdevs. If your vdevs are faster than your network? Congratulations, you’ll never throttle. But now you aren’t using your vdevs to their full potential. You should upgrade your network. Which means you need faster vdevs. Repeat as desired/financially practical.

This was a longer post than I intended but the takeaway is fairly simple; the default SLOG sizing and write throttle limits you to 4GB. Vdev speed is still the more important factor, but if you know your data and your system well enough, you can cheat a little bit.
9 Likes

It’s there a tuneable which allows you to increase the maximum size of dirty data being 4GB to say 1/2 of your ARC size (like the timetable that allows ARC to grow to > 1/2 memory size)?

Hardware Guide has recommendation of 8-32GB for SLOG sizing. Played with a VM of Electric Eel and if I add a single disk of 1TB and then also choose to add a SLOG. Why does the GUI take the entire device. I have fake disks of 1TB. Why isn’t there an option to over provision down to the suggested size range?

We have plenty of users adding SLOG, whether they need it or not and way larger than the 8-32 GB range.

zfs_dirty_data_max
zfs_delay_min_dirty_percent
zfs_dirty_data_max_percent
zfs_dirty_data_sync_percent
zfs_dirty_data_sync

Add:
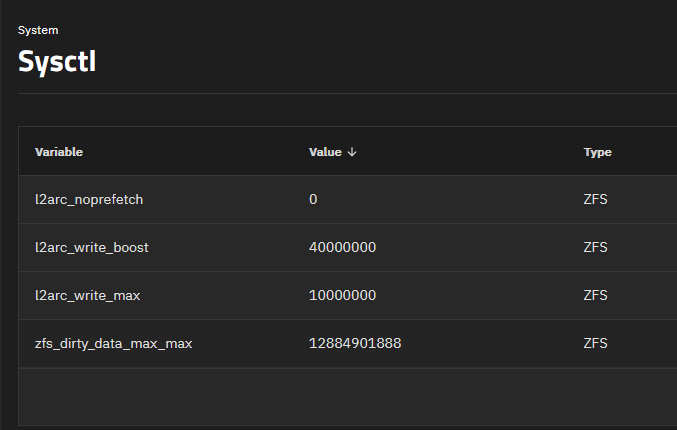
zfs_dirty_data_max_max

See them here:

https://openzfs.github.io/openzfs-docs/Performance%20and%20Tuning/Module%20Parameters.html#zfs-dirty-data-max

Yes, so, in Truenas, what’s the way to change the default since this has to be done at zfs module load time? Speaking of zfs_dirty_data_max_max. Is pre-init early enough? Not sure of the sequence at boot time with Truenas.

There are actually two types of over-provisioning:

  • Hardware over-provisioning - using a manufacturers utility you can reduce the size of the SSD as seen by the SATA interface / operating system and thus permanently increase the pool of free cells that are erased in advance of needing them, and sharing the wear over a larger pool of cells. Not all SSDs provide this ability. TrueNAS could potentially integrate the common utilities and provide a UI to use them, but I am not sure that this would be cost effective when you could instead do…

  • Software over-provisioning - this is what @SmallBarky was referring to - the ability in the TrueNAS UI to provision a vDev with only part of an SSD and to process a trim on the unused part to ensure that those cells are returned to the free cell pool.

1 Like

CORE has one such option… just saying’
Anyway, the TrueNAS GUI always uses whole drives, and if you have a proper DC drive for SLOG you’re probably better settting over-provisioning in hardware.

A few different rabbit holes going on here, I’ll try to tackle them in separate posts.

Adjusting dirty data values

zfs_dirty_data_max_max will increase your maximum limit but will not dynamically adjust it in real-time and require a reboot - you can adjust both this value and zfs_dirty_data_max to have the greater limit take effect immediately.

Note that increasing your dirty_data bucket will allow greater “bursts” of writes at SLOG or async speeds, but also allows for said “bursts” to evict larger chunks of the “tail end” of your MFU/MRU ARC queues.

Tune in small steps and observe the results over time. Factors of two are probably good - factors of ten less so.

SLOG Overprovisioning

Drive provisioning through the HPA (Host Protected Area) was possible through the UI on CORE but often resulted in user frustration on Community builds because drives can only have their HPA set once per power-cycle - and hot-pluggable bays or PWDIS support isn’t anywhere near guaranteed on commodity hardware. For Enterprise gear it’s easy enough to say “hotplug the tray and do it again” but pulling cables out of drives in a non-hot-swap machine can result in a Bad Time even if you avoid bumping other cables or components internally.

That said the option is still available through the CLI in CE as

Destructive Command Inside

disk_resize sdX 16G

which will resize disk sdX to 16G

but it still requires the support of the underlying technology at the drive level.

Hardware underprovisioning a freshly TRIMmed drive is the best way to guarantee wear-leveling behavior, but most modern drives will act identically whether they’re HPA’d, partitioned, or fully allocated but left largely empty.

1 Like

@HoneyBadger , the reason I am asking is I have:


echo 8589934592 > /sys/module/zfs/parameters/zfs_dirty_data_max_max

in my startup script as pre-init but that value does not change once booted. I have wanted to raise the max max value for a while now but can’t find a way in Truenas.

I am presuming this is where a system.advanced.update call is needed?

The better thing to do is just adjust zfs_dirty_data_max directly as a POSTINIT since that’s the actual tunable that the write throttle looks at.

The dirty_max can be set to anything you want, but not higher than max_max so it does no good to adjust zfs_dirty_data_max

The doc says:


`zfs_dirty_data_max_max` is the maximum allowable value of [zfs_dirty_data_max](https://openzfs.github.io/openzfs-docs/Performance%20and%20Tuning/Module%20Parameters.html#zfs-dirty-data-max).

It also says “Prior to zfs module load or a memory hot plug event”

So I went ahead and used system.advanced.update since preinit does not work for this setting as documented, and it does in fact also change zfs_dirty_data_max for me as 10% of my memory is more than the default value for max_max.

If you’re trying to push dirty_data_max above the default 25% of your system RAM then yes, you’d need to adjust both. But see above re: small changes more frequently being better than big changes suddenly.

But if that’s what you’re after then add them under System → Advanced → Sysctl as type ZFS:

1 Like

I don’t see a type field on Electric Eel, I presume that is the disconnect here.

But max cannot be set above max_max, and max_max is 4G by default. So, you must change max_max to increase max by even 1 byte. Go ahead, try it, try and set max to 1 byte larger than max_max and reboot. On my system, max_max is 4G.

I have added for my future upgrade notes to remove my advanced parm and move it to sysctl once on Fangtooth. Which is after libvirt comes back and people say it is working.

Ah, yes, that’ll be it. Presumably 25.04.2 will bring what you’re after. :slight_smile:

In the case where physical_ram is >=40GB yes, max being defaulted to 10% will already be 4GB, and raising both values is necessary to go beyond that.

That said, max is dynamic - so it’ll reset itself each boot/ZFS module load by design. It’ll need the override every time, whether by explicitly setting it, or adjustment of the other driving parameters (max_max, max_percent, etc)

1 Like

Well, consider memory = 96GB. 10% is 9GB. By resizing max_max only, max goes to 8GB without changing it. So, depends on memory size.