So I now have all (I think) the parts I need for my NAS build. Motherboard CPU and Memory
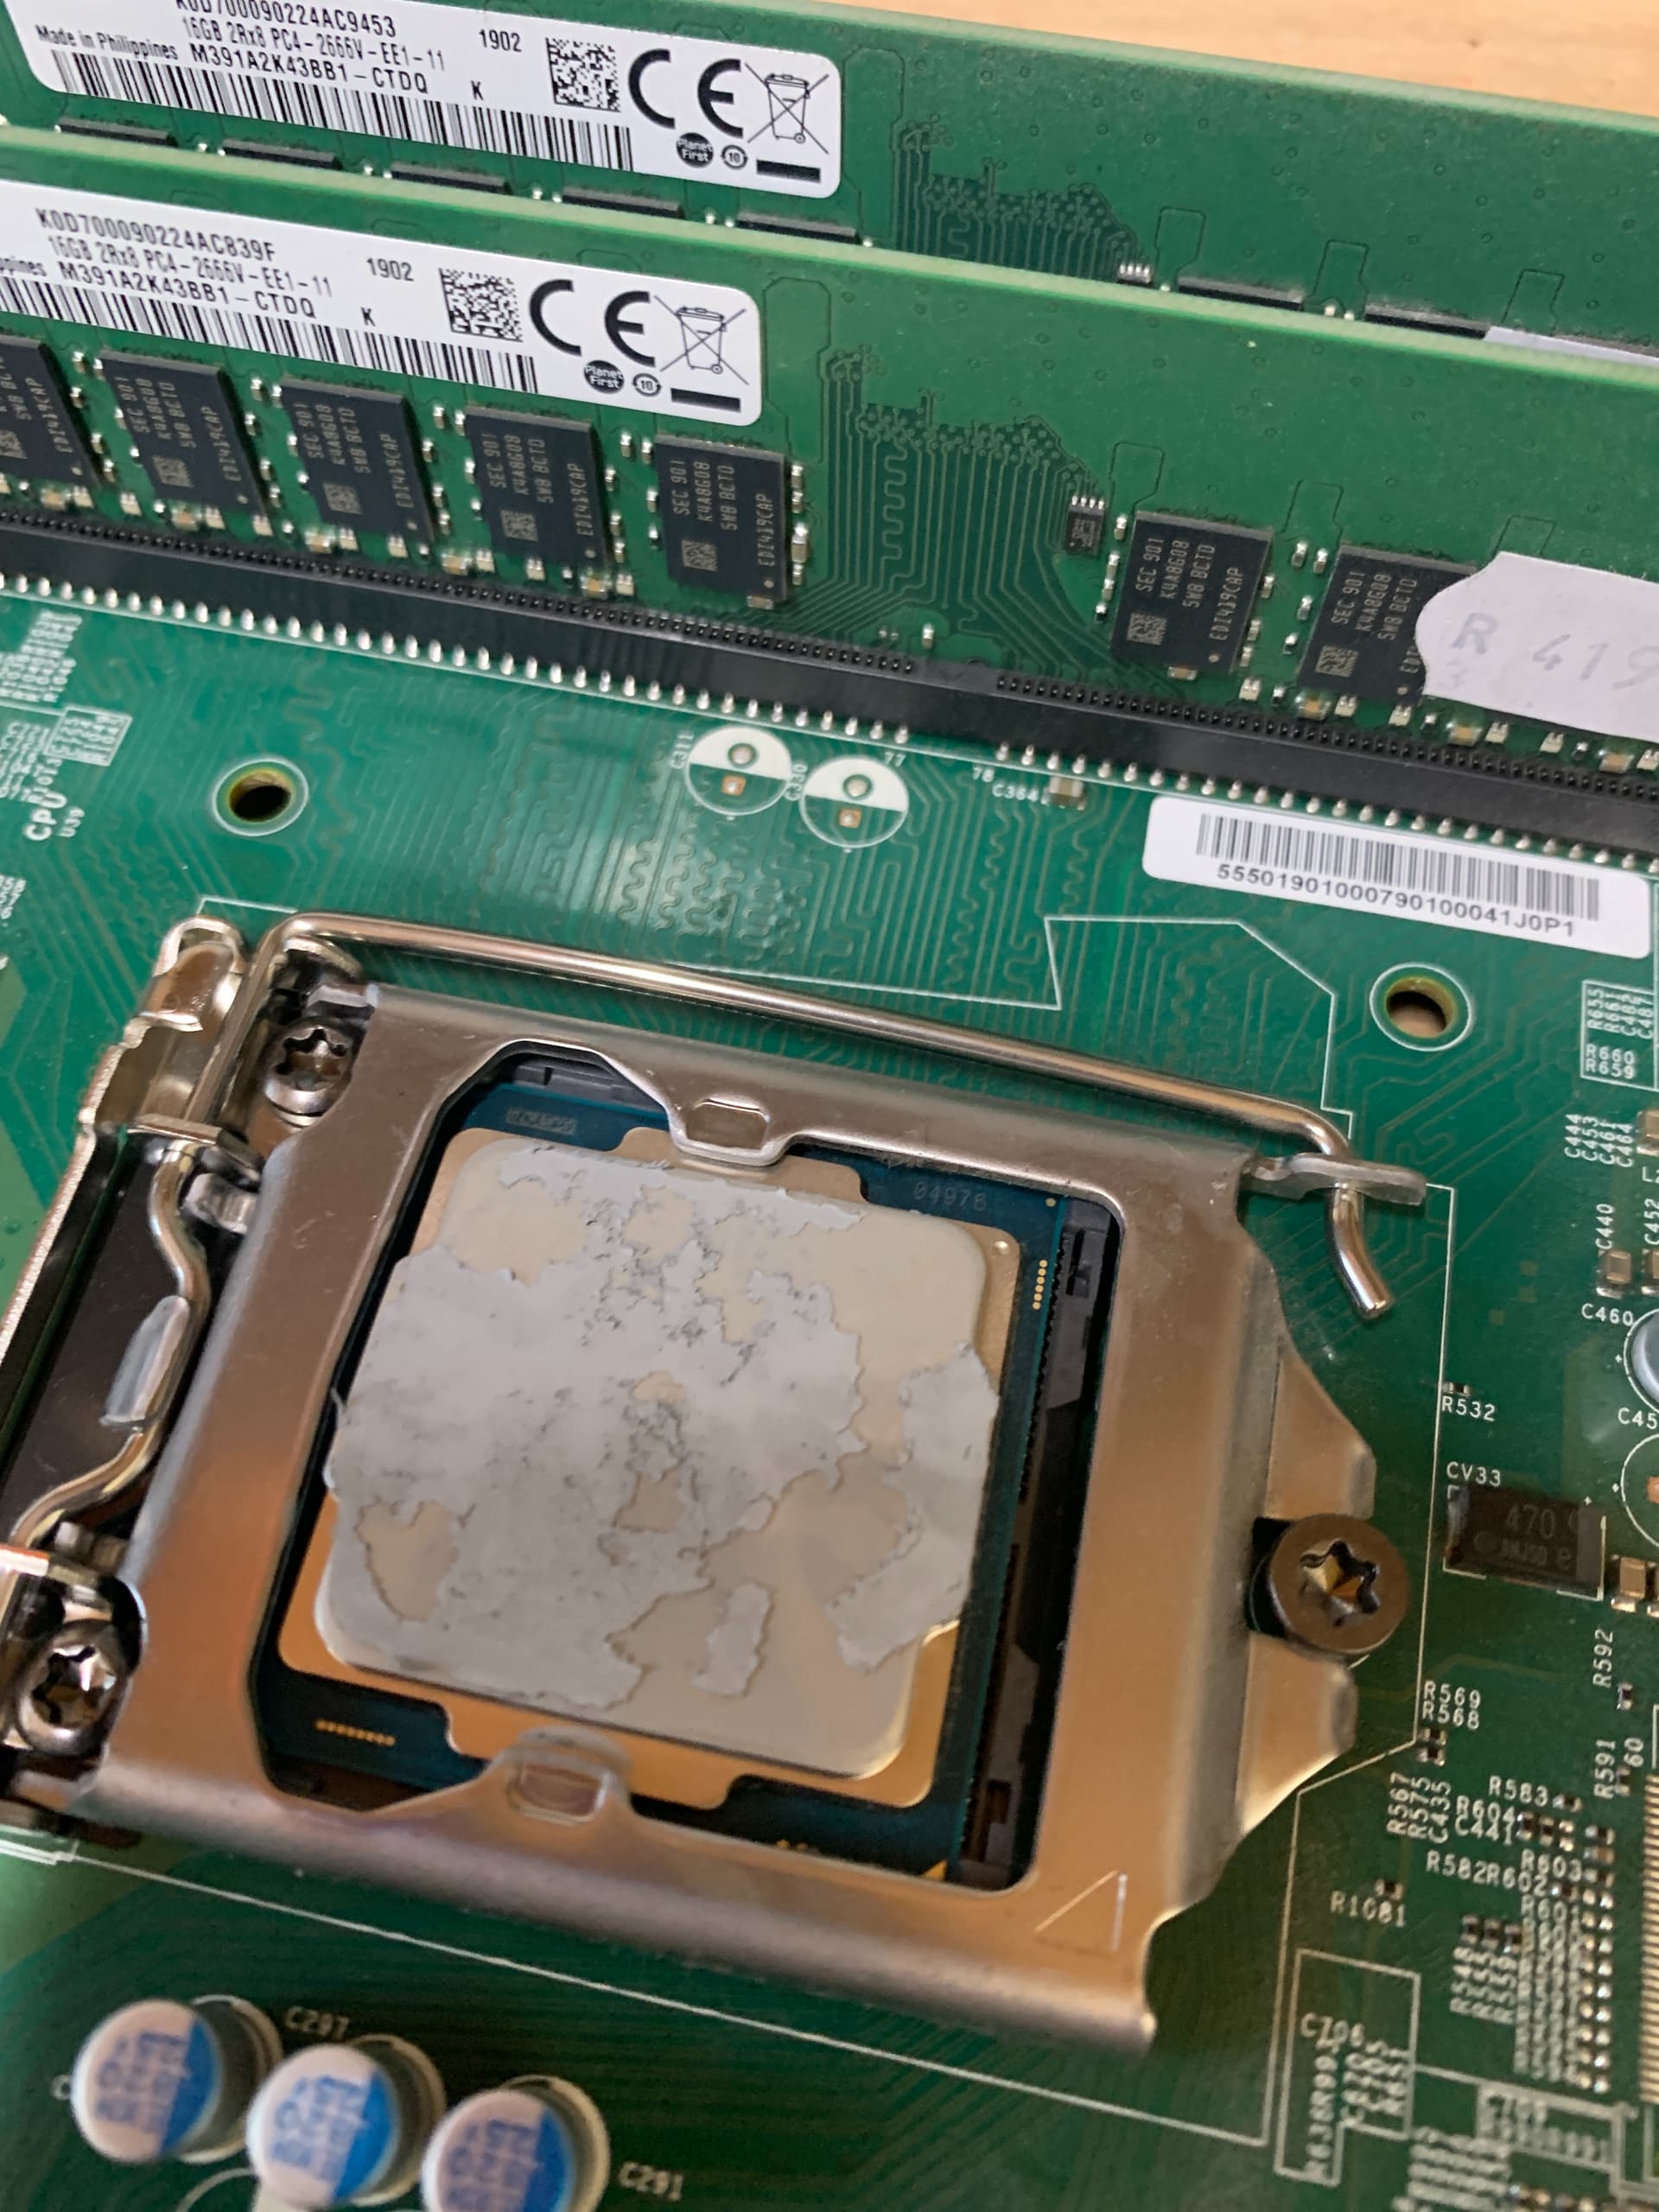
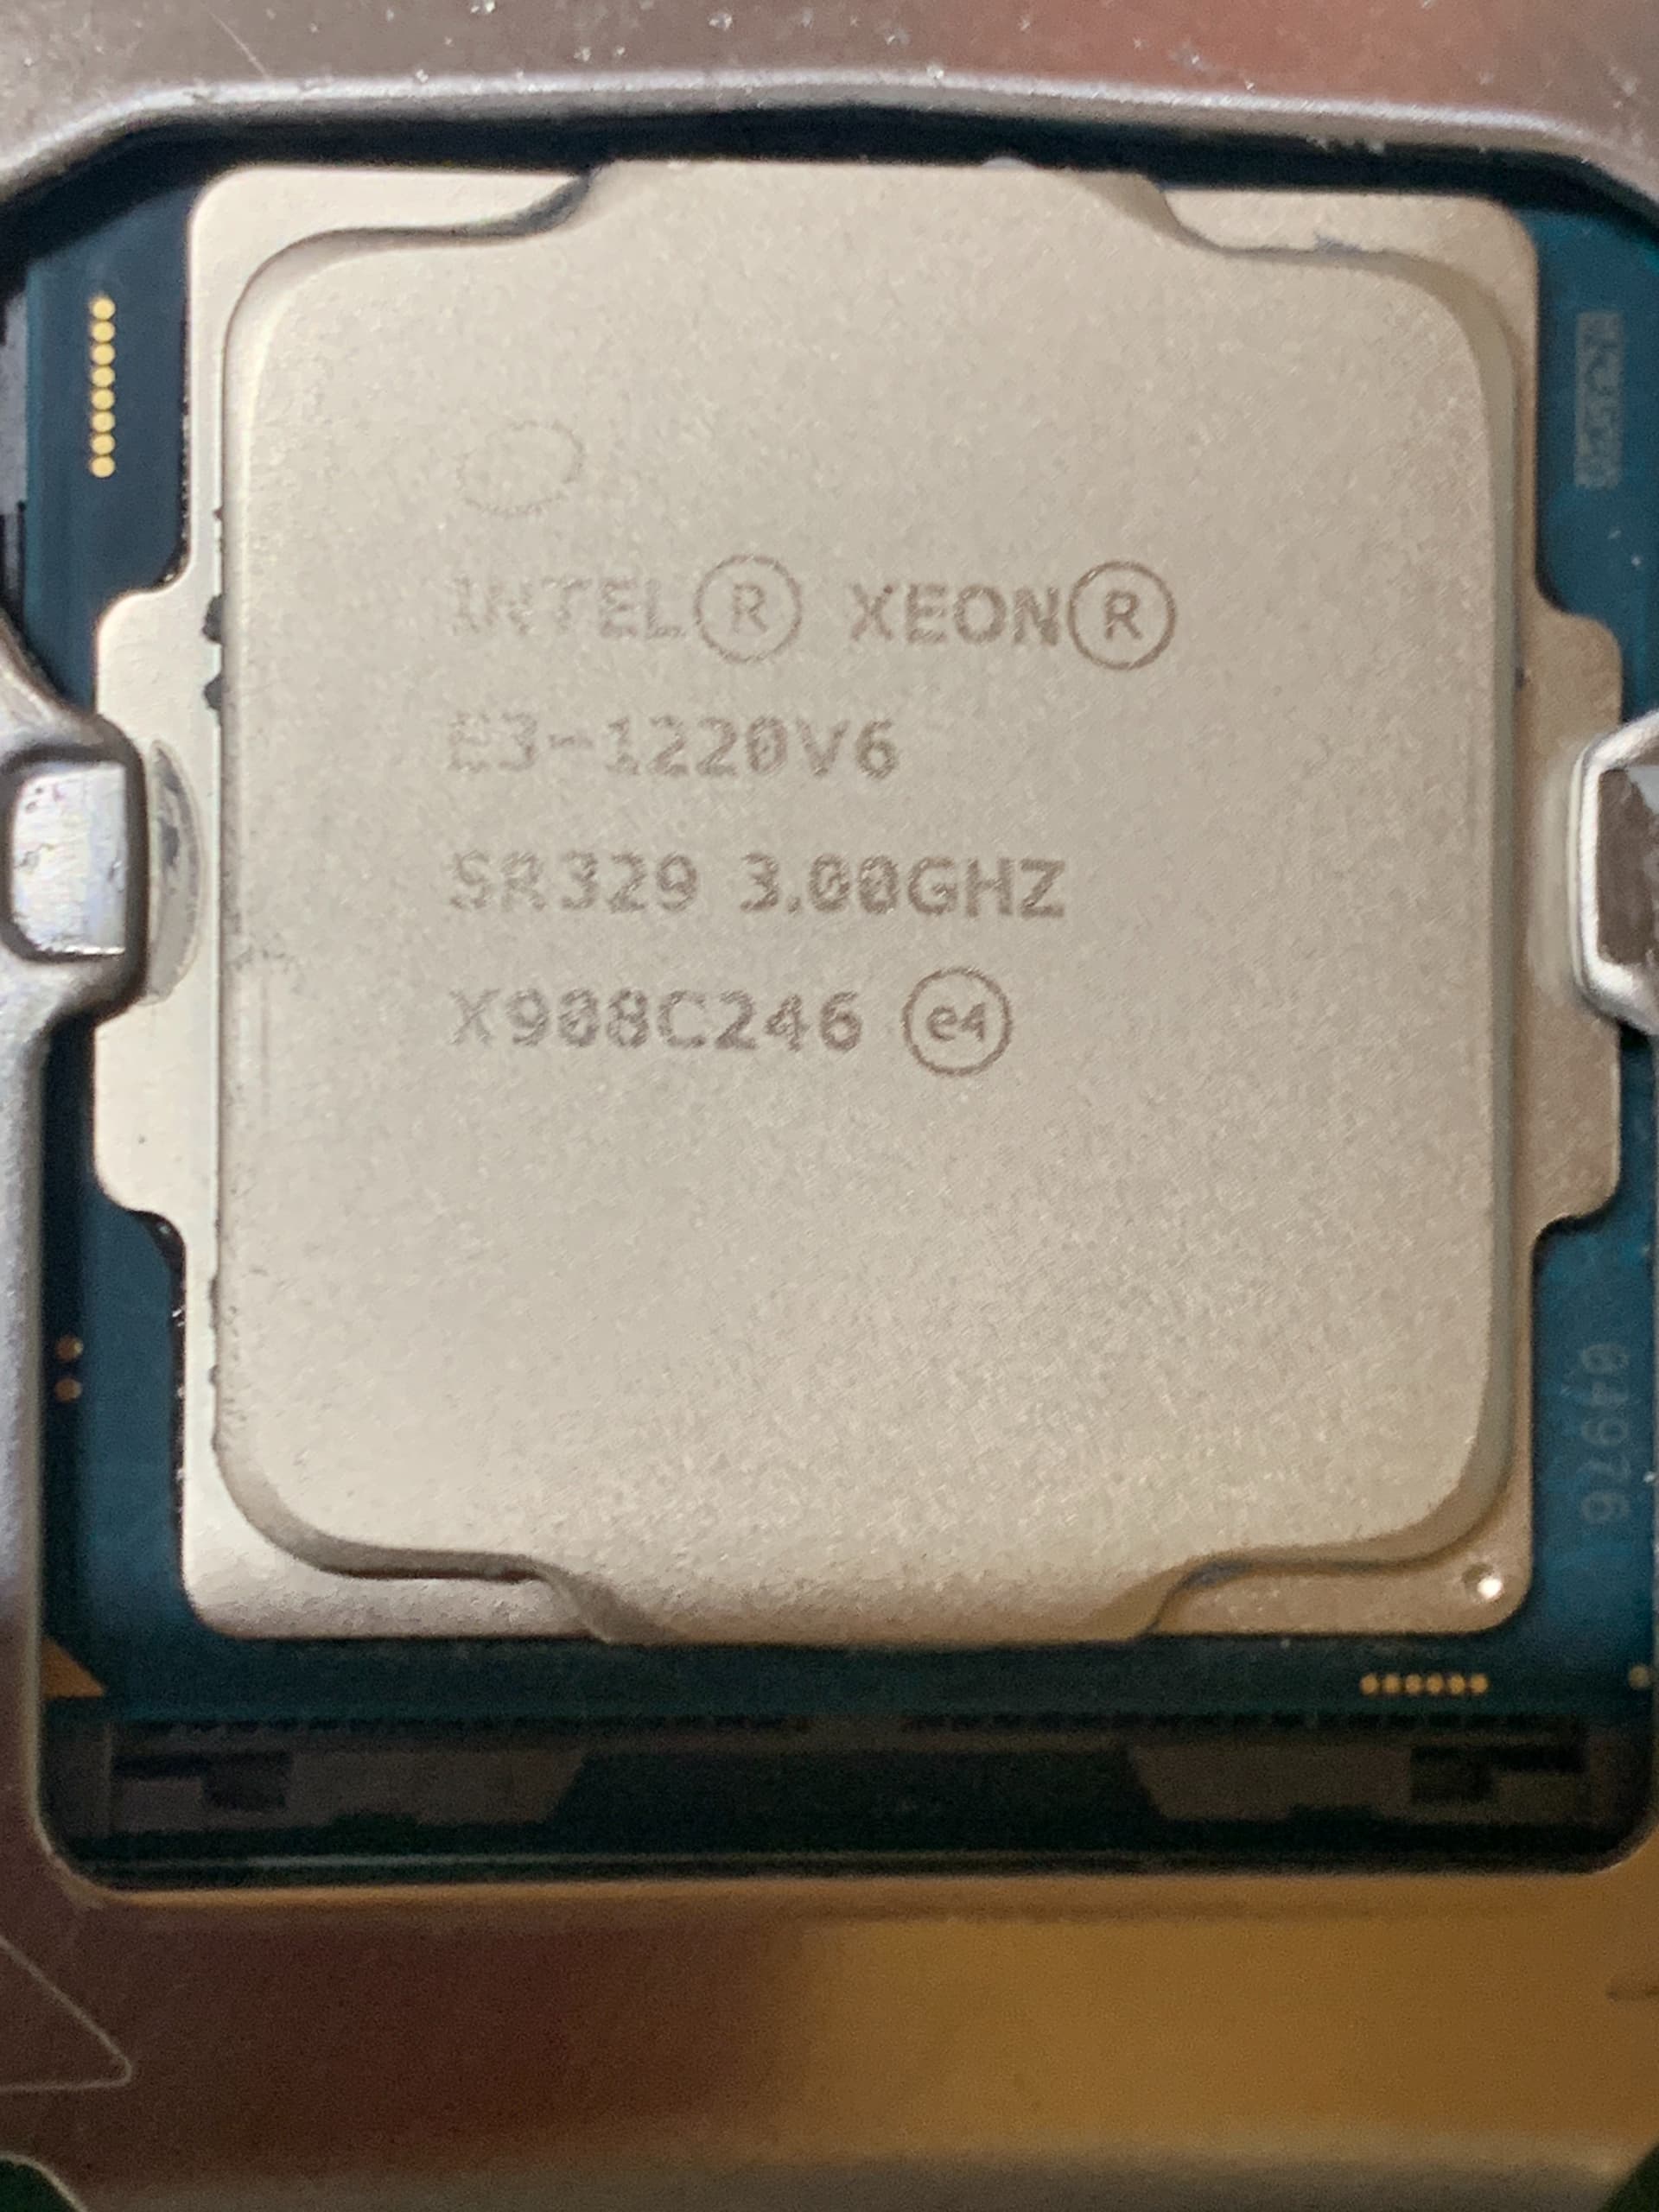
I bought a Supermicro 1u CSE-512-350 rack mounted server that came with a X11SSH-LN4F motherboard, Xeon E3-1220v6 CPU and 2 x DDR4-2400-16gb Ram.
CPU Heatsink and Cooler
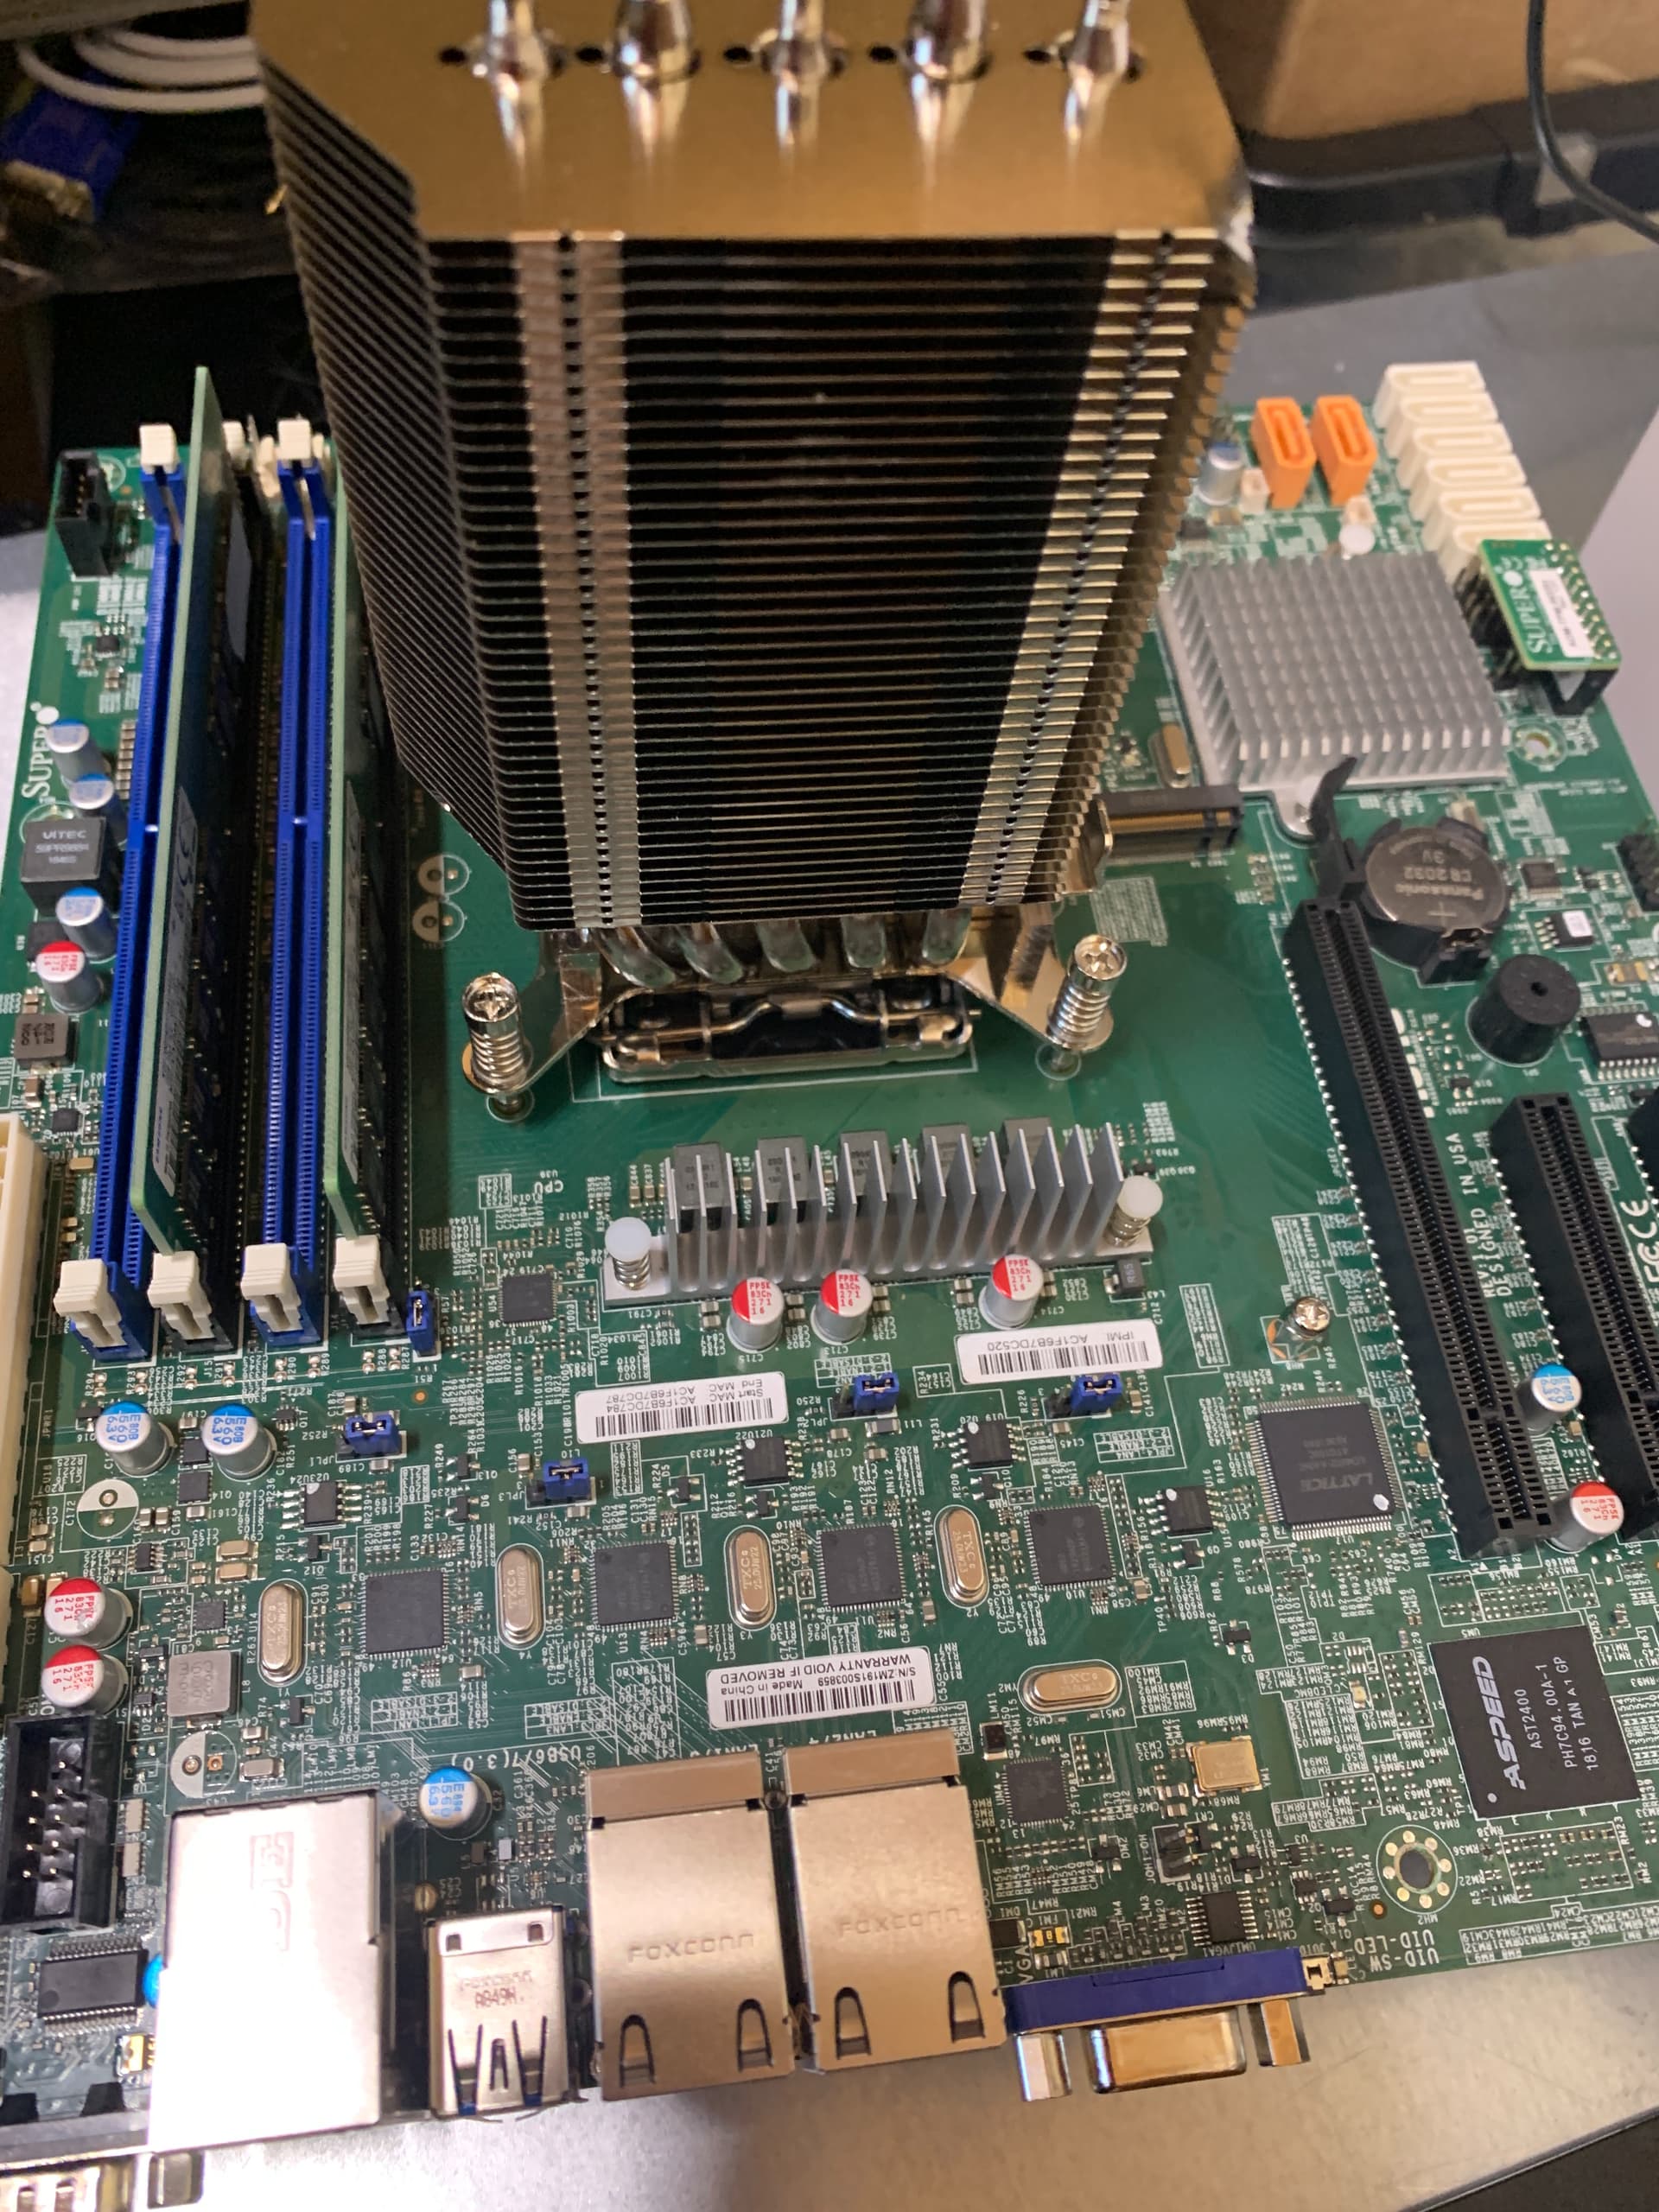
The plan is to move this into an ATX case so I bought a Supermicro SNK-P0051AP4 active heatsink.
PSU
My very old NAS is a FreeNAS build that was in an ATX case using a SuperMicro X7DVL-E motherboard and USB boot device. I will be using a different ATX case which has removable HDD trays, but will be re-purposing the 600Watt unbranded PSU.
Boot Device
For the boot device I am considering moving to a second hand Intel 40GB SSD that I picked up a few years ago for my FreeNAS, but never got around the using it.
Storage
For storage I will be re-using the 3 x 1TB SATA HDDs that I have in my current FreeNAS, setup in a RAIDZ1.
I’d love more / larger HDD but just can’t afford it at the moment. Use case is mainly simple storage at the mo. I have several HDDs with photos etc on and want to consolidate everything. I also have several DV8 and VHS home movies to transfer to digital storage. Maybe a more modern PSU will be needed then, what wattage is recommended ?
So, I started the strip down of the SuperMicro Rack and the transfer of parts into my ATX case. I cleaned up the case before the transfer. I removed the passive heatsink from S11 motherboard and cleaned up the old thermal paste, boy they stuck a lot on?
The new heatsink comes with pre installed thermal paste so following the instructions I started to install the Heatsink using the new provided backplate.
The issue I need help with is that I have never installed one if these Intel Heatsinks before and don’t know how tight to do up the screws. The instructions say to use a Torque Screwdriver and tighten to 5.0 kgf-cm (4.3lbf-in). Any tips on fitting these without a torque screwdriver?
So, even though I failed to find any definitive info on the CPU Heatsink clamping force question, I installed the backplate (remebering to peel off the sticky pad, then installed the Heatsink by locating and turning the screws in a diagonal fashion, a couple of turns at a time finger tight, until the spring gave resistance that require more force.
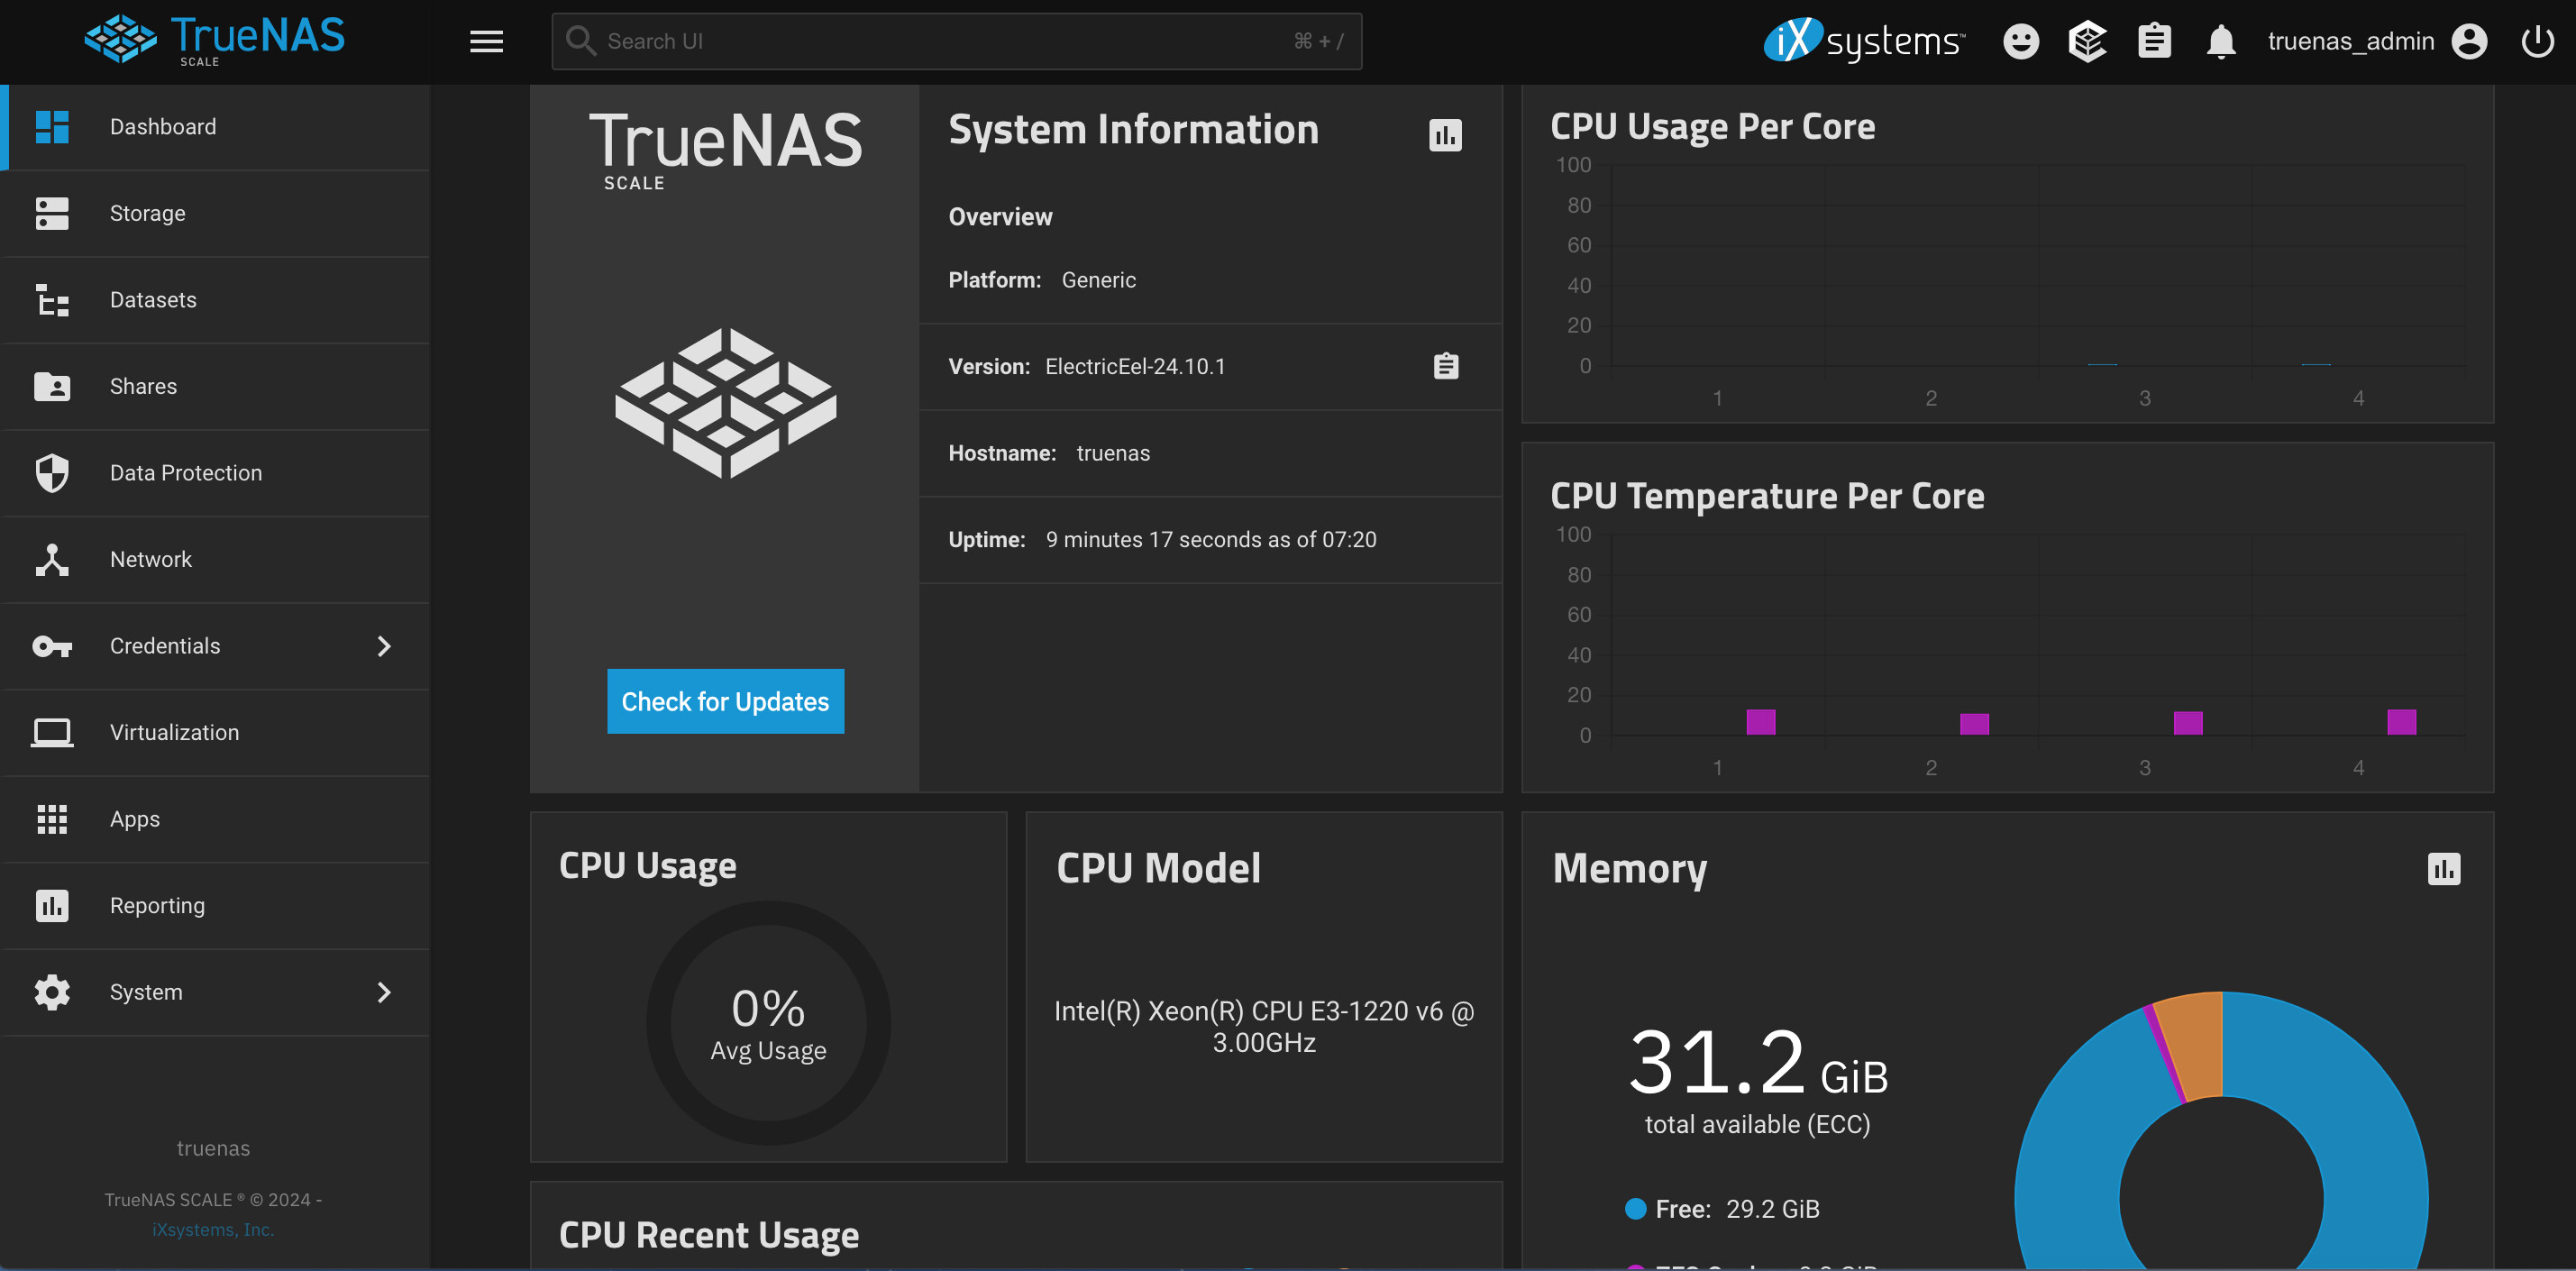
Now it is all in and connected up I need to create a TrueNAS boot device.
Also cannot connect the HDD LED connector, as it ha a two pin connector, but the motherboard FP connector (pin 13 / 14) are labeled
Pin 13 ID_UID_SW/3.3V Stby
Pin 14 HDD LED
Well, I have just successfully installed TrueNAS Scale on the 40GB Intel SSD in my new build.
Backing up the data on the existing NAS, then I’ll remove the 3 x 1TB SATA HDD’s and connect them to my TrueNAS and create a storage pool.