Hardware: ASUS B560-PLUS (BIOS 2001), Intel Core i7-11700, 64GB Corsair DDR4, Integrated Graphics (iGPU)
Status: Resolved
TL;DR: The problem was not a dead boot drive. The issue was a severely fragmented memory map caused by the Intel iGPU’s memory reservation, which prevented the Linux kernel from initializing. After extensive testing, the solution was a single BIOS setting: Reducing the iGPU Memory allocation from 1024MB to 128MB. My original boot drive is functioning perfectly in a new mirrored setup and did not need to be replaced.
Detailed Technical Explanation
1. The Root Cause: Memory Map Fragmentation
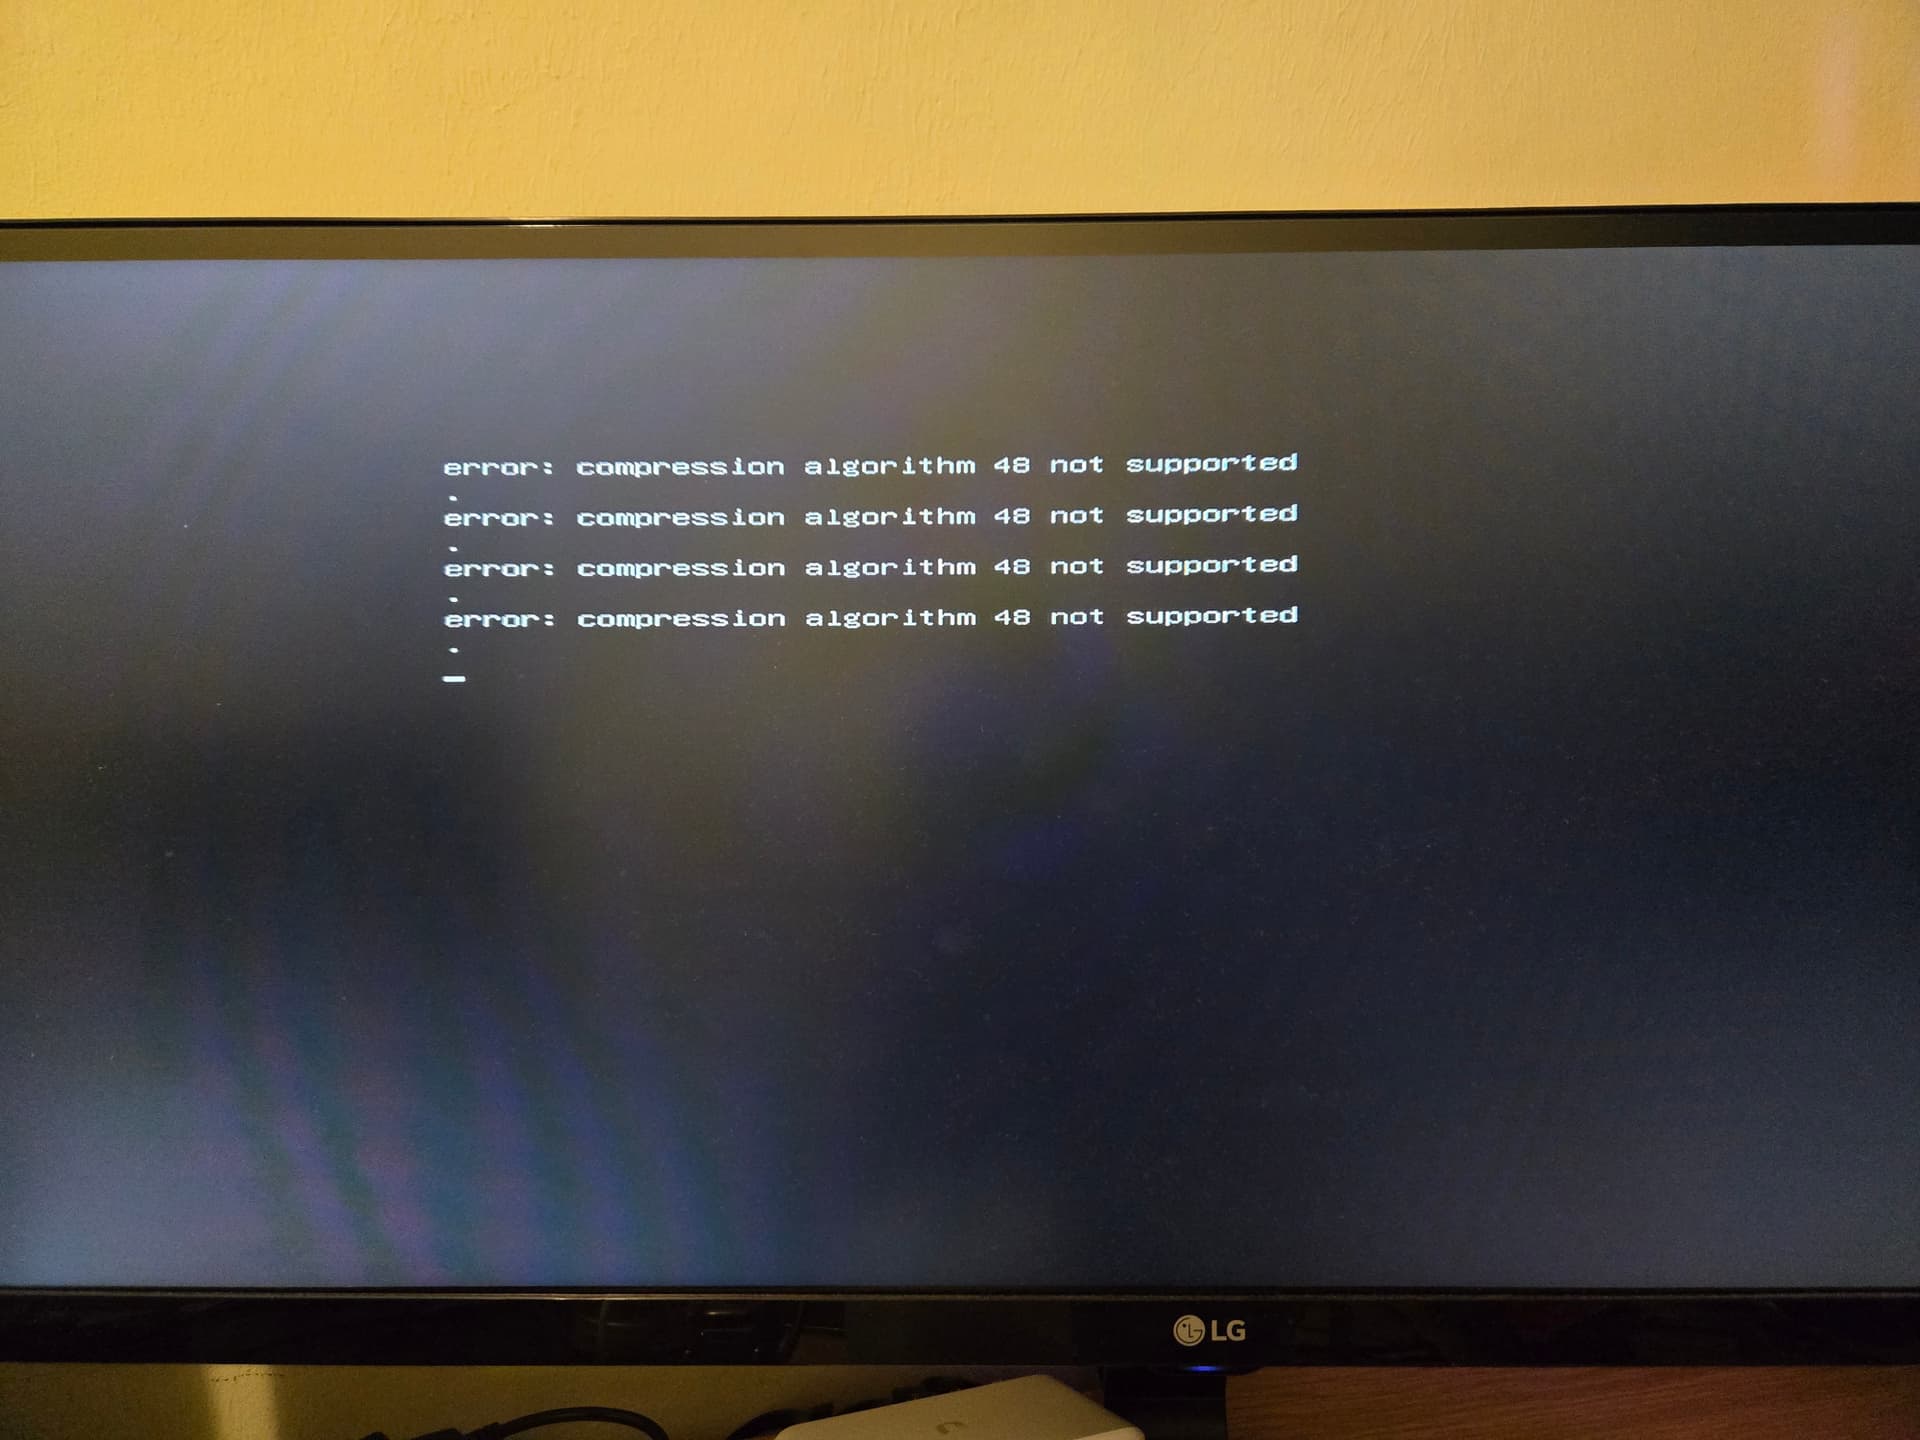
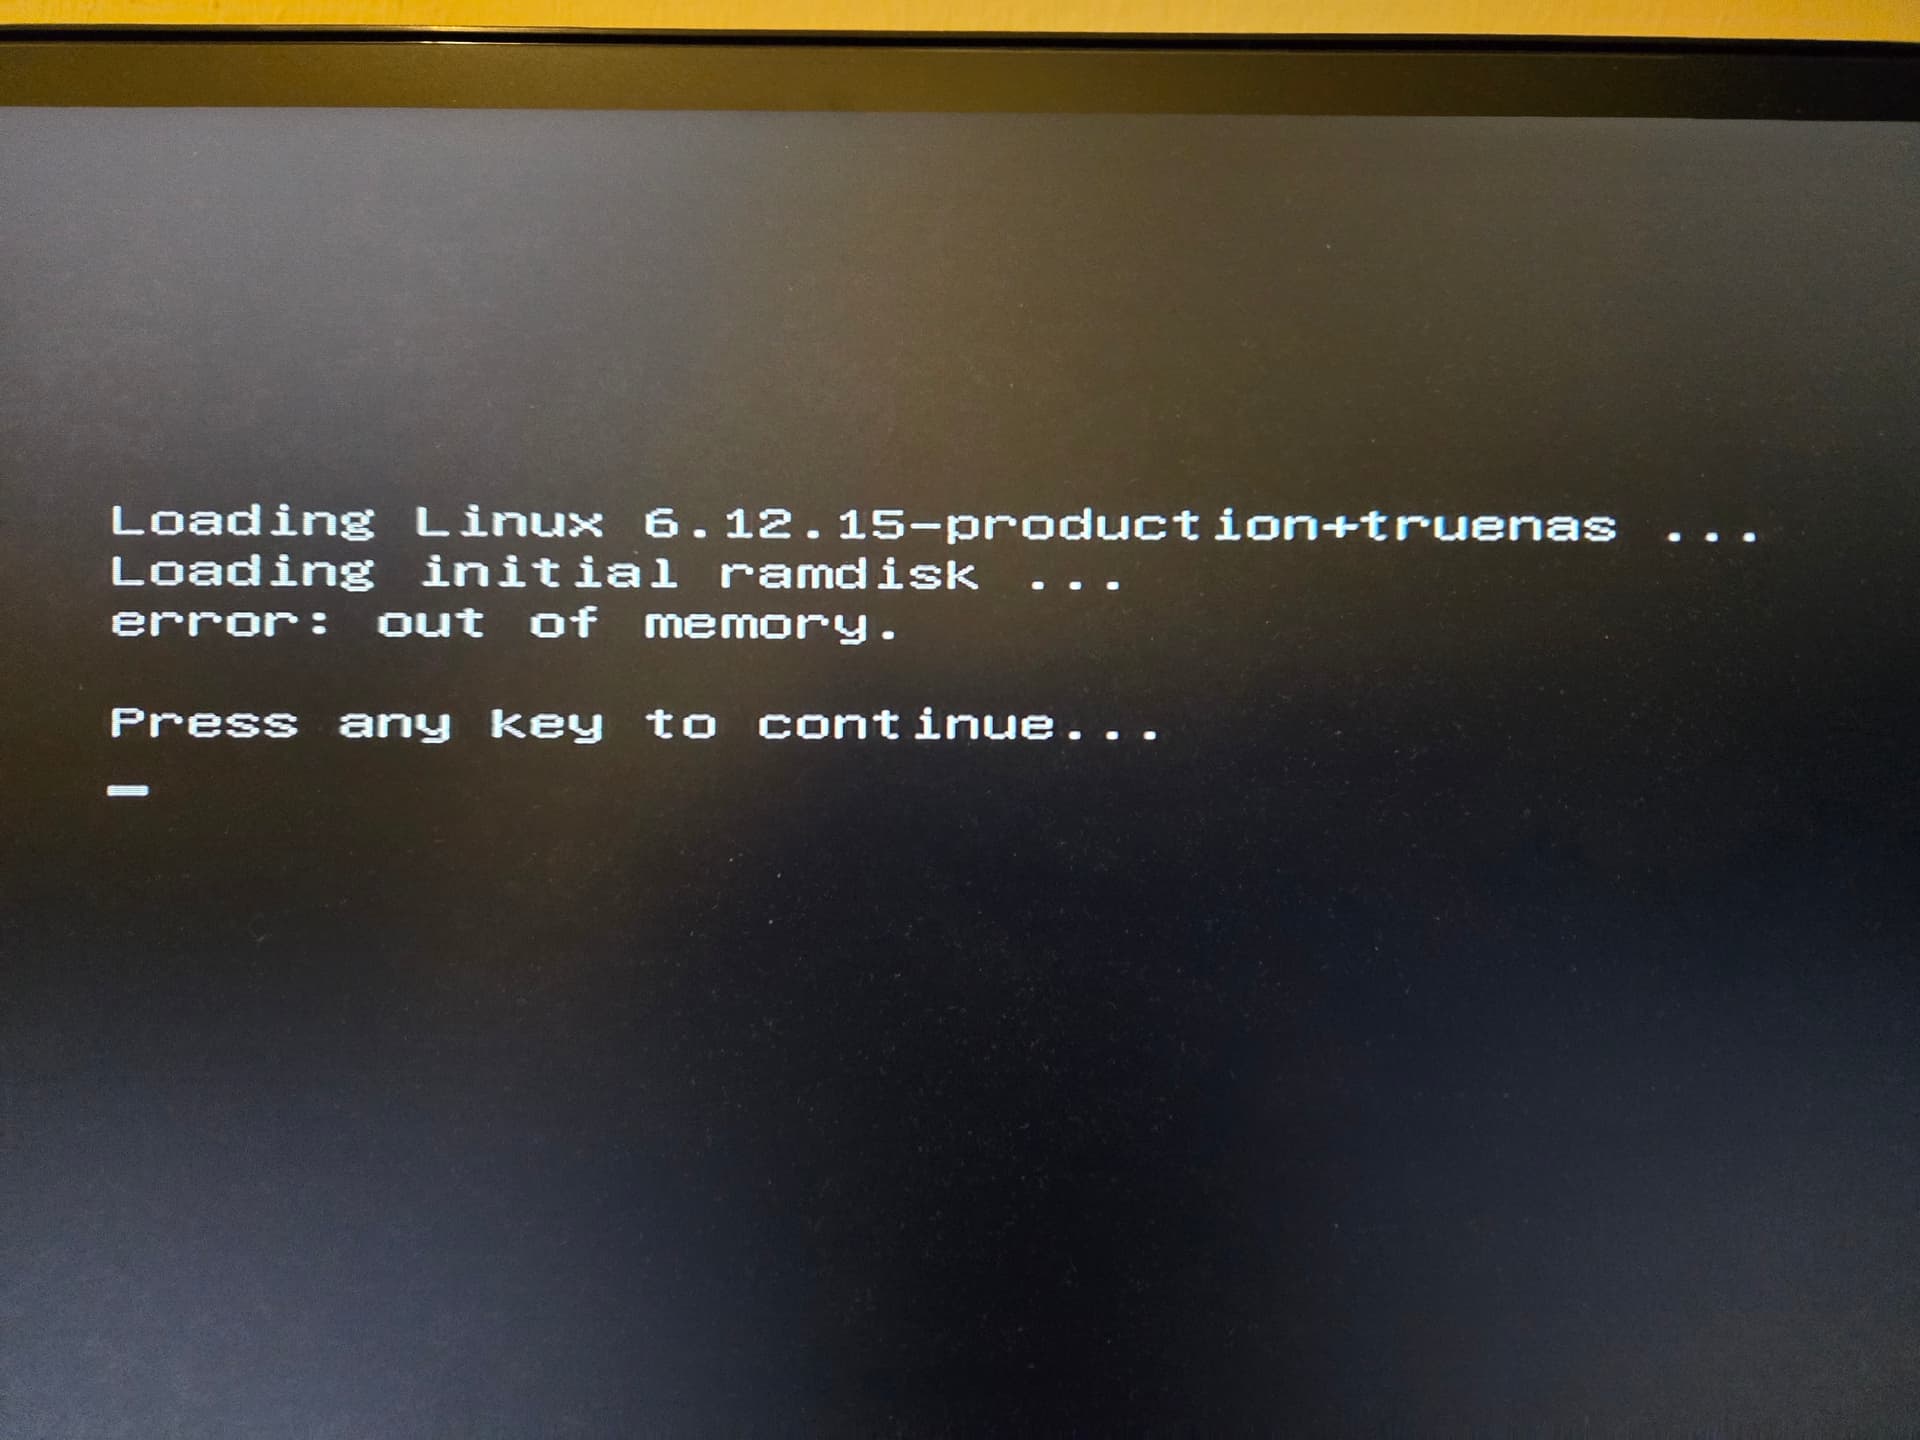
After an update, my system would fail to boot any Linux-based ISO (including the TrueNAS-SCALE installer and recovery media), throwing two critical errors:
error: Out of Memory- Followed by a kernel panic:
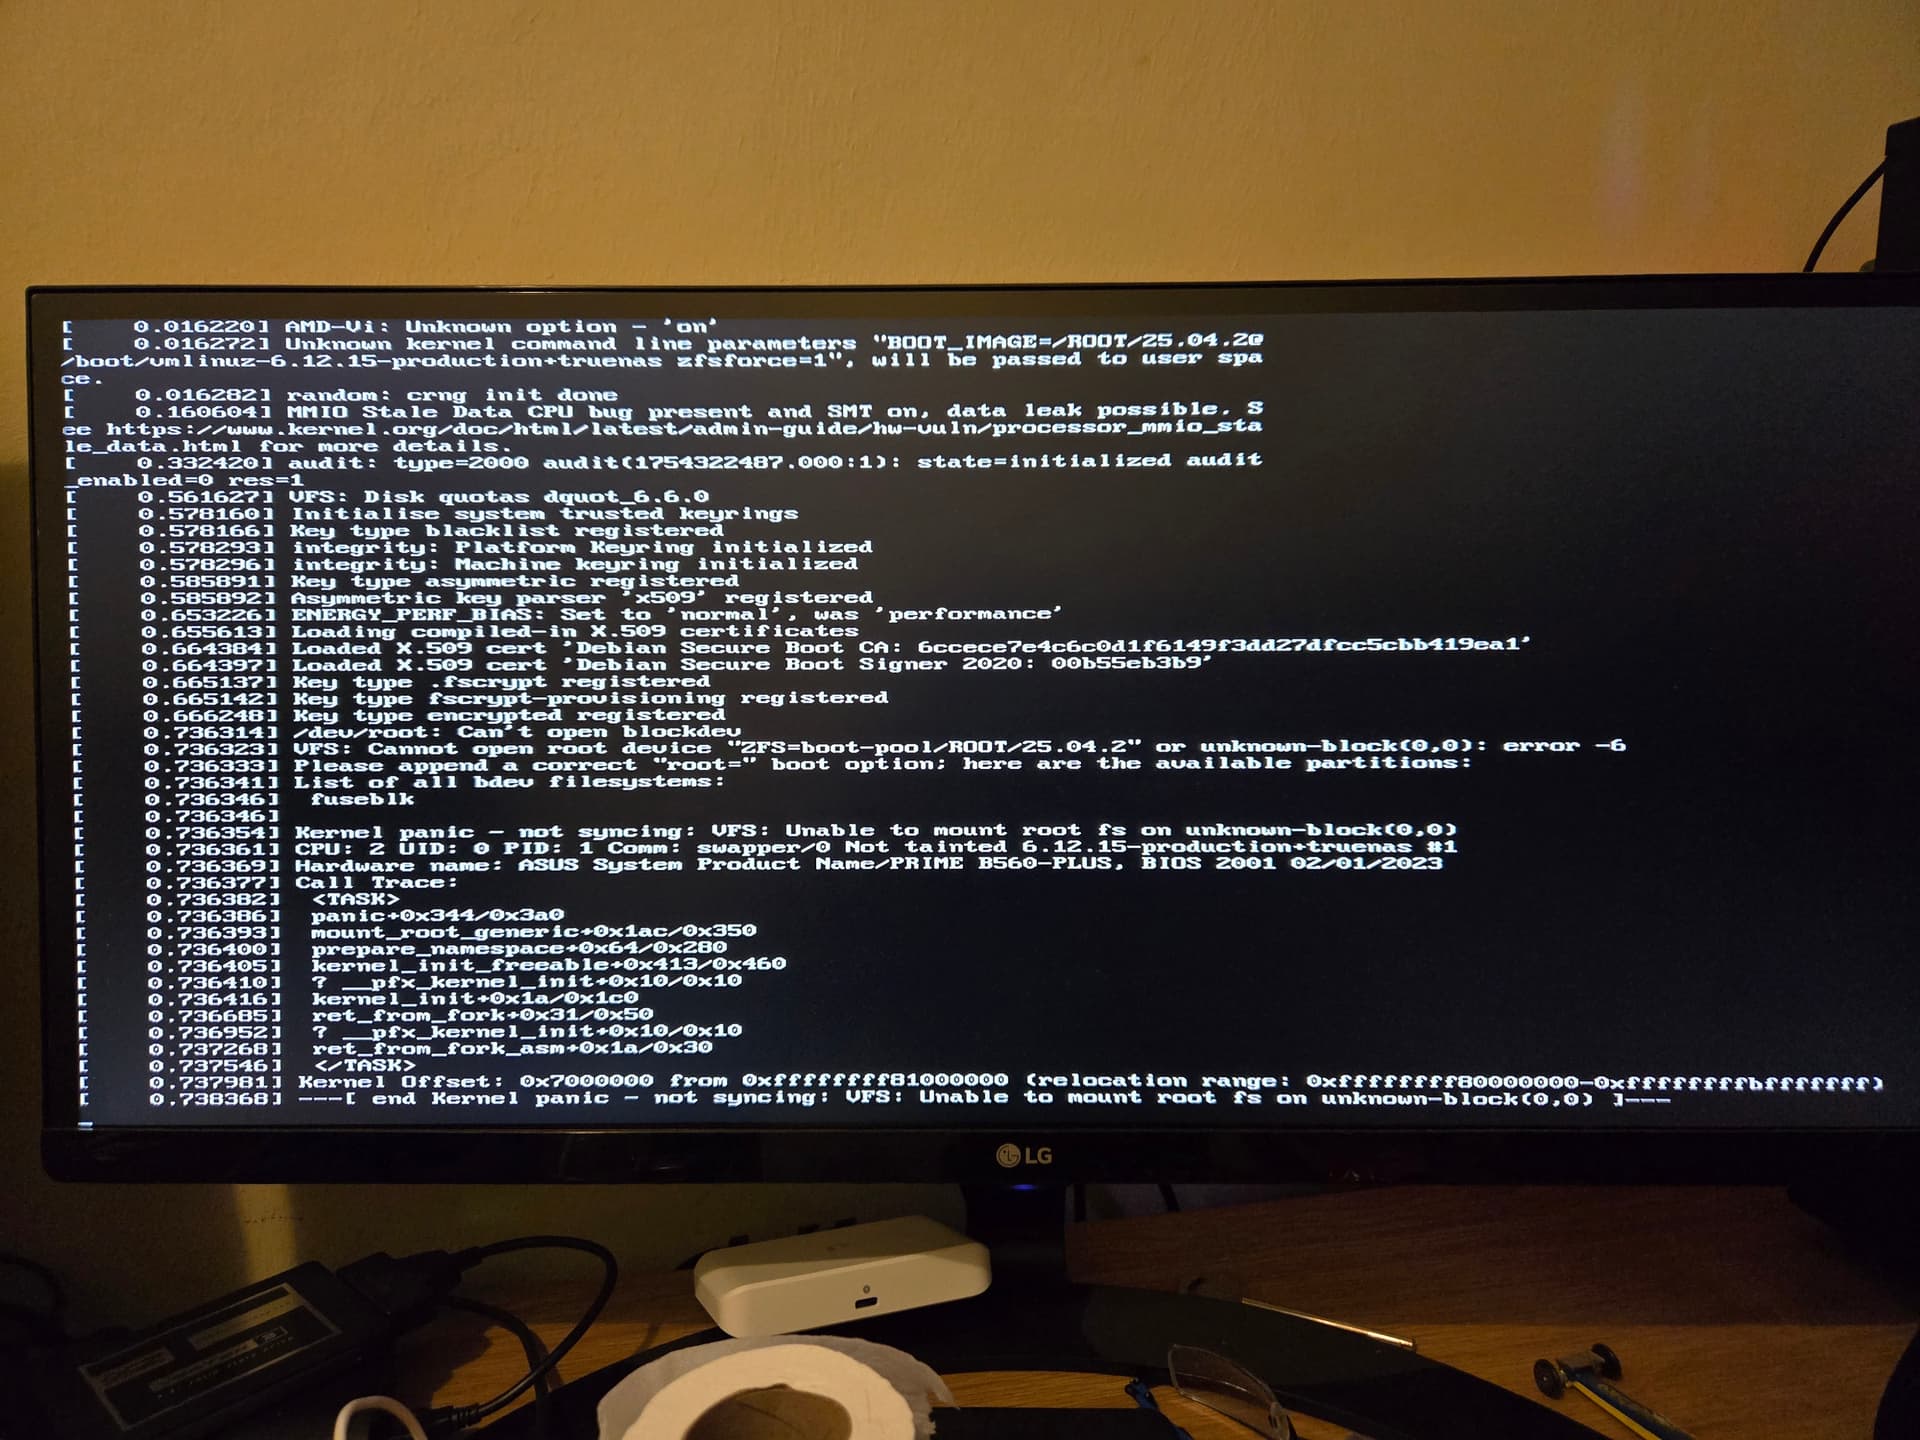
/dev/root: Can't open blockdev
This error occurs in the very first stages of the kernel boot process, long before it tries to access the root filesystem on the boot drive. The “Out of Memory” error is misleading; it does not refer to a lack of physical RAM (I have 64GB). Instead, it means the kernel’s early boot allocator could not find a large enough contiguous block of memory in the lower physical address space to load its essential structures and the initramfs.
The culprit was my 11th Gen Intel CPU’s integrated graphics (iGPU). The BIOS was reserving a large, multi-gigabyte region for the iGPU’s frame buffer. This reservation fragmented the memory map, creating a “hole” that the Linux kernel’s boot-time allocator could not navigate.
Think of it like this: The kernel needs a long, continuous parking space right at the entrance (low memory) to unload its initial cargo. The iGPU was parking a huge trailer across multiple spots, making it impossible for the kernel to find the space it needed.
2. The Misdiagnosis: “Dead Boot Drive”
The error /dev/root: Can't open blockdev naturally points toward a storage issue. This led to the initial advice that my boot drive was dead and needed replacement. However, this is a secondary symptom.
Why it happens: The kernel panics because it cannot allocate the memory needed to initialize its subsystems, including those responsible for identifying hardware like SATA controllers and NVMe drives. The panic occurs when it fails to find the root device because the necessary drivers and processes never loaded correctly due to the memory allocation failure. The boot drive was never the problem; it was a victim of the earlier memory initialization failure.
3. The Extensive Diagnostic Journey (What Didn’t Work)
Before finding the solution, I performed an exhaustive series of tests and fixes, all of which failed to resolve the issue. This process is important to document so others know what to skip.
- MemTest86 (4 passes): 0 errors. Proved the physical RAM was intact.
- Drive Health Checks: S.M.A.R.T. data for all drives was clean.
- Cross-Testing Media: The same Ventoy USB and ISO files booted perfectly on other systems.
- BIOS Settings:
- Loading Optimized Defaults.
- Disabling CSM (Compatibility Support Module) to force pure UEFI mode.
- Enabling
Above 4G Decoding.
- Disabling Secure Boot.
- Kernel Parameters: I tried manually reserving the memory region with
memmap=2G$0x200000000 and limiting the kernel’s view with mem=62G. These helped diagnose the issue but were not a clean fix.
- Alternative Boot Media: Using Rufus instead of Ventoy to create the boot USB.
4. The Actual Solution: Reducing the iGPU Memory Reservation
After all else failed, the solution was one specific BIOS setting:
Path in BIOS: Advanced > System Agent (SA) Configuration > Graphics Configuration > DVMT Pre-Allocated
Change: Set from 1024M to 128M.
Why This Worked:
The DVMT (Dynamic Video Memory Technology) pre-allocation reserves a fixed, contiguous block of system RAM for the iGPU at boot. By reducing this demand from 1GB to 128MB, the BIOS creates a much smaller “reservation” in the memory map. This leaves a large enough contiguous block of free memory in the critical lower address range for the Linux kernel to successfully initialize itself. Once the kernel is up and running, it can dynamically allocate more video memory to the iGPU as needed, so reducing this pre-allocated value does not impact performance for tasks like Plex transcoding.
5. Conclusion and Advice for Others
If you encounter a similar “Out of Memory” error followed by a kernel panic during boot, especially on a system with an Intel iGPU and a lot of RAM, do not assume your boot drive is dead as a first step.
The Number One Setting to Check:
Navigate your BIOS menus and find the DVMT Pre-Allocated or iGPU Memory Allocation setting. Reduce it to its minimum value (usually 64MB or 128MB). This was the definitive fix after every other recommended step failed.
My original boot drive with the update is running, and the system is completely stable. I hope this detailed explanation, and more importantly, the correction about the key setting, helps others who find themselves in this frustrating situation.