TrueNas disk partitions overwritten

Hi Team,
while getting some help on reddit, iX Chris suggested I setup an account here and see if it might be easier with the knowledge of the forum.

I’ll explain everything here again just so I can be clear;

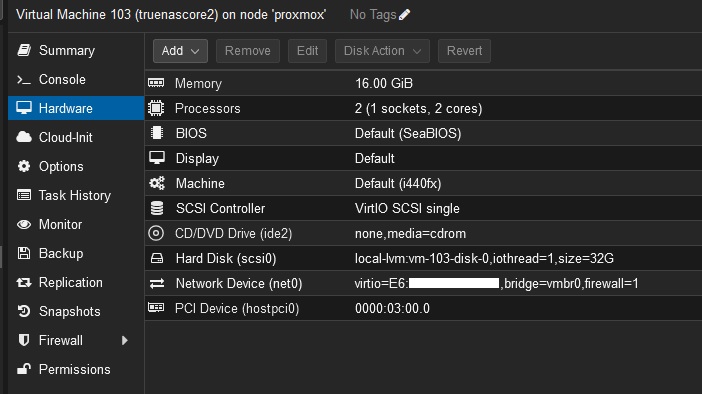
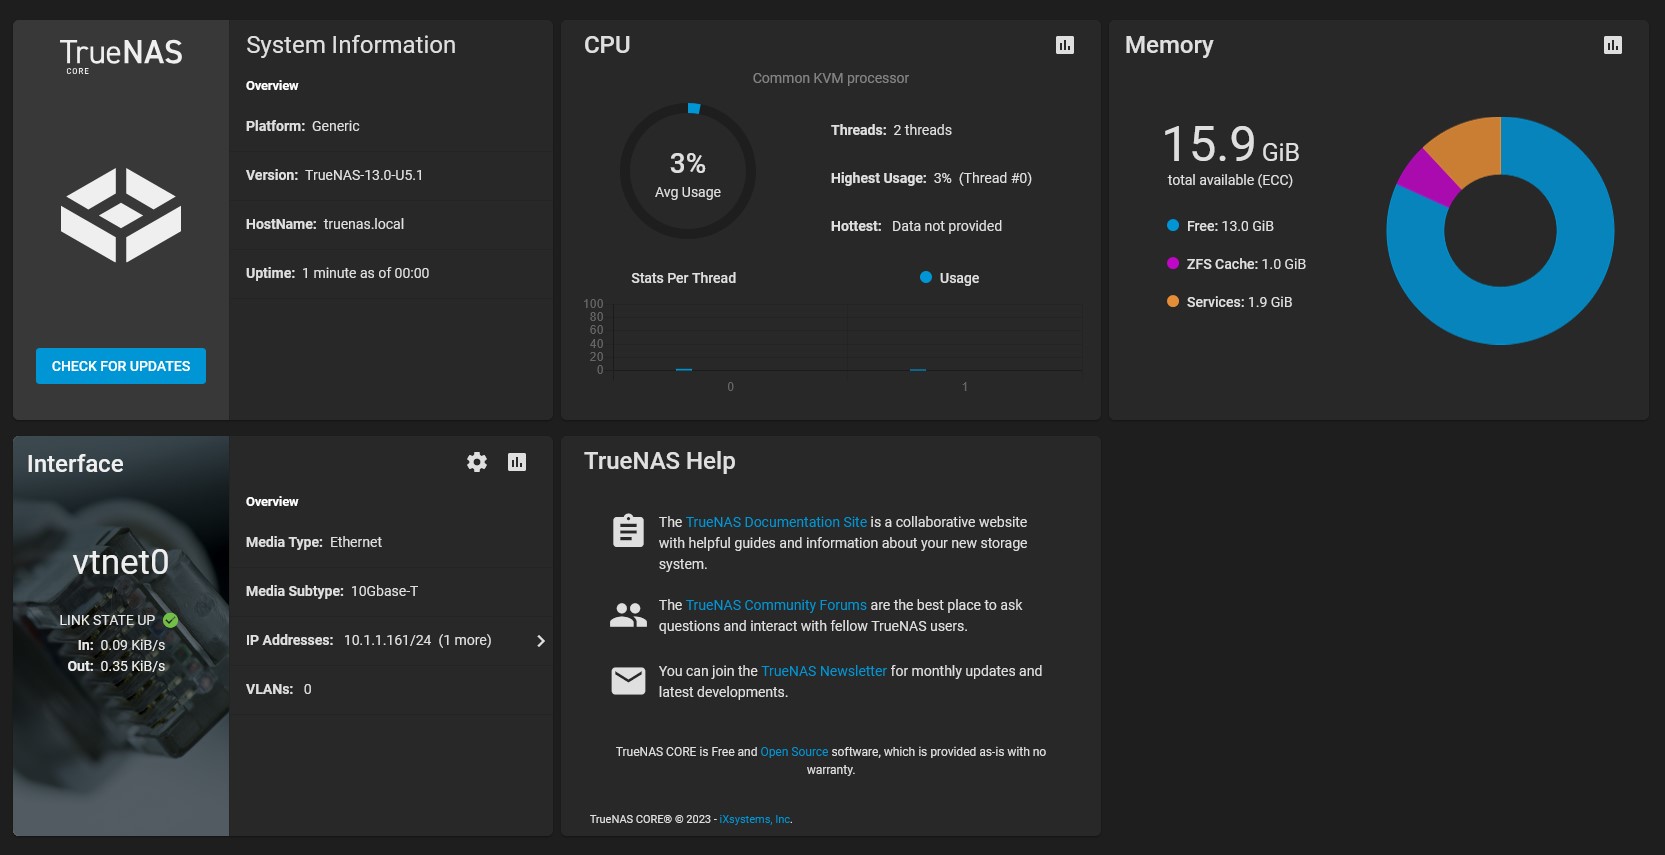
I have a TrueNAS core VM instance that I am running on a proxmox host on my small homelab. I am passing a PCI device directly to the VM (basically a HBA) so the VM has physical access to the disks
I was running a test on the host, added an additional PCI card, and doing so changed the PCI order without my knowledge. I added a second set of disks along with this new PCI card that I had planned to use.
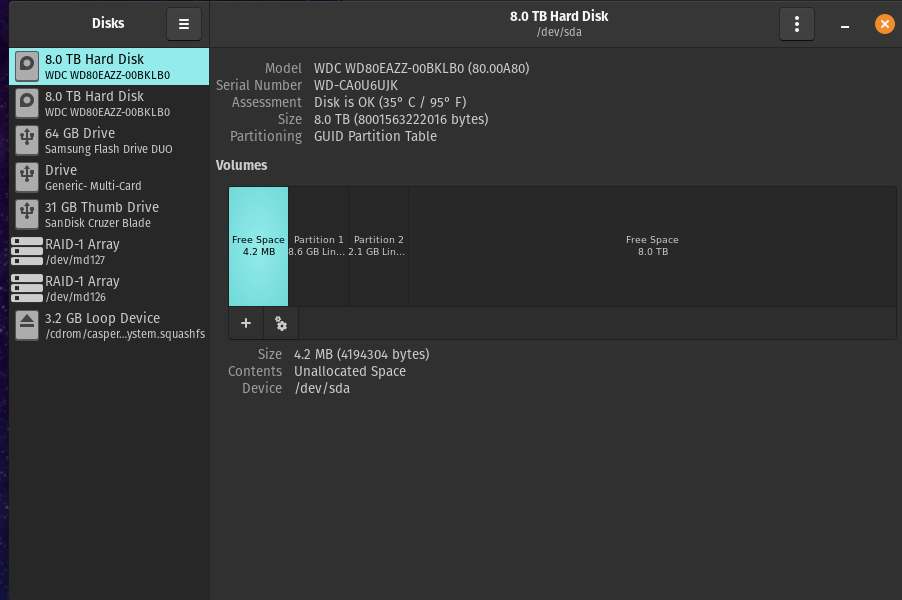
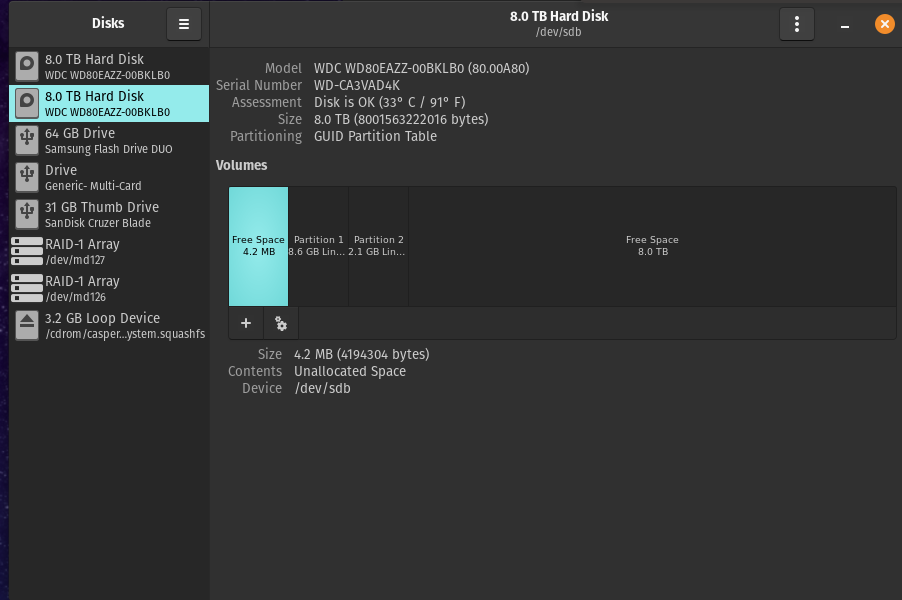
Full honesty, I was testing something called xpnology, which is a bootloader for synology’s nas software. I gave it the new PCI device in proxmox, and did the installation. It’s only 3x 3TB drives but i ignored it saying it was going to use 5 disks. Thought it was a glitch. maybe using the bootable disk or something. I clicked next a bunch of times, added the disks and was asking how to setup this new pool. something clicked and I shut it down, but was already too late. It had created some new partitions over my existing truenas instances

I attached the disks back to my truenas instance, and obviously nothing worked. disks showing in the portal, but the shares were gone, the pool was gone. it was gone. did some reading, and took the pool offline, which made no difference, but now not showing in the portal… might have been another bad step in hindsight,.

More reading suggested that it might be possible to recover data of the disks.
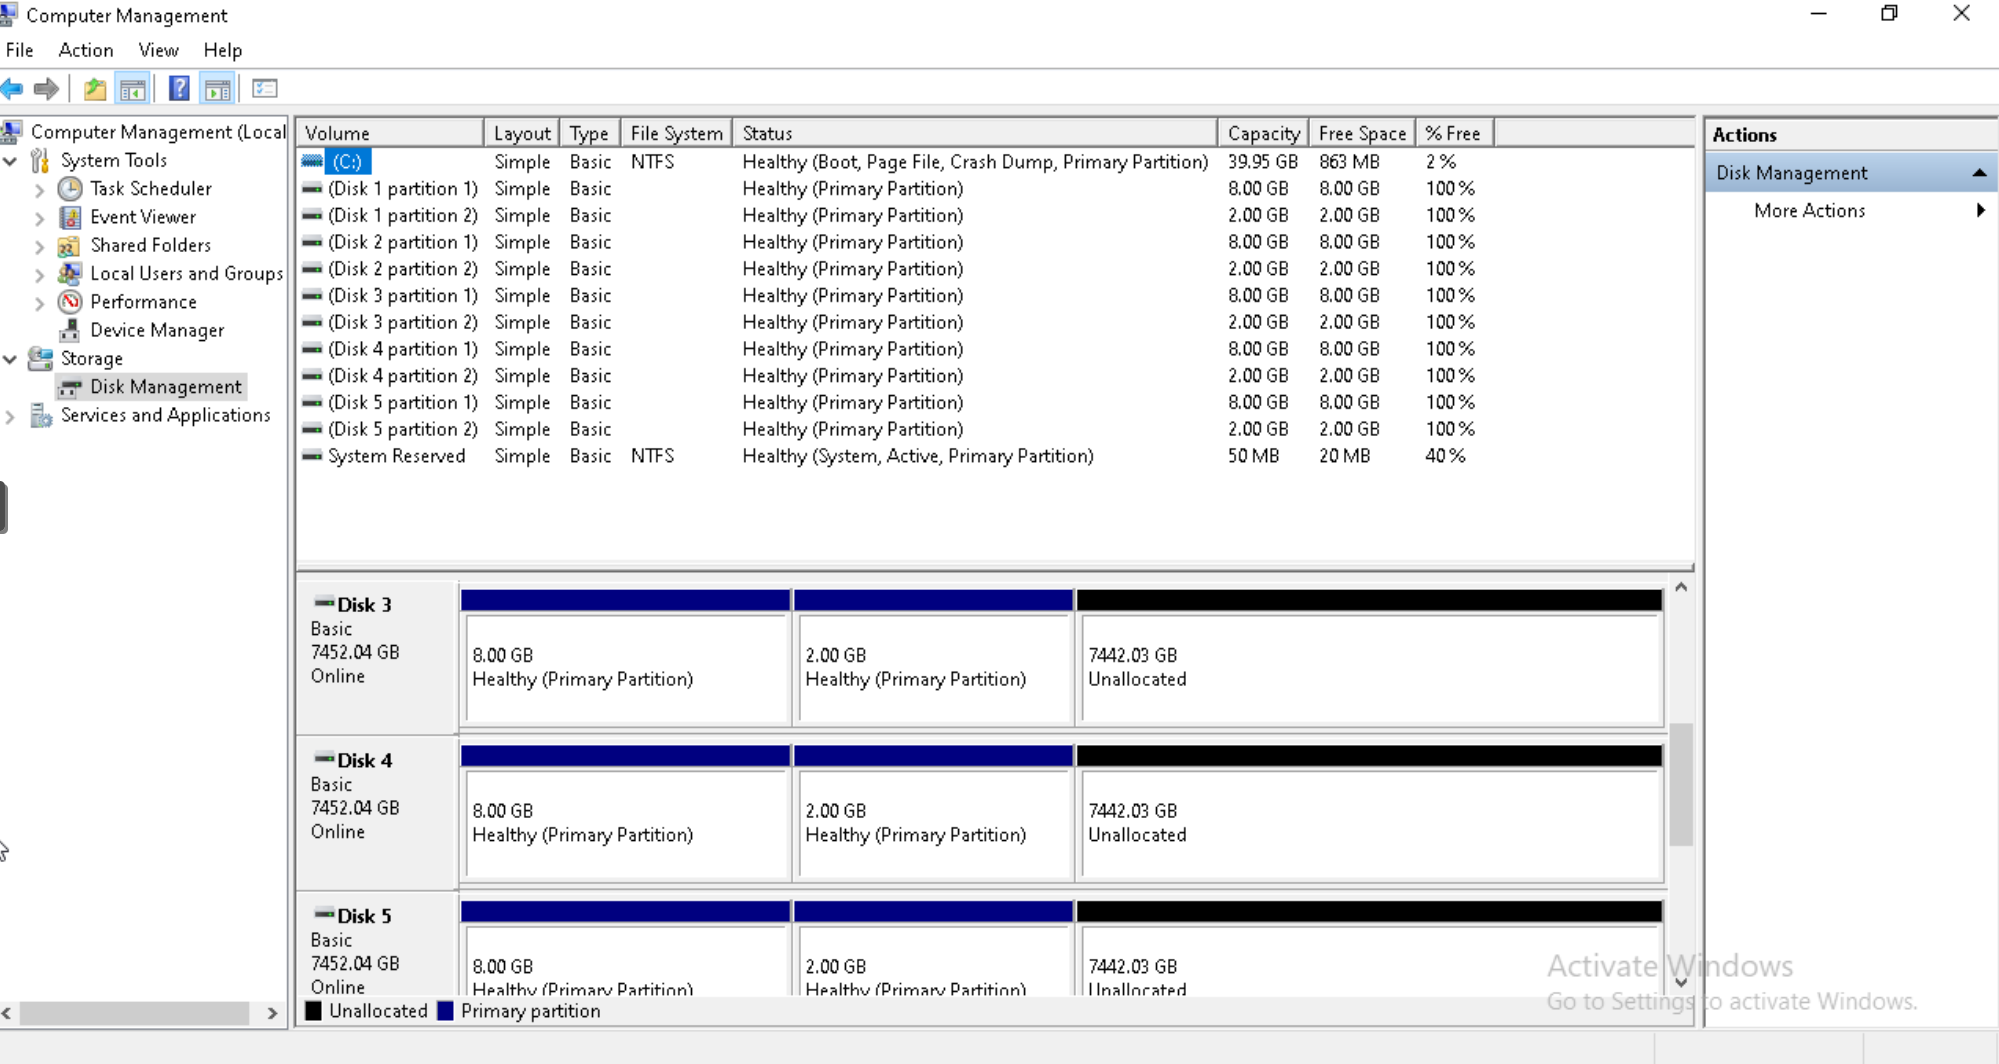
I attached the disks to a win10 vm.


Tried an application called Klennet ZFS Recovery. That ran for close to two days and eventually crashed.

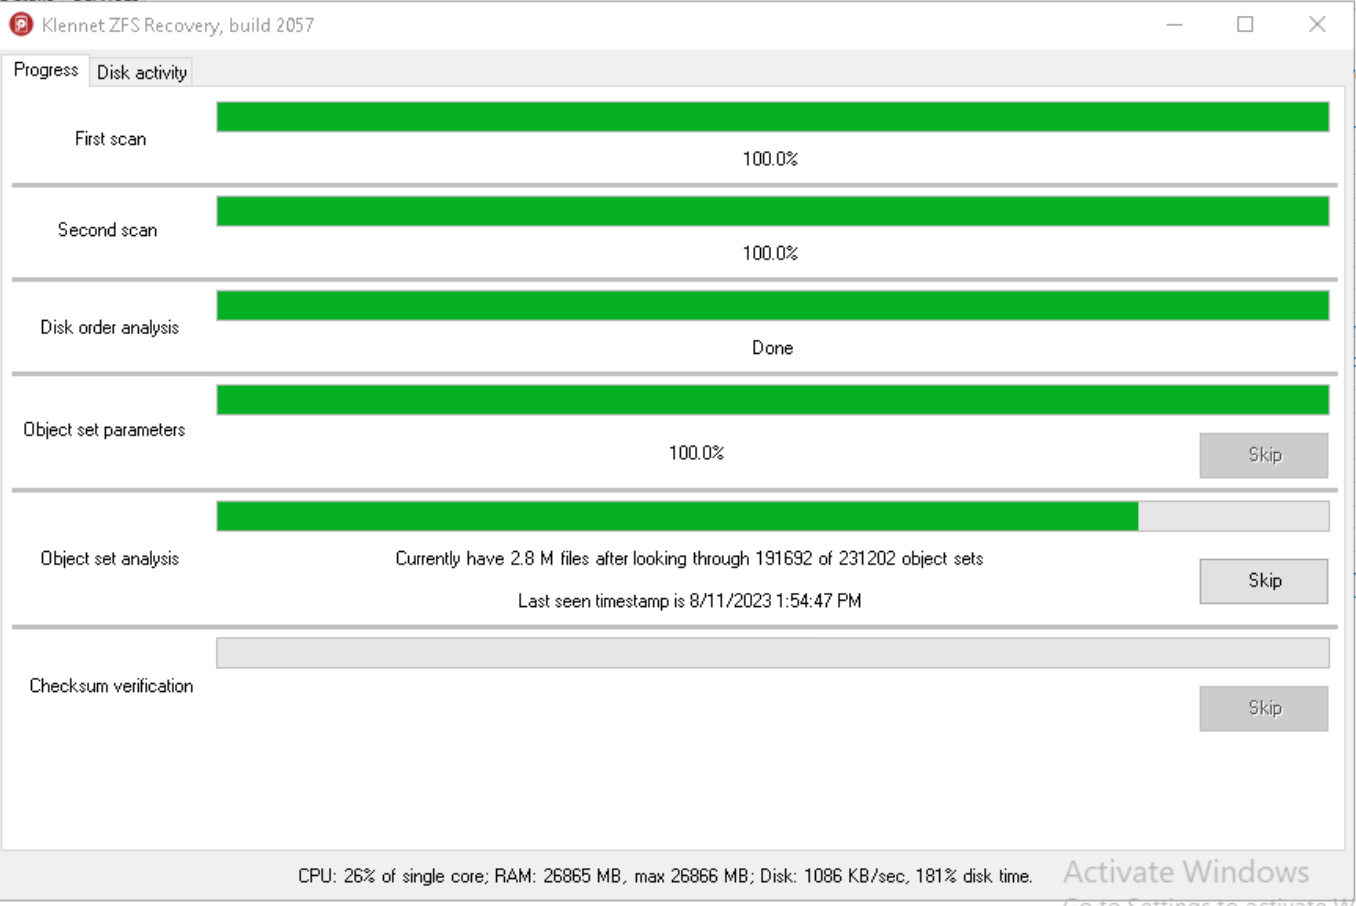
it looked like it was working at least…

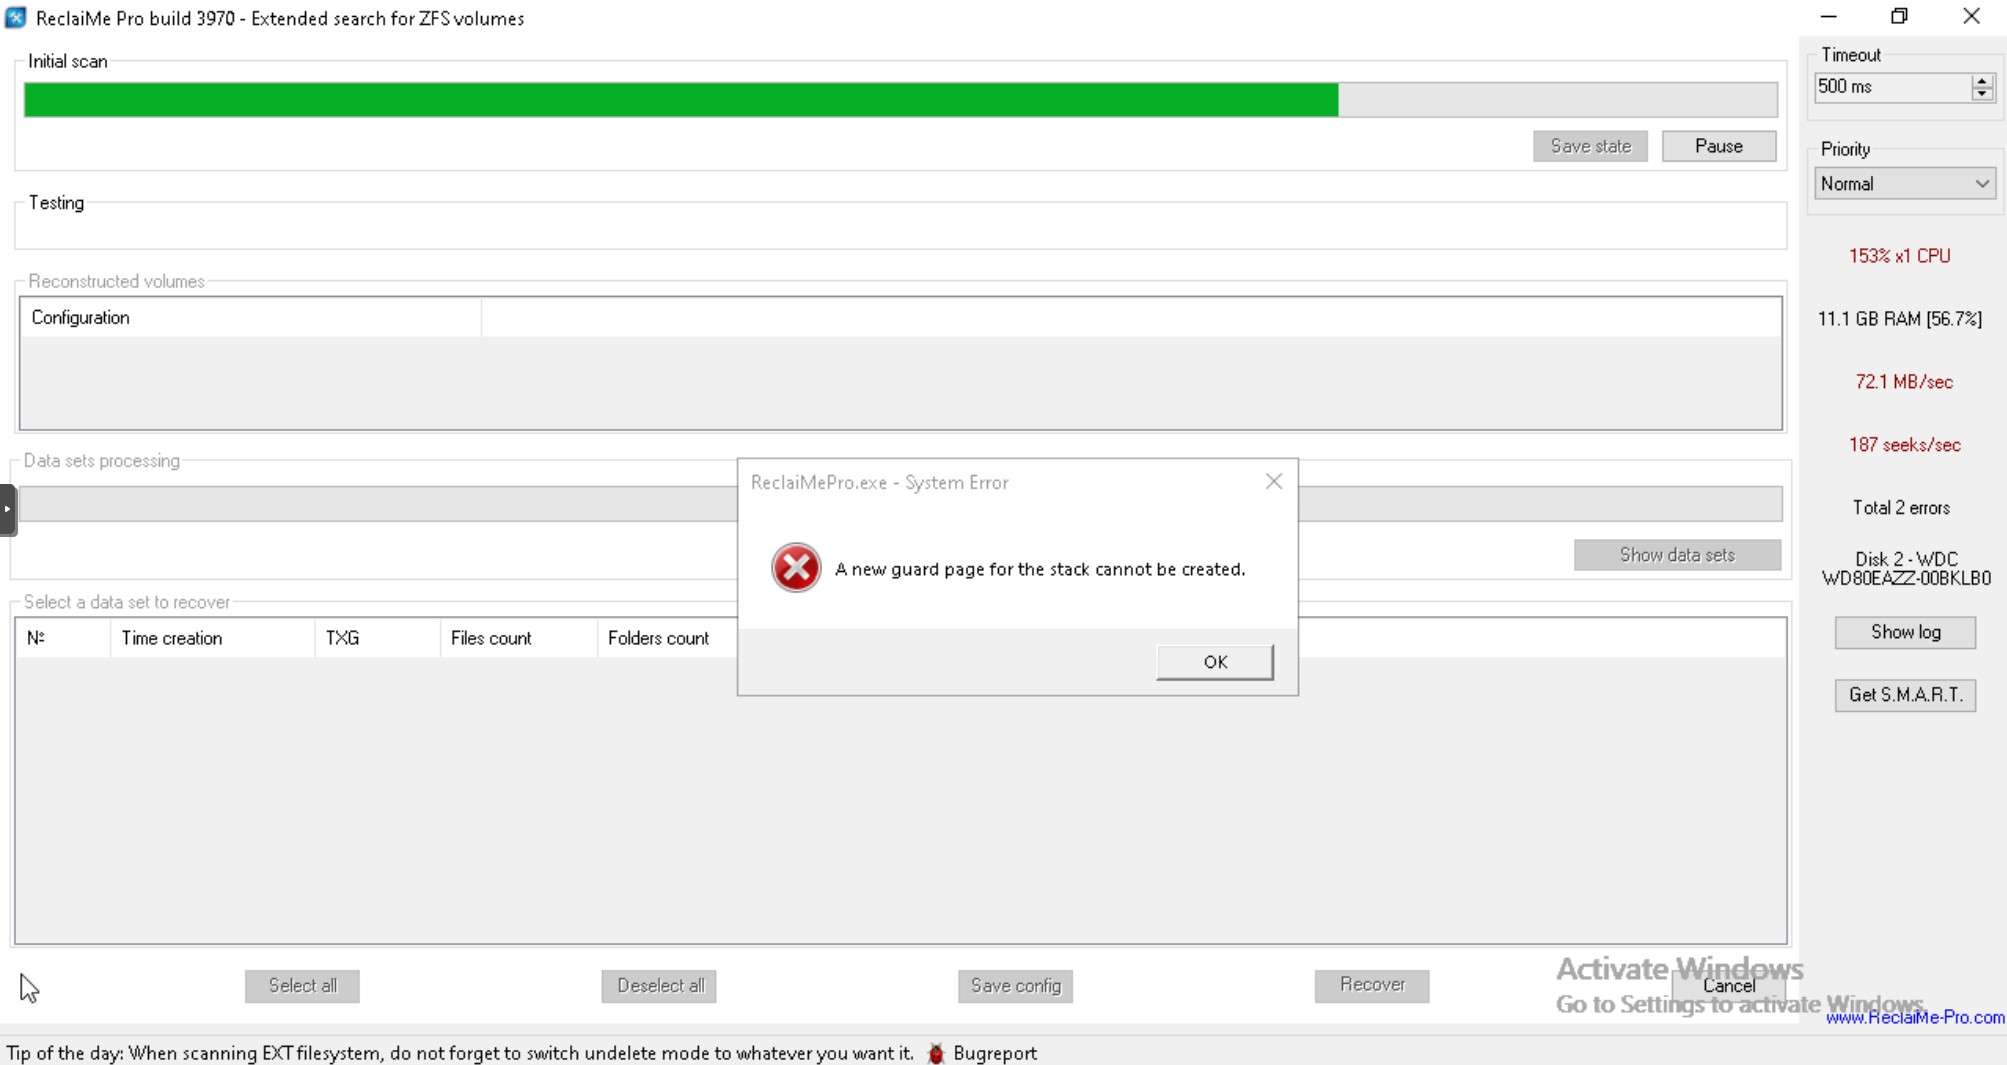
Tried running another application called ReclaiMePro which took a few more days to scan, but eventually crashed/failed also

At some point, I was clicking around in the settings and discovered a MBR disk check window. from here i can see something that gave me hope. still showing some TRUENAS info on the disk!

This made me change gears. maybe instead of trying to recover data, i could fix my partitions and perhaps get some (and if luck most/all) of the stuff back.

as mentioned before, Chris was nice enough to reach out, and ask some questions.
To answer those here, I dont have an additional disk at the moment to use for some testing, but I can possibly grab one (or more) for testing potentially. The pool was a z1 using 5x 8tb disks, or at least im 90% sure it was. 10% maybe z2.

to answer anyone else asking, My most valuable data has indeed been backed up. There are however less valuable data that consisted of backups of phones and computers and configs that wasnt super important, but i’d kinda like back if possible

I haven’t written anything else to the disk since this event as far as i know at least

I’m trying to add pictures, but i keep getting an error that says

An error occurred: Sorry, you can’t embed media items in a post.

turns out i was too new to do so.
pics updated in original post :slight_smile:

@HoneyBadger

I do not know enough about the ZFS on disk format to help… but perhaps the GPT recovery partitions are at the end of the disk, and could be used to recover the partitioning info at least.

And then I guess some label hack stuff could be used to see if labels can be recovered…

And then maybe the pools can be recovered… with various levels of degradation.

The good news is it seems like Klennet saw the files.

BUT this is not my forte… since I try not to get into this situation :slight_smile:

2 Likes

Hey @JimJames445 - thanks for the patience.

An extra disk here would be supremely valuable. My best guess at how to recover this is going to include some wonderfully ugly and very direct partition table modifications, so ideally we would want to do a bit-for-bit clone of one of your drives, put the original aside, and then make these partition table changes on your “clone” disk.

If we can get to the point where that clone disk is recognized as having one or more valid ZFS labels, and we get an “insufficient replicas” error - then perhaps if you’re comfortable, we go about those same edits on the other disks.

Fantastic news to hear that you’ve got an extra backup of the most critical data.

Another bit of fantastic news. Hopefully the xpenology installer didn’t write much during its “partition setup” process.

Step 1 here is to try to find/borrow an extra (ideally identical) disk to your previous ones, and do a bit-for-bit clone using Clonezilla or another piece of disk cloning software of one of the unlucky original formatted disks.

1 Like

I thought that this was likely going to be a possibility. i reckon it has the highest chance to work. and i dont feel good about file recovery tbh. with just how complicated this all is.

this all sounds like it might actually be possible. hope is such a scary thing. I’ll see if I can purchase another 8TB this week.

in the mean time, what software would you recommend to do the cloning. I can get my hands on some tools, but maybe gparted or something like that is the most simple…

It really is dependent on just what the xpenology installer did. Hopefully all it did was just repartition the drives, and if we’re able to restore it, then it will indeed be possible - but no promises here.

I’m a big fan of the bootable Clonezilla as a free and open-source disk cloning/image system.

1 Like

honestly, I’m very thankful you’d even look my way and offer a hand.

clonezilla sounds good. :+1:

h̶o̶w̶ ̶m̶u̶c̶h̶ ̶d̶o̶e̶s̶ ̶i̶t̶ ̶m̶a̶t̶t̶e̶r̶ ̶w̶h̶a̶t̶ ̶d̶i̶s̶k̶ ̶i̶ ̶g̶e̶t̶?̶ ̶l̶o̶o̶k̶s̶ ̶l̶i̶k̶e̶ ̶t̶h̶e̶ ̶d̶i̶s̶k̶s̶ ̶i̶ ̶a̶m̶/̶w̶a̶s̶ ̶u̶s̶i̶n̶g̶ ̶(̶W̶D̶8̶0̶E̶A̶Z̶Z̶)̶ ̶a̶r̶e̶ ̶h̶a̶r̶d̶ ̶t̶o̶ ̶g̶e̶t̶ ̶a̶t̶ ̶t̶h̶e̶ ̶m̶o̶m̶e̶n̶t̶,̶ ̶b̶u̶t̶ ̶s̶t̶i̶l̶l̶ ̶m̶i̶g̶h̶t̶ ̶b̶e̶ ̶p̶o̶s̶s̶i̶b̶l̶e̶ ̶(̶s̶t̶i̶l̶l̶ ̶l̶o̶o̶k̶i̶n̶g̶ ̶l̶o̶c̶a̶l̶l̶y̶)̶.̶ ̶c̶a̶n̶ ̶I̶ ̶g̶r̶a̶b̶ ̶a̶n̶y̶ ̶8̶T̶B̶ ̶d̶i̶s̶k̶ ̶o̶r̶ ̶a̶r̶e̶ ̶w̶e̶ ̶t̶r̶y̶i̶n̶g̶ ̶t̶o̶ ̶b̶e̶ ̶a̶s̶ ̶s̶p̶e̶c̶i̶f̶i̶c̶ ̶a̶s̶ ̶p̶o̶s̶s̶i̶b̶l̶e̶.̶ ̶i̶f̶ ̶i̶ ̶g̶r̶a̶b̶b̶e̶d̶ ̶a̶ ̶W̶D̶8̶0̶E̶A̶A̶Z̶ ̶w̶o̶u̶l̶d̶ ̶t̶h̶a̶t̶ ̶s̶t̶i̶l̶l̶ ̶b̶e̶ ̶f̶i̶n̶e̶?̶
EDIT: scratch that. not available in person, but found it online for an okayish price. Will hopefully be here by next week. Will keep you posted.

also, thought I’d mention. ran Klennet again, ran for 2 and a bit days, and it crashed the system it was running on. so that’s fun. :upside_down_face:

and again, thanks

1 Like

You’re welcome. Because we’re basically going to taking shots in the dark at the partition layout and hoping ZFS can piece things together, I definitely want to do this on a “burner disk” first so to speak until we can figure out the exact topology.

took them long enough to send the disk :
I’ve run into a bit of a snag. clonezilla refused to see the truenas drive, and only could see my USB and the new drive.
tested on a different computer. made sure it could be seen in bios and in a live linux distro, but wouldnt work. ran in ram and removed the usb and clonezilla could only see 1 drive…

ended up running the following linux command instead:
sudo dd if=/dev/sda of=/dev/sdb conv=noerror,sync bs=4M status=progress

it currently looks like it has done about 4TB worth of data now, so we’ll see what happens next.

after this is done, what would you like me to try next?
(that is to say, that this type of cloning will be good enough.)

cheers

Let’s see the output - within TrueNAS or not - with

sudo sfdisk -d /dev/sdX

where sdX is the drive you just cloned to. We’ll be working with the cloned drive only here, to avoid doing anything to the source.

To run a command as administrator (user “root”), use “sudo ”.
See “man sudo_root” for details.

pop-os@pop-os:~$ lslbk
Command ‘lslbk’ not found, did you mean:
command ‘lsblk’ from deb util-linux (2.37.2-4ubuntu3)
Try: sudo apt install
pop-os@pop-os:~$ lsblk
NAME MAJ:MIN RM SIZE RO TYPE MOUNTPOINTS
loop0 7:0 0 3G 1 loop /rofs
sda 8:0 0 7.3T 0 disk
├─sda1 8:1 0 8G 0 part
│ └─md127 9:127 0 0B 0 md
└─sda2 8:2 0 2G 0 part
└─md126 9:126 0 0B 0 md
sdb 8:16 0 7.3T 0 disk
sdc 8:32 1 59.8G 0 disk
├─sdc1 8:33 1 59.7G 0 part
└─sdc2 8:34 1 32M 0 part /media/pop-os/Pop_OS 22.04 amd64 Nvidia
sdd 8:48 1 0B 0 disk
pop-os@pop-os:~$ sudo umount /dev/sda1
umount: /dev/sda1: not mounted.
pop-os@pop-os:~$ sudo umount /dev/sdb1
umount: /dev/sdb1: no mount point specified.
pop-os@pop-os:~$ sudo dd if=/dev/sda of=/dev/sdb conv=noerror,sync bs=4M status=progress
8001536655360 bytes (8.0 TB, 7.3 TiB) copied, 51893 s, 154 MB/s
dd: error writing ‘/dev/sdb’: No space left on device
1907721+1 records in
1907721+0 records out
8001563222016 bytes (8.0 TB, 7.3 TiB) copied, 51896.3 s, 154 MB/s
pop-os@pop-os:~$
pop-os@pop-os:~$
pop-os@pop-os:~$ sudo sfdisk -d /dev/sdb
label: gpt
label-id: 4071A906-3012-11EE-9EC2-B9204F9364FA
device: /dev/sdb
unit: sectors
first-lba: 40
last-lba: 15628053134
sector-size: 512

/dev/sdb1 : start= 8192, size= 16777216, type=A19D880F-05FC-4D3B-A006-743F0F84911E, uuid=4648FF4D-FFD6-49C2-8BB7-BD93638564B5
/dev/sdb2 : start= 16785408, size= 4194304, type=A19D880F-05FC-4D3B-A006-743F0F84911E, uuid=9FE5F5D2-EF7A-426C-BB3D-704E1679D79D
pop-os@pop-os:~$
pop-os@pop-os:~$ and comparison^C
pop-os@pop-os:~$ ^C
pop-os@pop-os:~$ sudo sfdisk -d /dev/sda
label: gpt
label-id: 4071A906-3012-11EE-9EC2-B9204F9364FA
device: /dev/sda
unit: sectors
first-lba: 40
last-lba: 15628053134
sector-size: 512

/dev/sda1 : start= 8192, size= 16777216, type=A19D880F-05FC-4D3B-A006-743F0F84911E, uuid=4648FF4D-FFD6-49C2-8BB7-BD93638564B5
/dev/sda2 : start= 16785408, size= 4194304, type=A19D880F-05FC-4D3B-A006-743F0F84911E, uuid=9FE5F5D2-EF7A-426C-BB3D-704E1679D79D
pop-os@pop-os:~$

SDA was the original and SDB was the new blank disk


EDIT: just noticed this

hmmm. hopefully that’s okay. same disk model and everything…

You didn’t tell dd when to stop so I imagine it’s fine - the last-lba counter appears to be accurate as well, so it looks like the clone worked.

Xpenology definitely nuked the partition table so that’ll be where we attempt to resurrect things. Do you recall what version of CORE you were using - and for bonus points, how big was/is the virtual boot device you were running it from?

core virtual hard disk is

local-lvm:vm-103-disk-0,iothread=1,size=32G

.

the core instance still boots so checking that now

Version:
TrueNAS-13.0-U5.1

Appreciate your patience and your virtual hardware specs Jim. I’m gonna need to noodle on this one in the AM, and I’ll try to get something back to you as soon as I can.

1 Like

I appreciate any and all help, so thank you. Take your time, not a priority.
Merry Christmas.

heading out of town for a little while, so dont worry if i dont reply
if you can think of anything, jot it down here and I’ll try whatever you’ve come up with step by step, or if you have several ideas, one after the other.
happy new year all. catch you soon. <3

Hey @JimJames445 - thanks for your patience.

I’m ready to come back and take a swing in the dark here.

Using that bootable/live Linux setup you had before, connect only the clone disk and we’re going to take a blind shot at finding the right partition layout.

Copy the following into a text file named something like shot-in-the-dark.txt on your live install.

label: gpt
label-id: 4071A906-3012-11EE-9EC2-B9204F9364FA
device: /dev/sdb
unit: sectors
first-lba: 40
last-lba: 15628053134
sector-size: 512

/dev/sdb1 : start=         128, size=     4194304, type=516E7CB5-6ECF-11D6-8FF8-00022D09712B, uuid=5F56F119-D1D1-11EF-8370-000C29ED785D
/dev/sdb2 : start=     4194432, size= 15623858703, type=516E7CBA-6ECF-11D6-8FF8-00022D09712B, uuid=5F5AFE87-D1D1-11EF-8370-000C29ED785D

Then, from your command prompt, you’re going to use the following destructive command which is why it’s important that you only have the one cloned disk attached. Assuming that your cloned disk is /dev/sdb then you would do:

sfdisk /dev/sdb < shot-in-the-dark.txt

You should see a bunch of text with ending lines like:

The partition table has been altered.
Calling ioctl() to re-read partition table.
Syncing disks.

Once that’s been done, I’m not certain if Pop_Os has ZFS modules available - but we’ll want to ask ZFS what it thinks the labels look like, with

zdb -l /dev/sdb2

You might need to boot into TrueNAS or some other system that speaks ZFS natively, or else modprobe zfs-dkms or otherwise load it up first if it says command not found: zdb

If you get a result of “unable to find labels” then bad result. If you get something beginning like below:

------------------------------------
LABEL 0
------------------------------------
    version: 5000
    name: 'yourpoolnamehere'
    state: 0

then please post the entire thing between codeblock tags.

1 Like

thanks @HoneyBadger for the info.

i’d just like to say that i was only using POP because that’s what i had laying around on my usb. more than happy to use anything else suggested. but its just what i used… suggestions for something else for future reference?

i’ve run the command and things at least look good now.
I will say, that I did run into some trouble, but “figured it out”.
device was mounted on sda, so modified your script as expected
when running sfdisk, it kept showing me “Checking that no-one is using this disk right now … FAILED” when the disk wasnt being used.
I then (probably incorrectly) used the --force flag to get it done.
It further complained that it couldnt update the partitions and would need a reboot.
checking the disks via the “DISKS” app showed the same.

rebooting the live instance and checking everything again, and it looked like it had actually worked.
here are the outputs for you.

and

pop-os@pop-os:/media/pop-os/NEW VOLUME$ sudo zdb -l /dev/sda2
------------------------------------
LABEL 0 
------------------------------------
    version: 5000
    name: 'sapphire'
    state: 0
    txg: 6510548
    pool_guid: 4129880466361988471
    errata: 0
    hostid: 3938147066
    hostname: ''
    top_guid: 8818973256395834896
    guid: 2858572398724299414
    vdev_children: 1
    vdev_tree:
        type: 'raidz'
        id: 0
        guid: 8818973256395834896
        nparity: 2
        metaslab_array: 135
        metaslab_shift: 34
        ashift: 12
        asize: 39997054648320
        is_log: 0
        create_txg: 4
        children[0]:
            type: 'disk'
            id: 0
            guid: 2858572398724299414
            path: '/dev/gptid/40eb2a5f-3012-11ee-9ec2-b9204f9364fa'
            DTL: 5060
            create_txg: 4
        children[1]:
            type: 'disk'
            id: 1
            guid: 1194783631545835994
            path: '/dev/gptid/40de4124-3012-11ee-9ec2-b9204f9364fa'
            DTL: 5059
            create_txg: 4
        children[2]:
            type: 'disk'
            id: 2
            guid: 8569878839378827450
            path: '/dev/gptid/40f43471-3012-11ee-9ec2-b9204f9364fa'
            DTL: 5058
            create_txg: 4
        children[3]:
            type: 'disk'
            id: 3
            guid: 6839407397638309827
            path: '/dev/gptid/40ffa4dd-3012-11ee-9ec2-b9204f9364fa'
            DTL: 5057
            create_txg: 4
        children[4]:
            type: 'disk'
            id: 4
            guid: 6751170395373396232
            path: '/dev/gptid/4109a6d0-3012-11ee-9ec2-b9204f9364fa'
            DTL: 5056
            create_txg: 4
    features_for_read:
        com.delphix:hole_birth
        com.delphix:embedded_data
    labels = 0 1 2 3 
pop-os@pop-os:/media/pop-os/NEW VOLUME$ 

*I did have to install the ZDB package to get it working, but that’s neither here nor there.

both reporting the correct name of the pool; Sapphire.
does that mean there’s a chance that this is all possible? Do things look good?

1 Like

It’s possible that PopOS mounted the Linux level partition it saw, and therefore wouldn’t release the disk. To avoid having to hammer it through with --force and rebooting, you could unmount the partition (check mount for it) and then try.

But …

The fact that it picked up ZFS label 0 is very promising.

Can you run sudo zdb -ul /dev/sda2 against this disk? It should drop a much longer block of text which will include the uberblock lists which can be correlated to timestamps.

I’m still cautious, but now I’m “cautiously optimistic.”

1 Like

Further to this - the next steps would be trying to do similar steps (back up and save the partition tables as text, then push a modified one back) to each disk - although what we have to do is provide different partition UUIDs for each one so they can be juggled into place by ZFS with the -d device-level scan/import.

Because we’re only backing up the partition table in plaintext it should be safe to do this without cloning each disk to another; however, it should be said that there’s no guarantee of this behaving. You do have your most critical data backed up already at least.

1 Like