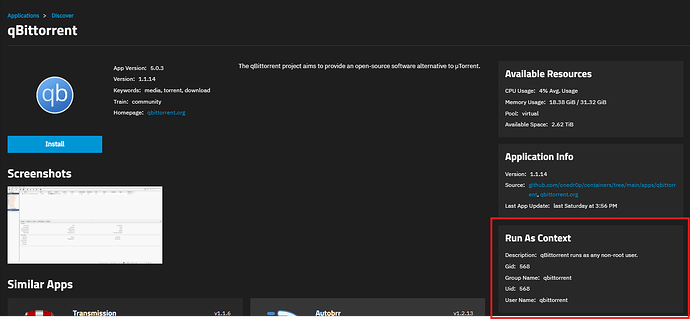
This isn’t a step-by-step guide on how to configure qBitTorrent, but rather some things I came across when I was installing it on my own TrueNAS Scale (Dragonfish) server to get qBittorrent 4.6.x up and running. I’m no expert on this app, but I know just enough to get it up and running, so hopefully this helps someone to get this app up and running initially.
Initial App Configuration
Network Configuration
- Since I need to set up port forwarding, I went to Network Configuration and enabled Host Network. This maps the jail to my local network.
- Web Port - This is the port number that is used to access the qBitTorrent web interface.
- BT Port - This is the port number that is actually used for Torrents. You may want to write this down in case it’s needed at your router.
Download Directory
By default, qBitTorrent sends all of it’s downloads to the following directory as defined in Tools → Options → Downloads → Default Save Path:
- App Version prior to 5:
/downloads - App Version 5 and later:
/config/Downloads
We need to map this to an outside storage such as a downloads directory. To do so, first go to the Storage Configuration → qBittorrent Downloads Storage and set the following:
- Type: Host Path (Path already exists on the system)
- Host Path Configuration - Leave Enable ACL unchecked
- Host Path - This is the actual directory in your pool, thus you want to set it to something like
/mnt/pool/downloadsdirectory.
Then create your app.
Electric Eel Note: The “qBittorrent Downloads Storage” is mapped as follows:
- App Version 5.0.1 / Version: 1.0.33 and earlier: /downloads
- App Version 5.0.1 / Version: 1.1.1 and later: /config/Downloads
Please note that the if you had established a mapping under Additional Storage as a workaround, you will need to remove it otherwise the upgrade from 1.0.33 to 1.1.1 will fail. The download directory is configured in qBittorrent in Tools → Options → Downloads → Default Save Path.
Finding That Initial Password
In the past, the initial username was admin while the password was adminadmin. While the initial username remains the same, the password is now randomly generated. Immediately after creating the jail, you want to access the logs as follows:
- Go to the qBitTorrent app.
- In the Workloads section, click on View Logs icon in the lower-right of that section.
- In the Choose Pod section, accept the defaults and click on Choose.
- Scan the logs for the line containing the word
passwordand copy that password. Example log lines:
2024-10-31 03:30:26.430460+00:00The WebUI administrator username is: admin
2024-10-31 03:30:26.430460+00:00The WebUI administrator password was not set. A temporary password is provided for this session: EqkKSsbqB - Go back to the App screen, then go to the section Application Info, then click on the Web Portal icon.
- Log into with the username of admin and the password from step 4.
To change the password in qBitTorrent:
- Log into the qBitTorrent app.
- go to Tools → Options .
- Click on the Web UI tab.
- In the Authentication section, set a new username and password and write them down.
- Scroll down and click on Save.
To turn off authentication on your own network, you will need to know your IP address and subnet mask. All of my systems are on the 192.168.1.XXX network with a subnet mask of 255.255.255.0, thus the actual IP address I will be entering in is 192.168.1.0/24. Your own network configuration may vary. To set this bypass:
- Log into the qBitTorrent app.
- Go to Tools → Options .
- Click on the Web UI tab.
- Go to the Authentication section.
- Check off Bypass authentication for clients in whitelisted IP subnets
- In the box immediately below, put in your network address. (e.g.
192.168.1.0/24) - Scroll down and click on Save.
Setting up a monitored folder
One nice feature of several Torrent clients is the ability to set up a monitor folder so that you can drop in the torrent files and have qBitTorrent automatically begin the download. I have a separate directory to go this automatically (e.g. is /mnt/pool/watch) which is mapped to the app internal directory (e.g. is /watch). To accomplish this:
- Go to the qBitTorrent App on TrueNAS SCALE.
- In the Application Info section, click on Edit.
- Go to Storage Configuration → Additional Storage
- For Type, select Host Path (path that already exists on the system)
- Leave Read Only unchecked.
- For Mount Path, type in
/watch. If you use a different name, note it down. - For Host Path Configuration, leave Enable ACL unchecked.
- For Host Path, this is where you want to configure the directory in your pool to be watched. This directory should already be created, so just select it. (e.g.
/mnt/pool/watch). - Scroll down to the bottom and click on Update.
- Wait one minute for the App to restart.
- Log into the qBitTorrent web interface.
- Go to Tools → Options.
- Go to the Downloads tab.
- Go to the Automatically add torrents from section.
- In the Monitored Folder section, add the internal directory you added from step 6 (e.g.
/watch). - In the Override Save Location section, leave it at Default save location.
- Scroll down to the bottom and click Save.
What will happen at this point is any torrent file you put into the watch directory (e.g. /mnt/pool/watch) will then be scanned by qBitTorrent, the download starts, and the torrent file will be deleted automatically.
Note: This guide was written at the time qBittorrent 4.6.x was the current deployed app on a Dragonfish server. There may be some changes with Electric Eel, but I haven’t gotten to that version yet.

