I have been experimenting with this and I think I have found the solution, i.e., a self-signed SSL certificate for Nextcloud that can be imported into Nginx Proxy Manager that is independent of the DNS/DDNS provider! What finally got things working for me was a combination of the TrueCharts video that @Wacky-Mole linked and the Techworks video and 45Drives article that you linked.
What I didn’t realize at first is that, in the Techworks video, he doesn’t appear to be using a reverse proxy at all, since, at 18:05, he manually adds the port number for File Browser to the end of his URL. This suggests that he forwarded the external port 30044 on his network to the internal device and port of his File Browser installation.
However, opening services to the outside world directly through port forwarding is generally not recommended for three reasons:
- By forwarding a different port to each app instead of only forwarding one or two ports to your reverse proxy (and allowing the reverse proxy to redirect traffic), you are increasing the surface area on which attacks can occur, as hackers can simply run automated programs that scan home networks for open ports and check for vulnerabilities.
- A reverse proxy has more robust capabilites to block any access requests that it deems suspicious. This is a feature which can be hardened in Nginx Proxy Manager by enabling options for your proxy hosts like Block Common Exploits, Force SSL, HTTP/2 Support and HSTS Enabled.
- A reverse proxy allows you to specify a memorable subdomain for each of your services (e.g., nextcloud.mydomain.tld), whereas with proxyless port forwarding, you and your users would have to remember each service’s unique port number (e.g., mydomain.tld:9001 for Nextcloud).
So, here is how I got a self-signed certificate for Nextcloud and imported it into Nginx Proxy Manager. I’ll start with the certificate authority first:
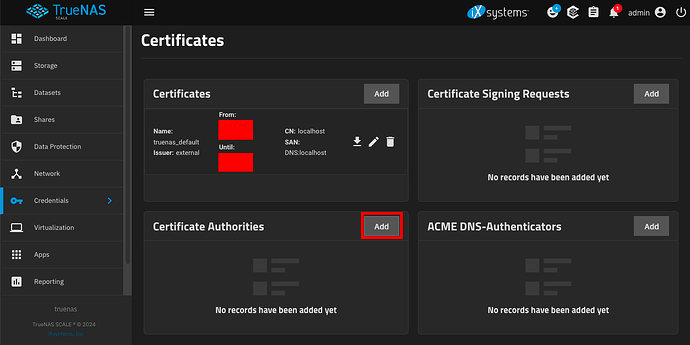
In TrueNAS SCALE, go to Credentials → Certificates → Certificate Authorities → Add.
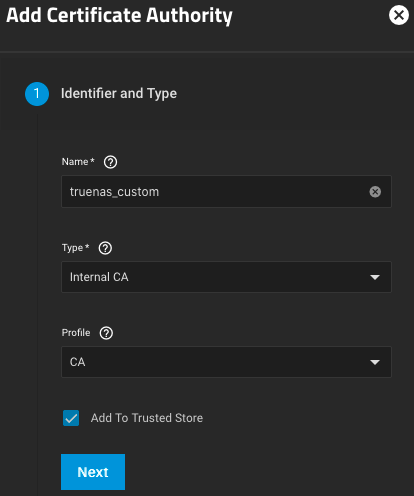
Here are my settings for the CA’s Identifier and Type.
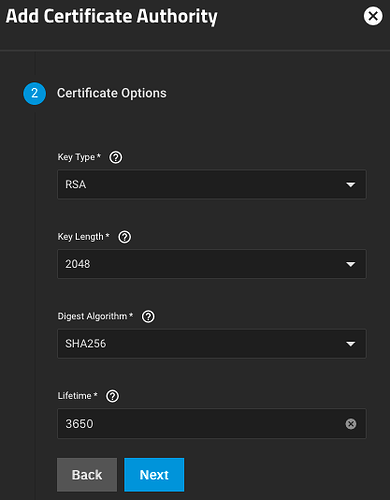
Here are my settings for the CA’s Certificate Options. Adjust the value for Lifetime to adjust the amount of time for which you would like your certificate authority to be valid (a value of 3650 means the CA will be valid for 3650 days, or ~10 years).
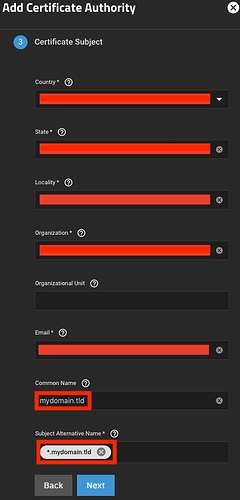
For the CA’s Certificate Subject, the values you enter for Country, State, Locality, Organization and Email shouldn’t have any influence on the efficacy of the certificate itself, but they are required fields, so you will be forced to put something. For Common Name, put your domain (e.g., mydomain.tld) and for Subject Alternative Name, put your wildcard domain (e.g., *.mydomain.tld).
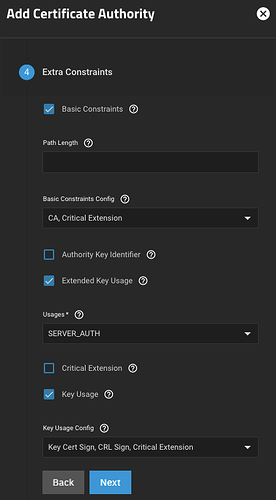
I left the settings for the CA’s Extra Constraints at their defaults.
Confirm your options and hit Save.
Now, here’s how to get a self-signed certificate:
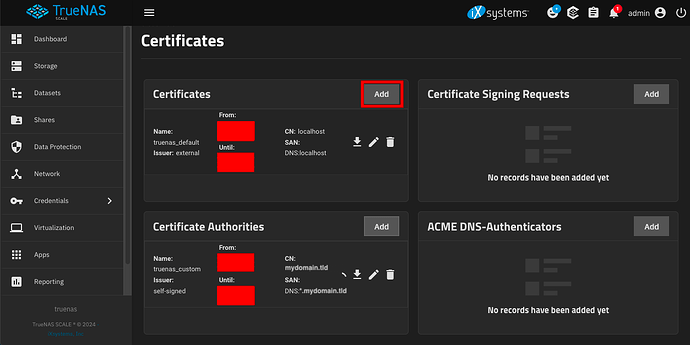
In TrueNAS SCALE, go to Credentials → Certificates → Certificates → Add.
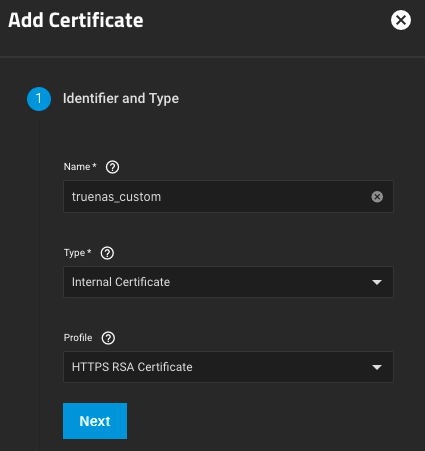
Here are my settings for the certificate’s Identifier and Type.
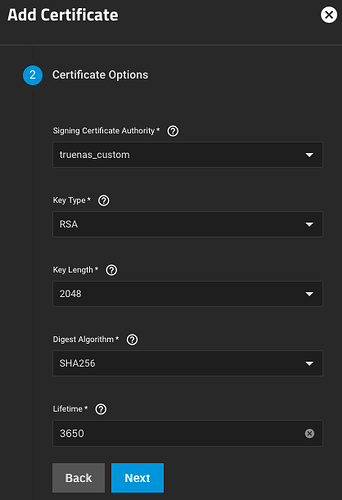
Here are my settings for the certificate’s Certificate Options. Adjust the value for Lifetime to adjust the amount of time for which you would like your certificate to be valid (a value of 3650 means the certificate will be valid for 3650 days, or ~10 years).
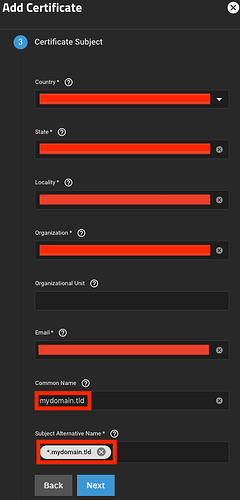
For the certificate’s Certificate Subject, just as for that of the CA, the values you enter for Country, State, Locality, Organization and Email shouldn’t have any influence on the efficacy of the certificate itself, but they are required fields, so you will be forced to put something. For Common Name, put your domain (e.g., mydomain.tld) and for Subject Alternative Name, put your wildcard domain (e.g., *.mydomain.tld).
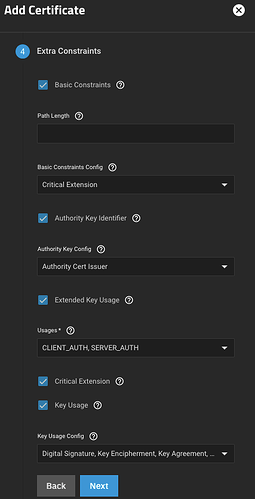
I left the settings for the certificate’s Extra Constraints at their defaults.
Confirm your options and hit Save.
Here’s how to import your self-signed certificate into Nginx Proxy Manager:
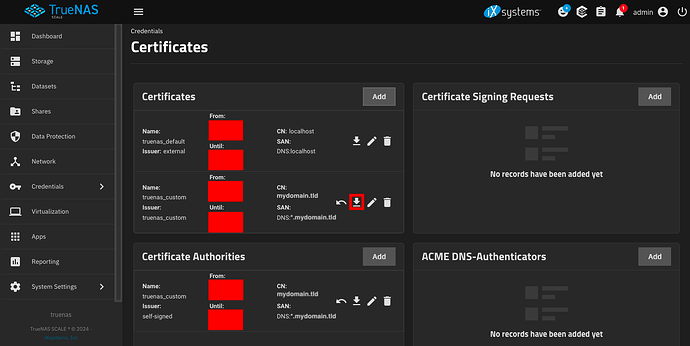
Press the Download button next to your new certificate.
Your computer should download two files: one that ends in .key and one that ends in .crt. You will need both of these files.

In Nginx Proxy Manager, go to the SSL Certificates menu.
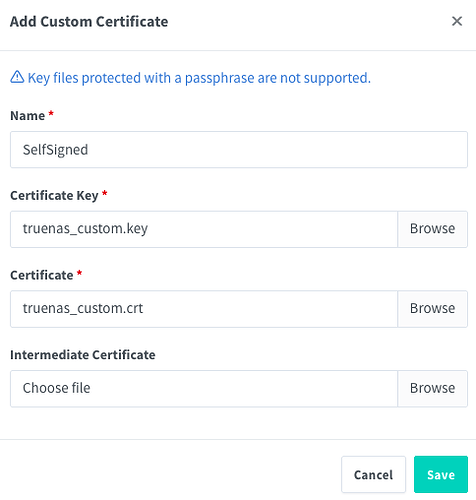
Select Add SSL Certificate and then Custom.
Set the Name to whatever you like. For the Certificate Key and the Certificate, import the .key and .crt files that you just downloaded, respectively.
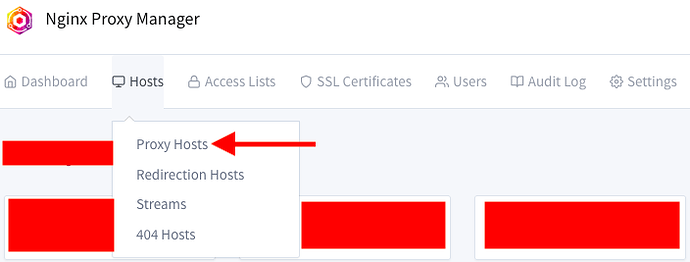
Go to Hosts → Proxy Hosts.
Select Add Proxy Host.
In the Details tab, fill in the information for your Nextcloud proxy host in the exact same way that I originally showed in the section of my guide titled Create a proxy host for Nextcloud (don’t necessarily just copy what’s in this picture; refer to the guide for more help with exactly what you should put here).
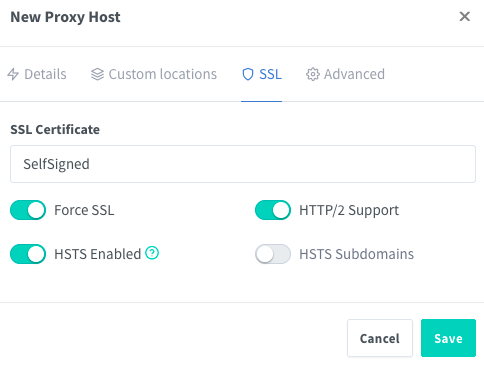
In the SSL tab, add the self-signed certificate that you just imported (I also went ahead and enabled Force SSL, HTTP/2 Support and HSTS Enabled). Then, hit Save.
You may already be able to access your Nextcloud installation by going to nextcloud.mydomain.tld. However, at this point, you still may find, as I did, that you are unable to access your Nextcloud installation, especially if you are using Firefox. This is likely due to you not yet having added your custom certificate authority as a trusted CA within your internet browser.
Here is how to add your custom certificate authority in Firefox:
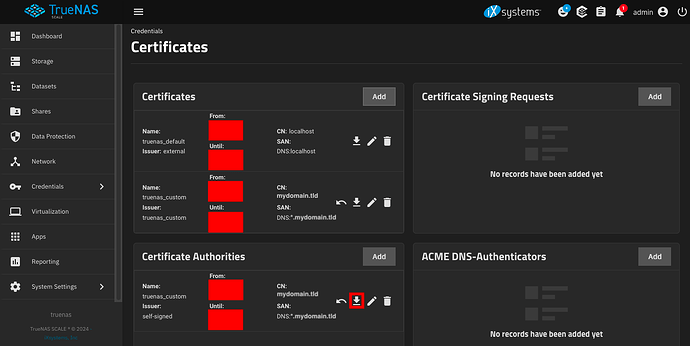
Press the Download button next to your new certificate authority.
Your computer should download two files: one that ends in .key and one that ends in .crt. You will only need the file that ends in .crt.
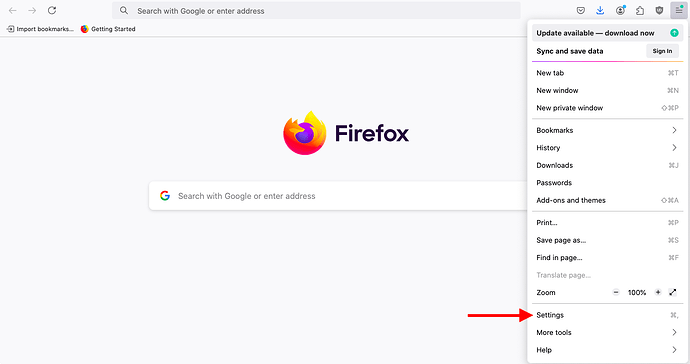
In Firefox, open the Settings.
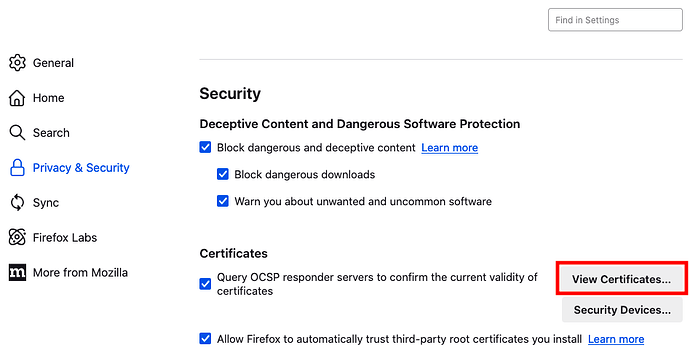
Go to Privacy & Security → Certificates → View Certificates…
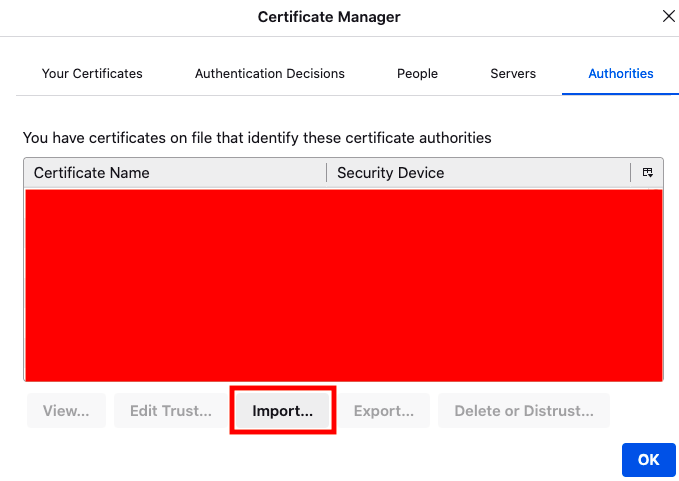
Go to Authorities → Import. Then select the .crt file for the Certificate Authority you just downloaded.
You should now be able to access your Nextcloud installation from your Firefox browser.
Hopefully this helps some people!
