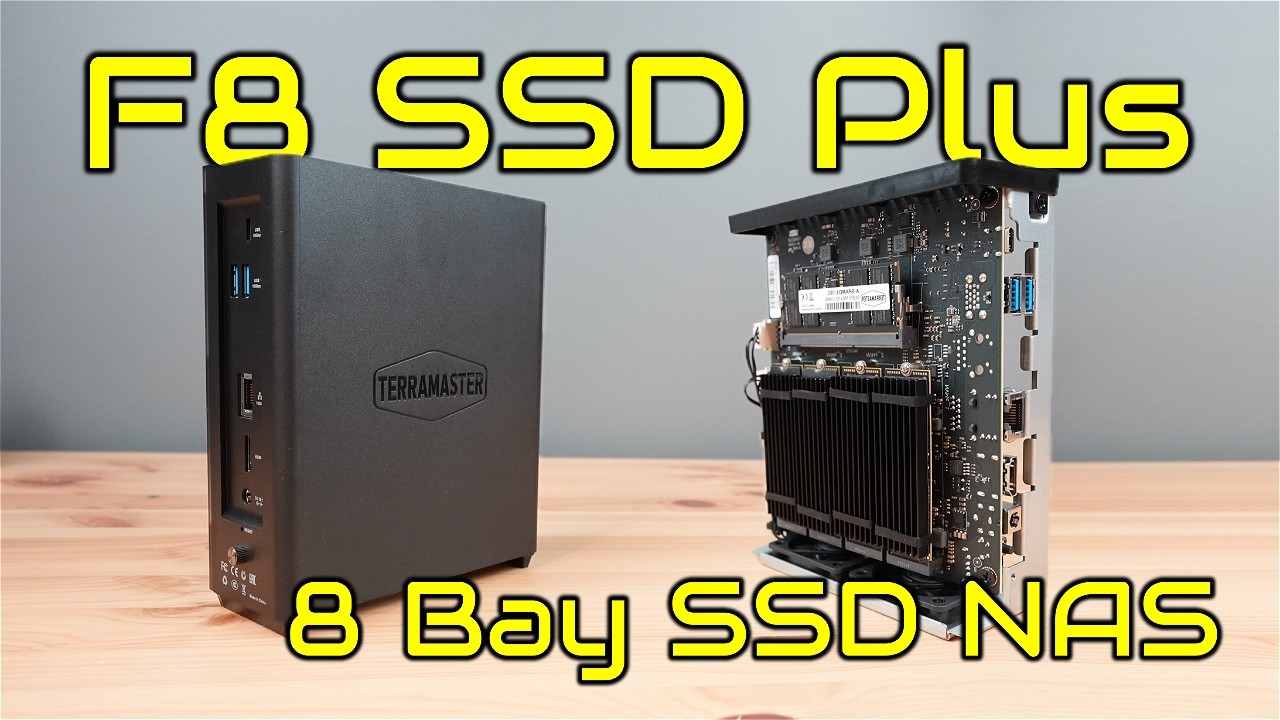
I attempted and succeeded in installing TrueNAS on my TerraMaster F8 SSD Plus. This post details my journey and will hopefully help others that endeavour to do the same! I have never used TrueNAS, so my experience is that of a complete beginner to this software.
Many reviews of the TerraMaster F8 SSD (and Plus variant) mention its TrueNAS compatibility. Yet, none show it actually running the software. I am writing this to rectify this situation and provide evidence of it actually running TrueNAS and confidence (or lack thereof) to those researching compatibility with this appliance.
Summary
TrueNAS SCALE: Flaky and broken
TrueNAS CORE: Works with caveats
Caveats with CORE: The built-in Aquantia AQC113 ethernet device is unsupported
Hardware
The NAS is a “TerraMaster F8 SSD Plus” with all 8 bays populated. Seven are 4TB Crucial P3 and P3 Plus’s for the storage pool, and one is a 250G Kingston NV2 for the boot pool.
TerraMaster OS
Before attempting any TrueNAS installs, I let the first-party “TOS” installer do its thing. I was not aware if it performed any hardware initialisation, such as firmware updates or BIOS setup. I felt it was wisest to let it run and complete a setup, both to ensure any hardware setup was done and to validate that all the hardware was working properly in a “known-good” environment. I verified everything was in good working order. I then removed the internally-mounted TOS USB, wiped the drives with ShredOS, and proceeded with TrueNAS setup.
Game Start: TrueNAS SCALE
Scale appears to be the up-and-coming preferred variant of TrueNAS. It is placed more prominently on the TrueNAS website, and it is labeled as “best for new deployments.” It was the obvious choice. I downloaded TrueNAS-SCALE-24.04.2.2.iso as the recent stable release and got to installing.
To get the USB to attempt booting, I needed to change these BIOS settings: (press ESC at the TerraMaster logo / American Megatrends logo)
- Security → Secure Boot → Secure Boot → Disabled
- Boot → TOS Boot First → Disabled
While I was there I also tweaked a couple other non-required options:
- Boot → timeout 5s
- Boot → quiet boot off
- Advanced → Power Management Features → restore from ac power loss → last state
- Advanced → CPU Configuration → BIST → Enabled
I saved this as User Defaults as a reasonable checkpoint of settings that I will always want, without too many tweaks. I chose Save and Reset and upon reboot, the plugged-in TrueNAS SCALE installer USB was selected automatically and proceeded with booting.
SCALE-UP your problems too!
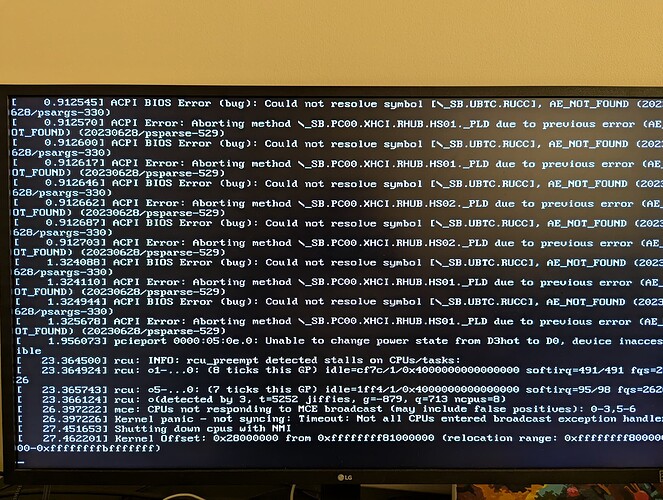
Once the installer was past GRUB, I was unfortunately greeted with total failure! rcu_preempt was detecting CPU stalls, and most of the time a kernel panic was being logged: Kernel panic - not syncing: Timeout: Not all CPUs entered broadcast exception handler. In all cases, the NAS would reboot and try again.
With some amateur researching and guesswork, I managed to find a set of BIOS options and kernel command-line options that seemed to get the installer to boot most of the time. Each time I found a tweak, it would get the boot process moving a bit further, then it would crash with some other issue. I have links in my notes to sources for all of these, but I’m unable to share them due to my forum trust level. Here are some other errors I encountered:
nvme pcie bus error severity=corrected type=inaccessiblenvme unable to change power state from d3cold to d0, device inaccessible
Eventually I got it to the install UI, and this is what I needed to tweak:
BIOS tweaks:
- Advanced → CPU Configuration → AP threads Idle Manner → HALT Loop
- Advanced → CPU Configuration → MachineCheck → Disabled
- Advanced → CPU Configuration → MonitorMWait → Disabled
Command-line options:
noapic- Necessary to bypass rcu timeoutpcie_aspm=off- Lets system continue even with bus errors, seems necessarynvme_core.default_ps_max_latency_us=0- Recommended by boot log warningspci=nocrs- Recommended by boot log warnings
I also found a few other command-line options that were offered by the community, but they seemed to have no effect:
pcie_port_pm=offprocessor.max_cstate=0 intel_idle.max_cstate=0 idle=poll
The overall theme of these tweaks is to disable various power management features and subsystems. I hypothesize that there is an incompatibility with the PCIe device tree that is on this NAS’s special-purpose motherboard and the Linux drivers responsible for managing PCIe connections. I think the CPU stalls were a result of driver bugs in the PCIe subsystem rather than an issue with CPU power management, as indicated to me by the lack of effect of the c_state cmdline options and the lack of effect of any CPU power management options in the BIOS, except for the HALT Loop choice.
Who needs all those drives anyways?
Once I was finally at the setup UI, I proceeded and found that only four of my eight NVMe drives were appearing. At this point, I gave up tweaking. I collected a dmesg log and tried a final hail-mary approach of trying other SCALE versions: TrueNAS-SCALE-23.10.2.iso and TrueNAS-SCALE-24.10-BETA.1.iso, neither of which proved any better even with all the tweaked options.
I decided to be adventurous and go with the other TrueNAS offering, TrueNAS CORE.
Attempt Two: CORE
Pokemon Red vs Blue?
With the latest recommended TrueNAS-13.0-U6.2.iso now downloaded and installed to my USB, I was hopeful for a different outcome. I was very relieved to see that the TrueNAS CORE installer booted without issue, even after restoring my BIOS tweaks to my User Defaults set earlier (no HALT Loop needed!). There were no PCIe bus errors in the logs, no stalled CPUs, and no missing drives in the install UI. I installed it to my boot pool of one drive and upon restart and removal of the installation medium, it actually booted the installed OS!!! I was shocked and grateful that I would not have to settle for that sus TerraMaster OS.
My next task was to start playing with it and getting everything set up to hold actual data. However, I encountered my next problem: there was no network connection. The console menu showed zero interfaces available. Huh?? After some research, I found that the Aquantia 10GbE AQC113 in this NAS is not supported by the installed Aquantia driver. I very much would like to use this, and I did find some community upgrades to the driver that might support AQC113, but it requires compilation of a custom kernel module to attempt and I just wanted things to work good-enough. I had a spare 1GbE USB adapter so I plugged that in and got it connected.
Once I was finally in the web interface, setup proceeded as I expected from my preparation reading the documentation. I got a pool setup, configured Samba access, and even set up its own mailbox so it can yell at me when things break. I could easily saturate the 1GbE adapter with inbound rsync transfers from my previous storage pool with barely a sweat from the CPU (~8% utilisation).
I do still have one lingering issue, any time I start a Cloud Sync task to back up my storage pool, the network adapter hangs and cuts off connectivity until I unplug and relpug it. I’m chalking this down to the realities of using a $15 USB ethernet adapter rather than it being TrueNAS’s fault, so for now I’m without a 3rd backup location, although I hope to try Duplicati via its plugin sometime soon, and if all other on-device solutions fail, I can easily use a 2nd node to handle cloud backup.
Final Thoughts
I would have preferred to use TrueNAS SCALE due to my familiarity with Linux, however I have found that BSD-based TrueNAS CORE is competent and well-suited for this task. I will likely come back to SCALE in a few years to try again and see if there is a resolution to those boot issues, but if not I will be happy to stay on CORE through to this server’s decommission time.

