I am an NAS enthusiast who enjoys exploring various new features. Recently, I purchased the TerraMaster F8 SSD all-flash NAS, which is compact and extremely quiet. I often carry it with me when traveling for photography. Lately, I spent half a day successfully installing the TrueNAS system on my F8 SSD. I am sharing the installation process here to help more NAS enthusiasts.
Preparation phase
To install TrueNAS, you need to prepare a USB drive to burn the installation image. Use balenaEtcher or Rufus tools to burn the TrueNAS image to the USB drive. Note that you should not use Ventoy to load the TrueNAS installation image. For Linux and MacOS platforms, refer to the official operation guide for burning:(The method for preparing the Proxmox installation media needs to be found on your own; this section does not support inserting links.)
- Configuring the BIOS
2.1 Access BIOS:
Press Del/Delete during startup to enter the BIOS settings.
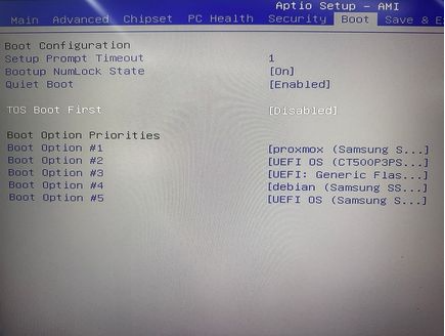
2.2 Disable TOS Boot First:
Go to Boot > TOS Boot First and set it to Disabled.
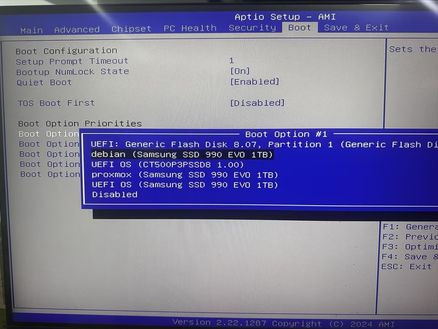
2.3 Set Boot Drive:
Under Boot > Boot Option #1, and select the bootable USB drive containing the installation image for TrueNAS 。
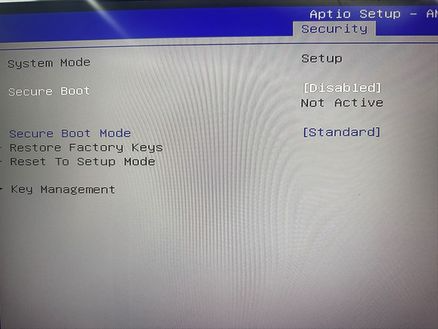
2.4 Disable Secure Boot:
In the Security tab, set Secure Boot to Disabled. This is essential for TrueNAS.
2.5 Save and Restart:
Press F4 to save your changes and exit. The F8 SSD will reboot and boot from the USB drive.
- Installing TrueNAS
After setting up the BIOS, follow the installation wizard for TrueNAS .
Official guides for reference:
TrueNAS Installation Guide: https://www.truenas.com/docs/scale/gettingstarted/install/installingscale/
That’s all you need to get started! Enjoy your new setup.