
I tried loading it and ran into issues but I didn’t try hard enough. I am sorry. Please standby.
1 Like
So when I load the config file and reboot, the boot stops at the BusyBox built-in shell (ash) and tells me I need to manually import the pool and exit, but without access to the GUI I was stuck.
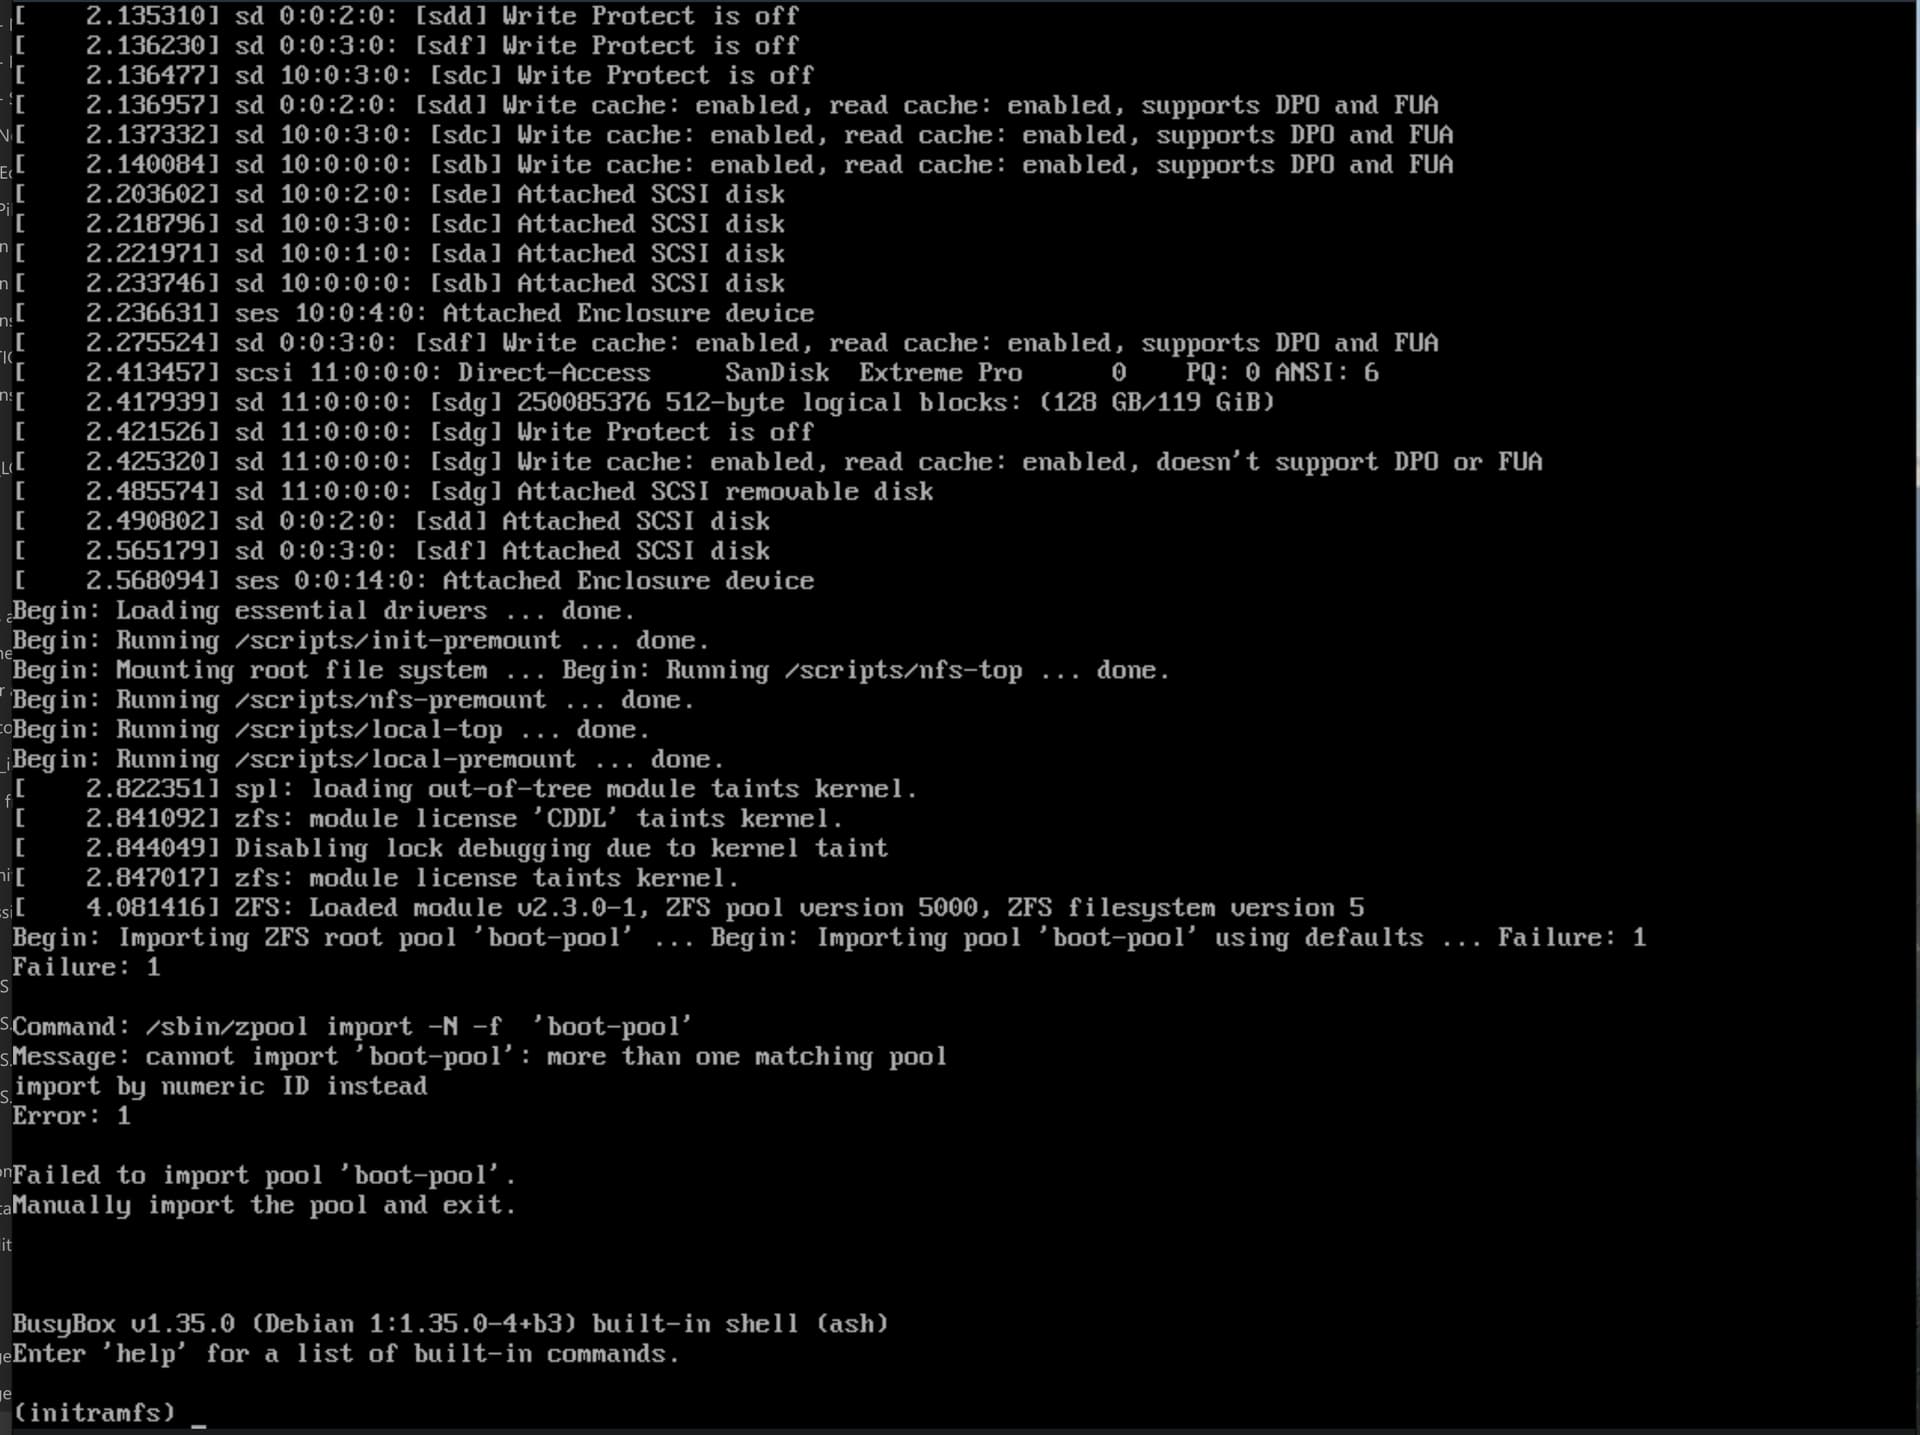
How do I find the numeric ID of the correct boot pool to plug into this command it’s giving me?
Unplug the old boot drive and try again. You shouldn’t need to type in anything during a boot process.
If it still doesn’t work, then we can move on to the recovery steps.
If you can’t get the old config file to boot, you should in theory at least be able to decompress the config .tar and see if it contains the pwenc_secret file.
If it does you can extract any existing key from the other file (the .db) using something that reads sqlite3, as shown in this blog:
You may opt to do this on a client computer, in which case you need to adapt the method to read and unencrypt the keys.
1 Like
I’ll walk him through it if this attempt to reboot with the config (and unplugged drive) doesn’t work.
2 Likes
- I successfully rebooted TrueNas and uploaded config file. System > General Settings > Manage Configuration > Upload file > upload truenas .db config file. It’s possible that these config files are from a different truenas setup I had been playing around with to get ready for this one.
- I import dataset. Storage > Import Dataset > selected zpool - leads to Unlock Pool (do you want to unlock it) prompt for the root dataset.
- Cannot unlock the dataset. This requires entry of a key file or passphrase, which as discussed, I did not properly obtain and retain, as I obviously should have.
Why didn’t the config restoration unlock it? Does this prove that these config backups were from my other truenas setup (the experimental lab)?
Because you didn’t export the secret seed when prompted.
We can move on to an attempted recovery.
Power off, plug the old boot drive back in, and reboot. Basically, how you were before trying the import config attempt.
After you boot up, let’s set up the recovery.
Reconfirm and paste the following again:
lsblk -o NAME,MODEL,PTTYPE,TYPE,SIZE,PARTTYPENAME,PARTUUID

zpool list

zpool import
Now set up for the recovery. Use sudo for admin commands when necessary:
mkdir /recovery

zpool import -R /oldboot -d /dev/sdg3 -N 2650431139805676226 oldboot

zfs list -t fs -r -o name,mountpoint oldboot
NAME   MODEL                                   PTTYPE TYPE   SIZE PARTTYPENAME             PARTUUID
sda    SAMSUNG MZ7L33T8HELA-00A07              gpt    disk   3.5T
└─sda1                                         gpt    part   3.5T Solaris /usr & Apple ZFS 7ef6f78c-5a38-4dc9-99da-6243677b79f7
sdb    SAMSUNG MZ7L33T8HELA-00A07              gpt    disk   3.5T
└─sdb1                                         gpt    part   3.5T Solaris /usr & Apple ZFS ab235bf6-08e7-47e4-b70f-008689e5515f
sdc    SAMSUNG MZ7L33T8HELA-00A07              gpt    disk   3.5T
└─sdc1                                         gpt    part   3.5T Solaris /usr & Apple ZFS 1fdc764f-5d69-4899-b1ea-90cbde3f7918
sdd    MTFDDAV240TGA-1BC16A 03KH111D7B08304LEN gpt    disk 223.6G
├─sdd1                                         gpt    part     1M BIOS boot                f220a939-33c2-4e2c-aefc-09e4a0d92151
├─sdd2                                         gpt    part   512M EFI System               cba8bdd0-6f57-46d7-a20a-6a2872bd5919
└─sdd3                                         gpt    part 223.1G Solaris /usr & Apple ZFS 1b959ea8-5d07-4c80-a856-163b9b4b8e1e
sde    SAMSUNG MZ7L33T8HELA-00A07              gpt    disk   3.5T
└─sde1                                         gpt    part   3.5T Solaris /usr & Apple ZFS 3819f55e-fcb6-4a78-8cac-6c56cd5b2680
sdf    MTFDDAV240TGA-1BC16A 03KH111D7B08304LEN gpt    disk 223.6G
├─sdf1                                         gpt    part     1M BIOS boot                72ae5f1d-d8a5-417d-9a52-10b2362e72be
├─sdf2                                         gpt    part   512M EFI System               2eeef0f1-a4a2-47d5-8114-947c17e49d35
└─sdf3                                         gpt    part 223.1G Solaris /usr & Apple ZFS ec2f7f42-08ae-4af3-85f4-012c6c959869
sdg    Extreme Pro                             gpt    disk 119.3G
├─sdg1                                         gpt    part     1M BIOS boot                f6bb71c1-a996-4ff5-a714-95b208ac5a91
├─sdg2                                         gpt    part   512M EFI System               37506496-8304-4828-a828-18320eb901b8
└─sdg3                                         gpt    part 118.7G Solaris /usr & Apple ZFS 6b70a97b-2db5-4e70-8691-d67a9a75c1a2
NAME        SIZE  ALLOC   FREE  CKPOINT  EXPANDSZ   FRAG    CAP  DEDUP    HEALTH  ALTROOT
boot-pool   222G  2.84G   219G        -         -     0%     1%  1.00x    ONLINE  -
zpool      17.5T  2.66T  14.8T        -         -     4%    15%  1.00x  DEGRADED  /mnt
  pool: boot-pool
    id: 2650431139805676226
 state: ONLINE
status: Some supported features are not enabled on the pool.
        (Note that they may be intentionally disabled if the
        'compatibility' property is set.)
action: The pool can be imported using its name or numeric identifier, though
        some features will not be available without an explicit 'zpool upgrade'.
config:

        boot-pool   ONLINE
          sdg3      ONLINE
how do I get past the read only file system error? i invoked =sudo= privileges.
Which part? The first command?
I guess we can use /mnt/recovery instead.
First, export the old boot pool.
zpool export oldboot
Then do this:
mkdir /mnt/recovery

zpool import -R /mnt/oldboot -d /dev/sdg3 -N 2650431139805676226 oldboot

zfs list -t fs -r -o name,mountpoint oldboot
I changed the -R parameter.
truenas_admin@truenas[/mnt]$ sudo mkdir /recovery
mkdir: cannot create directory ‘/recovery’: Read-only file system
Did you boot up in some sort of readonly recovery mode?
I can create directories just fine with my TrueNAS Core system. I would expect this to be the same with SCALE.
EDIT: You did not type the command correctly.
Please don’t deviate from the commands. Leading slashes are not insignificant.
got it. worked. thanks. following the other directions now.
I get:
truenas_admin@truenas[/]$ sudo zpool import -R /oldboot -d /dev/sdg3 -N 2650431139805676226 oldboot
cannot import 'boot-pool': pool was previously in use from another system.
Last accessed by (none) (hostid=0) at Fri Jul 25 09:24:26 2025
The pool can be imported, use 'zpool import -f' to import the pool.
I made an update.
Use -R /mnt/oldboot instead.
You can also add the -f parameter.
I would also import it as readonly.
EDIT: Updated command:
zpool import -f -o readonly=on -R /mnt/oldboot -d /dev/sdg3 -N 2650431139805676226 oldboot
NAME                                                      MOUNTPOINT
oldboot                                                   none
oldboot/.system                                           legacy
oldboot/.system/configs-ae32c386e13840b2bf9c0083275e7941  legacy
oldboot/.system/cores                                     legacy
oldboot/.system/netdata-ae32c386e13840b2bf9c0083275e7941  legacy
oldboot/.system/nfs                                       legacy
oldboot/.system/samba4                                    legacy
oldboot/ROOT                                              none
oldboot/ROOT/25.04.1                                      legacy
oldboot/ROOT/25.04.1/audit                                /mnt/oldboot/audit
oldboot/ROOT/25.04.1/conf                                 /mnt/oldboot/conf
oldboot/ROOT/25.04.1/data                                 /mnt/oldboot/data
oldboot/ROOT/25.04.1/etc                                  /mnt/oldboot/etc
oldboot/ROOT/25.04.1/home                                 /mnt/oldboot/home
oldboot/ROOT/25.04.1/mnt                                  /mnt/oldboot/mnt
oldboot/ROOT/25.04.1/opt                                  /mnt/oldboot/opt
oldboot/ROOT/25.04.1/root                                 /mnt/oldboot/root
oldboot/ROOT/25.04.1/usr                                  /mnt/oldboot/usr
oldboot/ROOT/25.04.1/var                                  /mnt/oldboot/var
oldboot/ROOT/25.04.1/var/ca-certificates                  /mnt/oldboot/var/local/ca-certificates
oldboot/ROOT/25.04.1/var/lib                              /mnt/oldboot/var/lib
oldboot/ROOT/25.04.1/var/lib/incus                        /mnt/oldboot/var/lib/incus
oldboot/ROOT/25.04.1/var/log                              /mnt/oldboot/var/log
oldboot/ROOT/25.04.1/var/log/journal                      /mnt/oldboot/var/log/journal
oldboot/grub                                              legacy
Now this:
mount -t zfs -o ro oldboot/ROOT/25.04.1 /mnt/oldboot/root
done
Now this:
ls -l /mnt/oldboot/root/data