I not an expert at all and built a truenas with an SDD for the OS and 2 disks WD RED 4TB, one of them is reported as degraded.
I tried to follow the guide to replace it but cannot.
first I put the failed disk offline, then switched off the pc to replace it with the new HD.
at the first restart, the system reported so many errors about the missing hd that truenas did not load. Going into BIOS and then doing a new start, shell loaded but does not show any pool at all.
I put back the failed HD and after another restart, the pool is back on, always in degraded status.
I thought I had to try and detach the HD while system was running, but it did not work either.
Shut down system, remove old/defective disk and replace with new disk (hopefully after the new disk was burned in and tested)
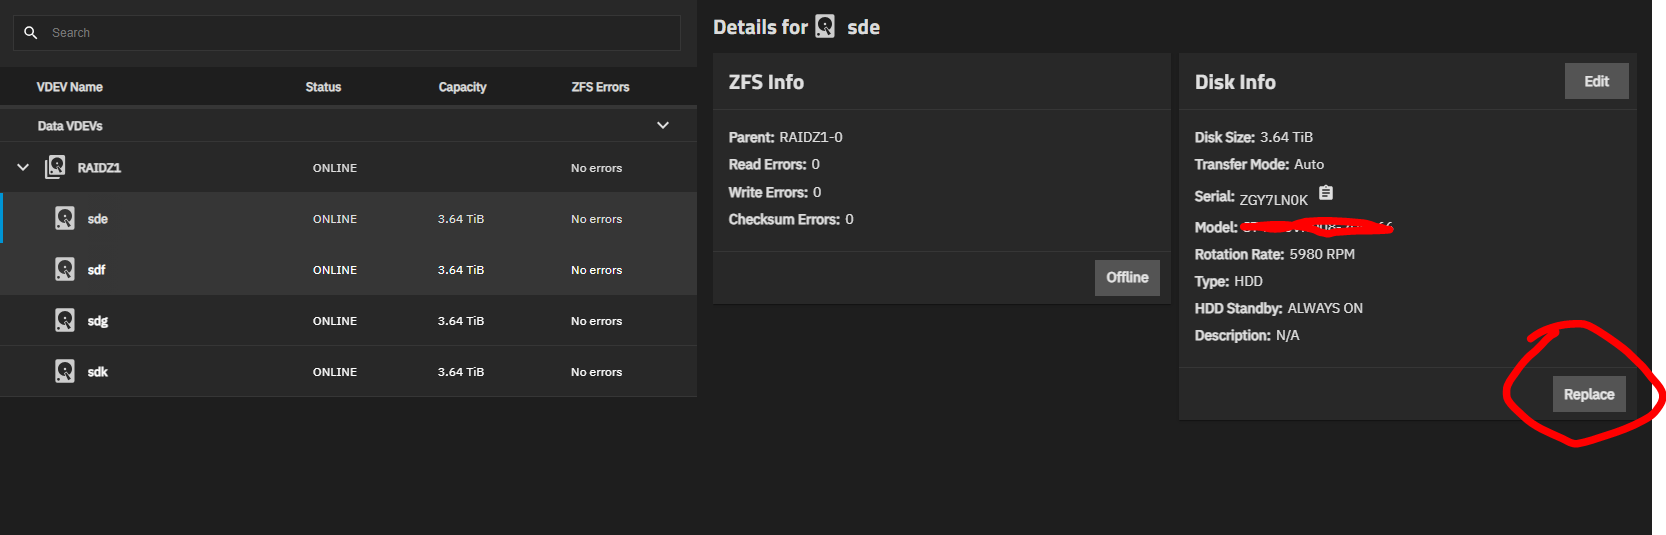
Start truenas, go to Storage → view vdev → click on the vdev you want to replace a disk in-> right sie of the screen is a disk info tile-> bottom right of that tile is a replace button.
It is going to depend on your VDEV layout. If your two disk pool is striped and not a mirror, you will need to add a third physical disk to your machine and do an ‘in place’ replacement. If you have enough disk ports, I recommend doing the in place procedure anyway.
Do you know your VDEV layout? The screen should look like what LarsR posted. That example shows a Raid-Z1
Yesteray I followed the procedure and system started resilvering, I got quite scared because it was reporting ada0, the functioning HD as removed, and this morning system was not working.
I had to force a restart and I can say that it works, it seems that all is back.
On the dashboard the pool is in unhealthy status with both disks being online, is there a command I can use to solve this status ?
Then, this I really do not understand what it means, I have this alert:
“The following system core files were found: rrdcached.core. Please create a ticket at https://jira.ixsystems.com/ and attach the relevant core files along with a system debug. Once the core files have been archived and attached to the ticket, they may be removed by running the following command in shell: ‘rm /var/db/system/cores/*’.
2026-07-30 17:13:39 (Europe/Rome)”
This may be off topic, but does it say something to you ?
rrdcached.core is the memory dump created after the system reporting software (which creates the reporting graphs) crashed. You can delete it; it’s usually uninteresting, and iX won’t look at core files for TrueNAS Core any more.