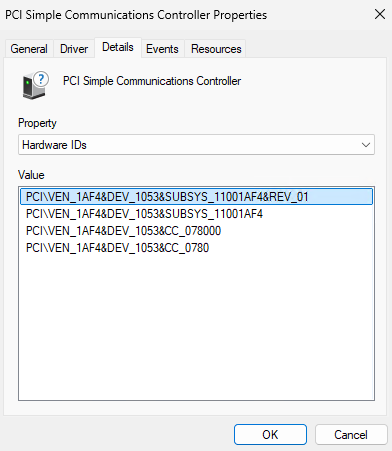
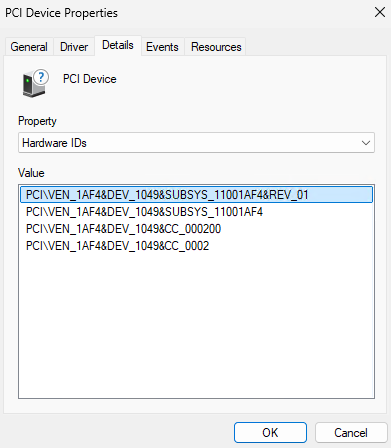
Made for 25.04.0
First you should read the official tutorial to get yourself familiar with with the new Instances: /scale/scaletutorials/containers/
This guide is meant as collection of different ways to install/migrate Windows depending on your needs. Pick parts that apply to you. You are not supposed to do every part described here one-by-one.
Here I present multiple ways how to get Windows working on new Incus based VMs in Fangtooth with Virtio devices and drivers.
First some basics. Incus based VM disks (root disk, custom zvol, mounted ISO file etc.) can be of different types based on io.bus setting inside Incus config.
TrueNAS sets this by default as nvme. Other options are virtio-scsi or virtio-blk.
We are only interested in either nvme or virtio-scsi.
nvme is default in TrueNAS.
In Truenas UI this setting is called I/O bus when you add disks.
Incus docs.
A. New install
Important: Windows installer ISO mounted as NVMe (which is default in TrueNAS) will never work. You have to mount it as virtio-scsi via io.bus setting.
Tip: To boot from ISO for Windows install you have to “press any key” during UEFI boot start. You have to be prepared to connect via VNC early enough to make it in time.
1. What can you do without Virtio drivers (not recommended)?
Currently your only non-virtio option is NVME drive (for both root disk and ISO). But Windows installer doesnt preload NVMe driver. This means that its not initially available and is loaded on demand from the installer ISO. This should be the case for Windows 10 and 11. But because the installer ISO itself is on NVMe drive its kinda Catch 22. You would need NVME driver in the first place to get into the ISO.
Current workaround is manually mounting the ISO as IDE CD-ROM. Then it will see itself and load NVMe driver. You can do it via raw.qemu and adding:
-drive file=/home/user/windows.iso,media=cdrom,file.locking=off
This will then allow installing it on root disk set as NVMe.
But even then your network connection wouldnt work because thats Virtio based and you would still need to mount and install Virtio drivers for it. So I dont recommend this way. Its easier to just use Virtio from the start.
Use either Distrobuilder in part 2 or manually mount Virtio drivers in part 3.
2. Use Distrobuilder.
This tool will inject Virtio drivers into your Windows ISO and you can then install it directly on Virtio-SCSI root disk.
Easiest way is to use Ubuntu and install Distrobuilder via Snap. I recommend using edge channel which is the latest version on GitHub.
sudo snap install distrobuilder --edge --classic
Snap package doesnt contain all needed runtime dependencies. For example on clean installed Ubuntu Server 24.04.2 LTS you need:
sudo apt install libwin-hivex-perl wimtools genisoimage
Once you have all dependencies you can repack your Windows ISO by:
sudo distrobuilder repack-windows --windows-arch=amd64 Windows10.iso Windows10-virtio.iso
Windows10.iso is the original Windows ISO and Windows10-virtio.iso is the repacked ISO that now includes all needed Virtio drivers.
You dont strictly need --windows-arch=amd64, if omitted arch will be autodetected.
Now you can just use this repacked ISO and it will work on Virtio-SCSI root disk (or NVMe). You have to use Virtio-SCSI for the Windows installer ISO itself or it wont work
I recommend using Virtio-SCSI for root disk.
You just use the repacked Windows10-virtio.iso and it should just work without needing to do anything else.
For more info try reading Simos guide.
Alternatively you can try compiling Distrobuilder yourself.
3. Mount Virtio drivers ISO as IDE CD-ROM.
Great video guide for Windows 11: https://youtu.be/3HbGdzmKxSc?t=1192
My own text guide below.
In this part we are using the original Windows ISO. For example Windows 11 can be downloaded here: Download Windows 11
I originally made guide on Linux Containers forum.
But here are specific steps for TrueNAS. Download stable Virtio drivers ISO onto you host Truenas.
You can use in shell: wget https://fedorapeople.org/groups/virt/virtio-win/direct-downloads/stable-virtio/virtio-win.iso
Create VM like normal. Use Virtio-SCSI for the Windows installer ISO or it wont work. You can use either Virtio-SCSI or NVMe for the root disk but you have to load Virtio-SCSI driver either way. I recommend using Virtio-SCSI for root disk. Then in TrueNAS shell use sudo incus config edit <instance> and append to raw.qemu this config:
-drive file=/home/user/virtio-win.iso,media=cdrom,file.locking=off
Put space before the append. Use your file path. Dont remove the VNC config thats already there otherwise VNC wont work.
Full raw.qemu line in config will then look something like this:
raw.qemu: -vnc :7 -drive file=/home/user/virtio-win.iso,media=cdrom,file.locking=off
Save and you can start VM, connect via VNC and begin Windows install. When it asks you for drivers you should see your mounted virtio-win cdrom available. The only critical driver to install is vioscsi, others can be installed after finishing the Windows install. For example for Windows 10 and amd64 arch, the path is: D:/vioscsi/W10/amd64. After loading it you will see you Virtio-SCSI drive available. If you need internet available during the install load NetKVM driver. Then finish the install like normal.
Once its complete and you are on desktop go into your Virtio ISO which is still mounted as CD-ROM and run virtio-win-guest-tools.exe. This will install all remaining Virtio drivers. After that restart the VM. Then in TrueNAS you can remove the raw.qemu config we added before, but keep the VNC config.
B. Migration
Important: Your network connection will not work if you dont install Virtio drivers. So even if you plan using NVMe you still need Virtio drivers.
Important: If your migrated Windows doesnt boot even after following this guide, try to disable Secure Boot.
Tip: If you have problem with selecting device to boot from you can try manually selecting boot disk by repeatedly pressing Esc during UEFI boot. This should get you into UEFI menu where you can use Boot manager.
4. Basic migration if your Windows supports NVMe.
Before switching to Fangtooth, download stable Virtio drivers ISO and install into your VM by running virtio-win-guest-tools.exe.
Then upgrade to Fangtooth.
If you want to use NVMe for the zvol, thats all. It will work if your Windows supports it (Win10 and Win11).
If you want to use Virtio-SCSI zvol you have to set unused root disk as Virtio-SCSI and boot the VM with NVMe zvol. This will allow it to see the Virtio-SCSI root disk and load Virtio drivers. You can then shutdown the VM, set custom zvol as Virtio-SCSI and boot. It should now work. Source.
5. If your Windows doesnt support NVMe
If you cant use NVMe in part 4. you will have to manually set AHCI (SATA) drive and mount your zvol there.
Use sudo incus config edit <instance> and delete your zvol disk if its there. Keep only root disk and set it as Virtio-SCSI.
In raw.qemu append:
-device ich9-ahci,id=ahci -drive file=/dev/zvol/v1/myzvol,format=raw,if=none,id=disk,file.locking=off -device ide-hd,drive=disk,bus=ahci.0
Put space before the append. Use your file path. Dont remove VNC config thats already there.
Full raw.qemu line in config will then look something like this:
raw.qemu: -vnc :7 -device ich9-ahci,id=ahci -drive file=/dev/zvol/v1/myzvol,format=raw,if=none,id=disk,file.locking=off -device ide-hd,drive=disk,bus=ahci.0
You also have to add raw.apparmor to Incus config otherwise it will fail on permissions. First check target of /dev/zvol/v1/myzvol symlink.
You can use command readlink -f /dev/zvol/v1/myzvol
The path is just example, you need to use path to your zvol.
Output will look something like /dev/zd16
Then add it into Incus config and allow read/write access. It will look like this: raw.apparmor: /dev/zd16 rw,
You can also just permit everything, but I wouldnt recommend it: raw.apparmor: /dev/* rw,
Either way, save and boot the VM. It will try to boot via PXE, you have to manually tell it to boot from AHCI disk. Best way is to prepare VNC software before starting VM and then connect quickly after. Repeatedly press Esc while in VNC waiting for first lines of UEFI appear. You should get into UEFI manager. Go into Boot manager and select UEFI QEMU HARDDISK Yes, there are two, one of them is your AHCI and one of them root disk. But root disk wont do anything. AHCI is usually the last one on bottom. So select and boot into your AHCI drive. After that it should be the same as in part 4. So shutdown, switch to Virtio-SCSI and it should work. Dont forget to delete configs we added above.
6. If you didnt install Virtio drivers before migration and it boots on NVMe
If your Windows can boot on NVMe then use that (its the default setting), but also mount Virtio ISO as IDE CD-ROM and install drivers from there. Its basically the same like in part 3. This is the case for example for Windows 10 and Windows 11.
Download stable Virtio drivers ISO onto you host Truenas.
You can use in shell: wget https://fedorapeople.org/groups/virt/virtio-win/direct-downloads/stable-virtio/virtio-win.iso
Then use sudo incus config edit <instance> and append to raw.qemu this config:
-drive file=/home/user/virtio-win.iso,media=cdrom,file.locking=off
Put space before the append. Use your file path. Dont remove the VNC config thats already there otherwise VNC wont work.
Full raw.qemu line in config will then look something like this:
raw.qemu: -vnc :7 -drive file=/home/user/virtio-win.iso,media=cdrom,file.locking=off
Save and you can start VM.
Go into your Virtio ISO which is mounted as CD-ROM, run virtio-win-guest-tools.exe. This will install all Virtio drivers. Then in TrueNAS you can remove the raw.qemu config we added before, but keep the VNC config.
7. If you didnt install Virtio drivers before migration and it doesnt boot on NVMe
If you cant use NVMe you have to set AHCI drive to boot and use that as in part 5. And also mount Virtio drivers as IDE CD/ROM and install them as in part 6. This is for example the case for Windows 7.
You would basically append to raw.qemu:
-drive file=/home/user/virtio-win.iso,media=cdrom,file.locking=off -device ich9-ahci,id=ahci -drive file=/dev/zvol/v1/myzvol,format=raw,if=none,id=disk,file.locking=off -device ide-hd,drive=disk,bus=ahci.0
Read part 5 and part 6 for more info.
C. Extra
8. If you need legacy BIOS (seabios)
I didnt test this, but I can give some basic guidelines.
By default Incus uses modern UEFI. For legacy BIOS you need to disable Secure Boot and set security.csm: true in Incus config.
But in 6.0.3 version Incus looks for BIOS firmware in /usr/share/OVMF but its actually located in /usr/share/seabios. So you need to symlink or copy the firmware to the OVMF location.
This is solved in Incus version 6.0.4 where it looks in correct location. This new version should be available in Truenas 25.04.1
9. If you have problem with time (real-time clock)
Incus by default uses UTC for real-time clock which is expected by Linux guests, but this can be problem for Windows which expects local time.
This can be solved by configuring Windows itself to use UTC according to this guide on Arch Wiki.
In next Incus version 6.0.4 it will be possible to solve this by setting image.os: Windows in Incus config which will change Incus settings to be more appropriate for Windows guest. Relevant Incus docs
Any notes and corrections of possible mistakes in my guide are welcome.


