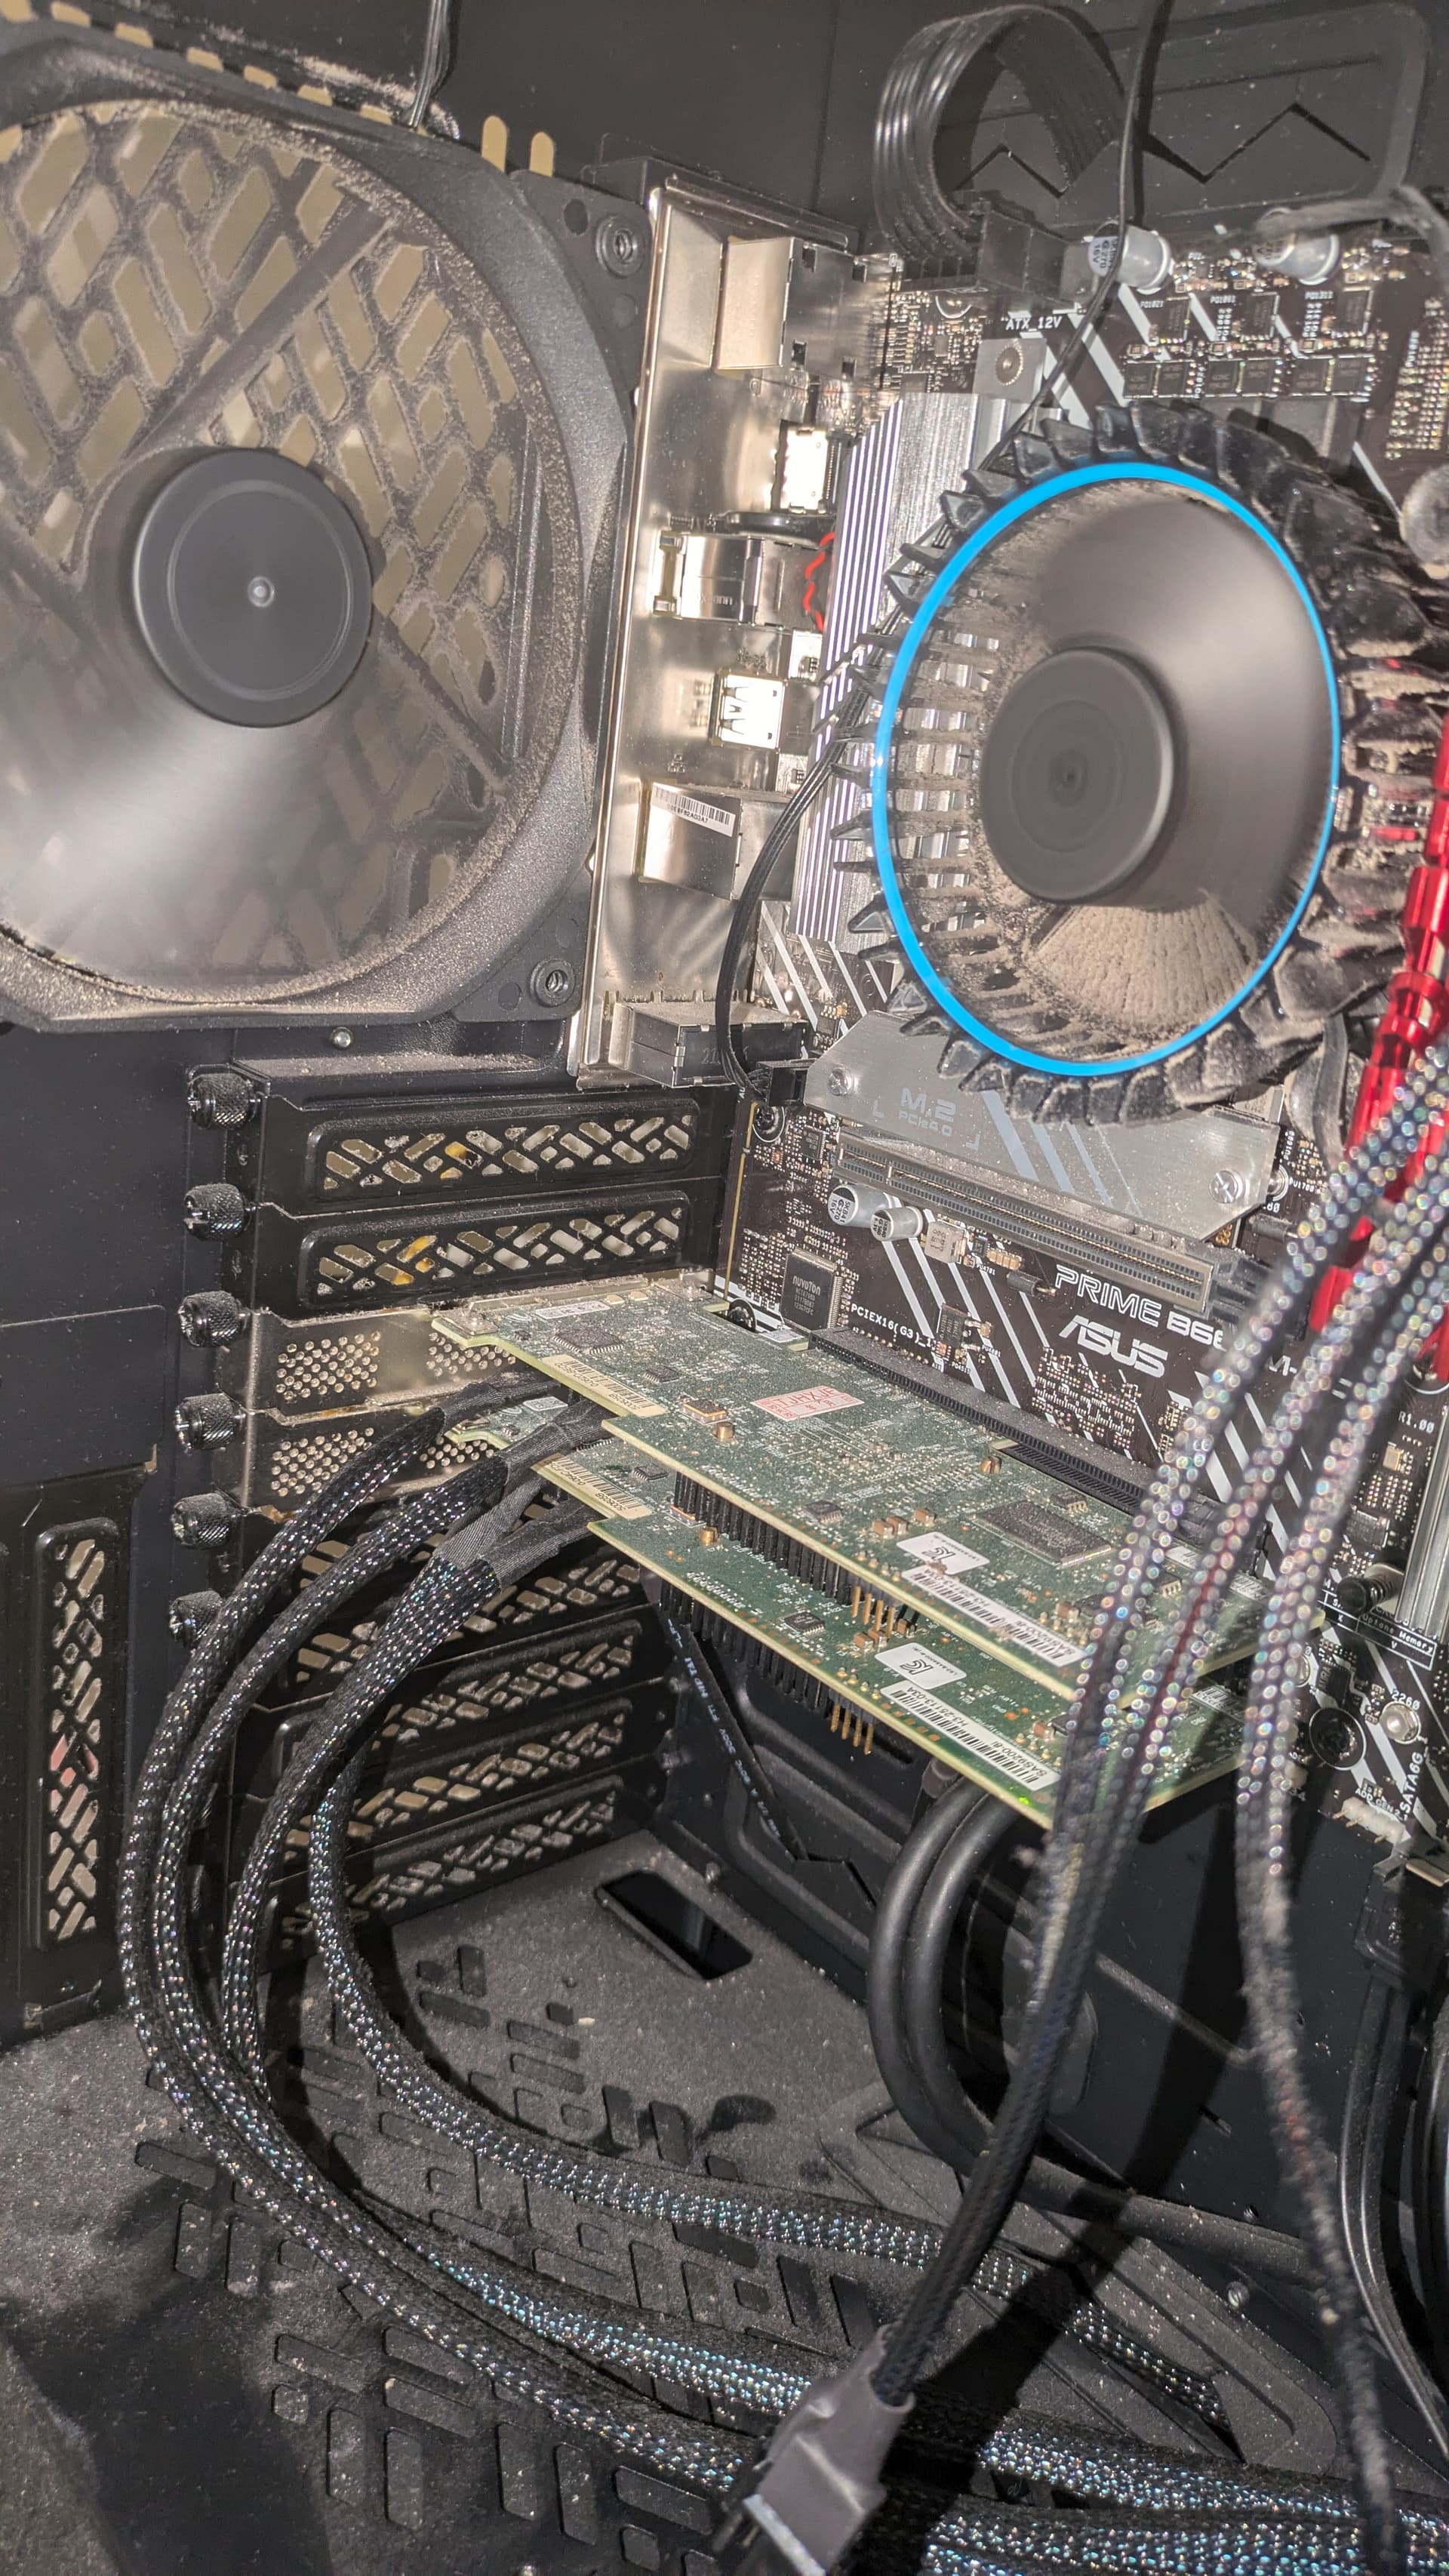
Okay, the pool has been re-imported and the bad disk is on its way back to WD. I’ve also plugged in that extra case fan—I had to go and buy a splitter cable as there weren’t enough outputs on the motherboard, which must be the reason I didn’t connect it when I was first setting up.
Still need some sort of resolution on the HBA and temperature issues. And to get SMART tests scheduled properly.
I’m pretty sure the answer is, place a fan on the HBA and as for SMART tests, you have three options as I can see it. 1) Schedule in the GUI, 2) Install Multi-Report, or 3) Wait for Goldeye which is said to perform automatic SMART testing. I will likely test that second option this week to see what is going on there. That could mean the death of Drive-Selftest (part of Multi-Report).
Straight up what I’ve done. I have a limited amount of space between my pcie slots, so I couldn’t even 3d print myself a mount or airflow guide.
I also have a fan standing my gpu pointing at my chipset. Considering these are 40-60mm fans, the extra 20 grams of weight ain’t going to do much harm.
Even if I could access a 3D printer it’s unclear how that helps with the lower of the two HBAs; I’m not even sure you could squeeze a fan in the gap between them but then it would just be blowing the hot air right into the second HBA.
Can you describe how these two HBA’s are mounted, or better yet, attach a photograph to a post here, so that we can help you more directly to find a solution to this cooling problem?
It seems very unlikely that there isn’t a way to move air past the heatsinks on these HBA’s, possibly even with just one fan as it seems the HBA’s are mounted in adjacent slots.
The key here isn’t necessarily the specific air temperature, though the cooler the better, but to get air movement past the heat sink to reduce the effect of the heat-transfer-inhibiting boundary layer and enhance convective heat transfer - the specific reason that the air requirement for cooling HBA’s is specified in terms of feet feet per minute or an equivalent velocity unit, not in terms of volume or mass. We want the supplied air to have a scrubbing action at the hot device and/or its heat sink.
What I have done is take a 120+mm fan and place it on top of the PCIe slots pointing at the PCIe cards. I use slim cable ties to fasten the fan in place.
Yup, I can’t help out with the hardware issue. And no, you would not lay a fan in there, you would have to mount a fan and do it the proper way. If you have a 3D printer, you could make a custom bracket.
We have and I’m not sure why it fails to work for you.
Yes, it is in Beta testing testing right now, official release is April 2026 I think. I have no clue how TureNAS will determine SMART testing is to be done, they haven’t said. I plan to test the Beta out to see what the SMART testing really does, or doesn’t do. Hopefully it works for NVMe drives this time.
Nice photo which brings me to an important note: Dust can and will cause shorts in electrical circuits. It’s a good thing we do not use Tin in circuit cards these days, Tin Whiskers were the death of a computer, or even Silver Migration, bad stuff. Gold doesn’t do that.
The point, you might consider blowing out the computer with some compressed air.
For a trial you could do what @NugentS suggested. Get a small(ish) high-pressure fan (not a low pressure “wiffler”) and zip tie it to “anything” that will hold it vertically with its “eye” just above the lower PCB’s edge adjacent to the center of the edge of the heat sinks. In such a location its discharge will be split to pass over both heat sinks towards the system board. The lower heat sink will experience more flow as there is less restriction to it, so “biasing” the added fan’s center vertically upwards somewhat might be helpful as the upper heat sink will naturally have a greater resistance to air flow.
The “anything” could be, for example, a thin piece of plywood with a hole in it for the fan intake or discharge, mounted vertically to a block of wood, itself screwed/bolted down to the floor of the case through one or more of the many cooling slots there.
If there were only one HBA in place (as I recall mentioned earlier) then you could strap a small fan directly (flat) over the heatsink. That would work for the lower HBA but not for the upper…
Your local HVAC contractor would likely be able to fabricate you a sheet metal bracket and/or a simple diverter/duct section to split the discharge of a fan and direct it to the heatsinks.
You appear to have ample room and easy access to be able to achieve some enhanced cooling for your HBA’s should they need it (I don’t recall that being ID’d as an actual problem up thread…).
And, yes, I would definitely blow the dust out of your computer. A problem may well exist because the spaces between the heatsink fins are full of it.
No idea what your criteria are for these classifications.
It’s worth noting that the previously-disconnected case fan was at the bottom of the front of the case, so there should be significantly more airflow going past the HBAs now than there was previously. But I’ve no idea how to monitor temperatures.
Your local Umart folk will be able to give you what they have “to fit” if you take in the pic and tell them what you are trying to do. @NugentS’s 120mm fan would be fine as long as it has the impeller geometry and close tolerances to generate some pressure in the discharge air stream as it leaves for fan shroud. Umart will understand, I’m sure.
You may have more air “going past” but you need air “scrubbing” the heat sinks to thin the layer of still air adjacent to the surface that inhibits the heat transfer from the surface.
BUT - I’ve just gone back over the thread and I see that the HBA temperature issue was raised, as it normally is with any HBA in a standard desktop computer case, but never actually identified as a specific problem in your application. Accordingly, I suggest that you follow the suggestions of @Fleshmauler in post #41 - install a cooling fan “if feasible” as it can never be a negative in the situation you have, but focus now on the update of the HBA firmware.
The reporting of the previous effort to make the update is impossible for me to untangle. It seems that you may have to follow leads from the Scottie link you posted to get to a bootable drive from where you are now, but I don’t know how to work that problem without hands on the keyboard. Perhaps you should call ASUS support and have them help you through it if you can’t figure it out?
Do not introduce metal unless you are 100% certain it will be mounted solid. Metal and electricity
What I do is create a duct out of a cereal box. The cardboard is thin yet stiff. You can fold it to make a nice duct, including holes for mounting points. It could even hold a fan if you use sharp bends to ensure a stiff structure. Use good tape, not staples, to hold the duct in shape.
Also, wasn’t it discussed that one of the HBAs could be removed since it is not needed? That would help a lot.
There’s no good alternative to a (LSI) SAS HBA if you need to have more drives.
Rather than using two HBAs, however, you could use a single 9305-16i or -24i (which would still require cooling), or keep one of your HBAs and use an expander (the expander needs cooling, but it is not a PCIe device, so it could be placed wherever there’s airflow and where it doesn’t obstruct cooling to the HBA).
If it was pushing air inside the bottom of the case, this fan would have helped.
Although a (thin) 40/50 mm fan zip-tied to the HBA heatsink, or a fan on the side panel (if the case has a side intake for GPUs), would probably bring more flow where it matters.